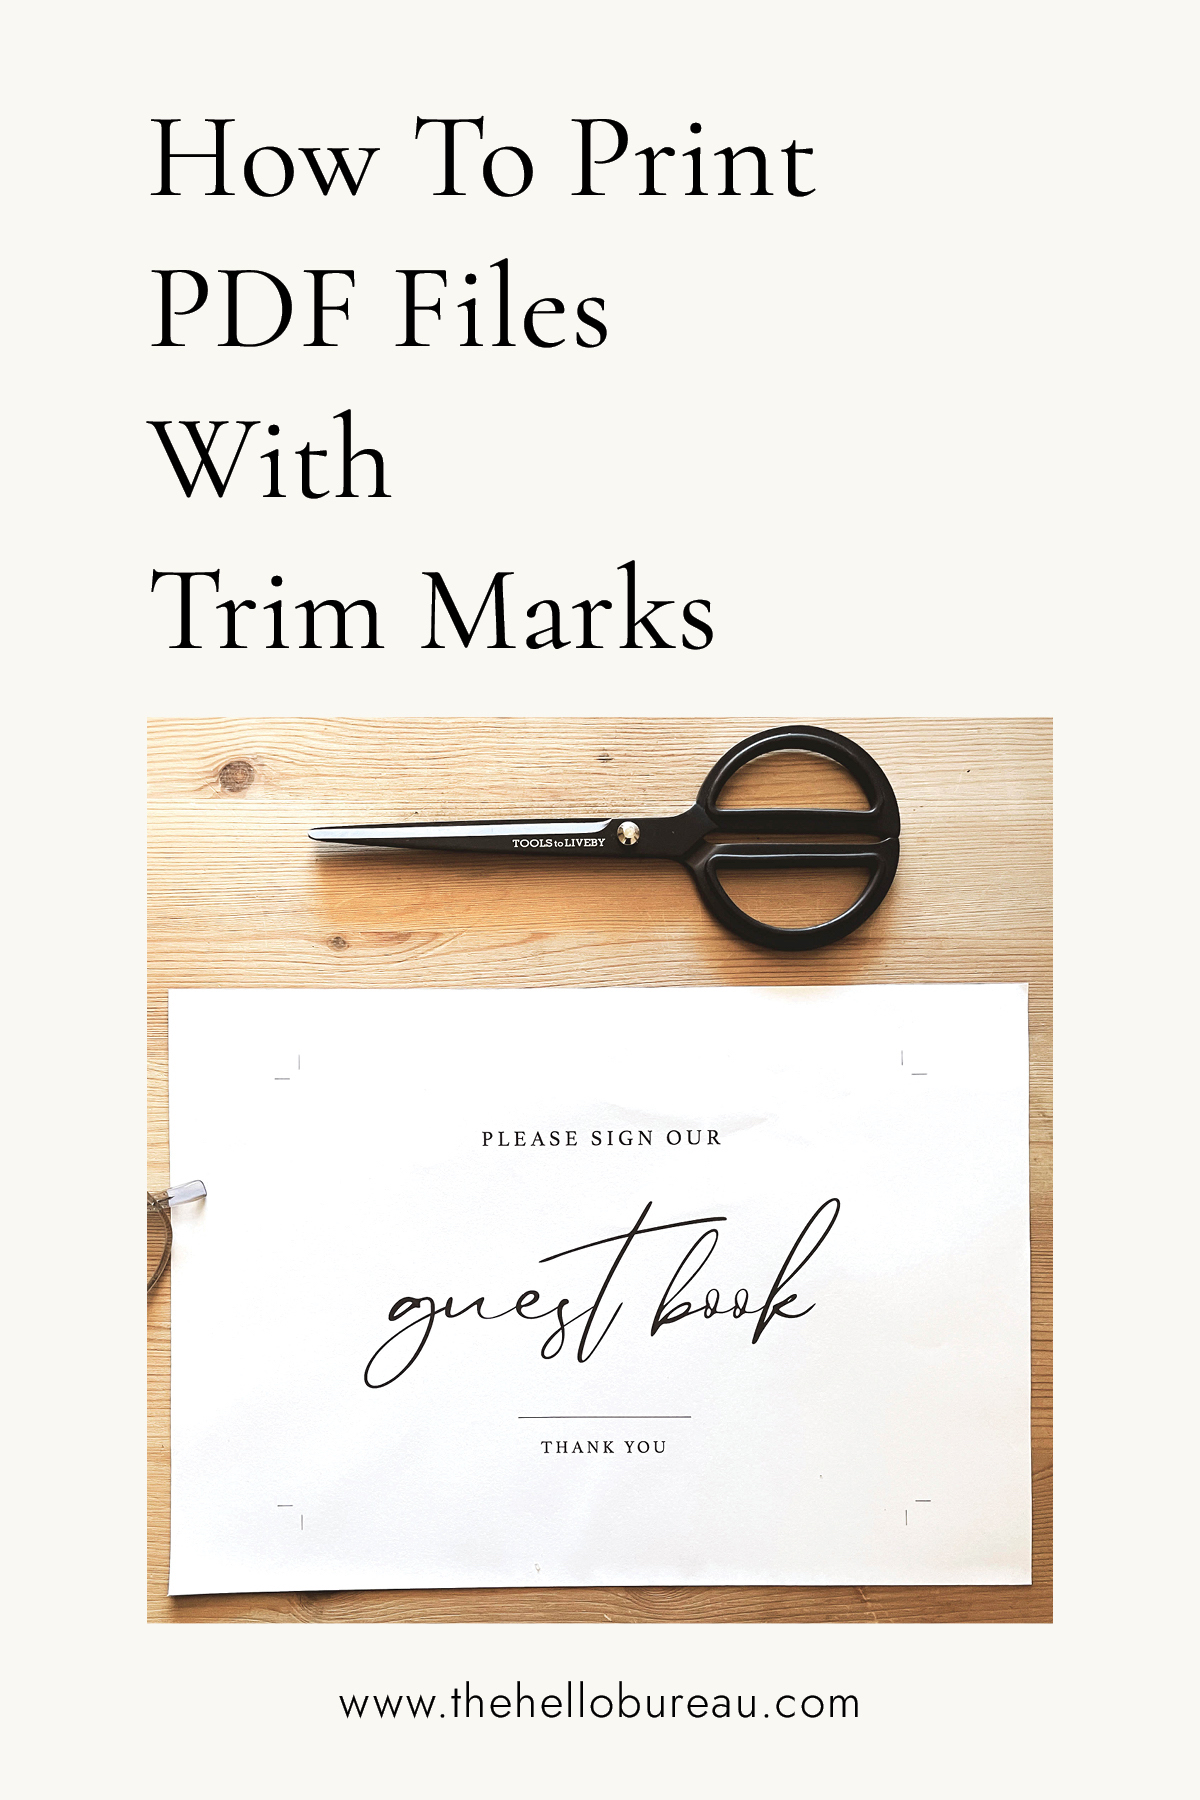
If you’ve got a home or office printer, then this hack will help you to print out PDF files with trim marks. Say goodbye to the guesswork and endless measurements when it comes to printing templates and digital prints. Please note that trim marks only work for file sizes under A4 and US Letter (unless you have an A3 printer). By incorporating trim marks into your pages, you can ensure that your home-printed digital prints are precisely the size they were intended to be.
Achieving accurate prints with trim marks requires proper setup of your digital files. To ensure seamless results, it’s essential to set up your files with the correct dimensions. For instance, if you intend to print a 5″x7″ artwork, the PDF file should be configured precisely as 5″x7″ to enable the correct placement of trim marks. By adhering to this crucial step, you guarantee that the trim marks align precisely with the intended dimensions.
How To Print A PDF With Trim Marks In Adobe Acrobat
1. We recommend using Adobe Acrobat Reader to open the PDF document. You can download this for free at Adobe.
2. Set up your paper size. In the print menu, click ‘Page Setup…’ and choose your printer page size with scaling at 100%. Click ‘OK’ to close the window.
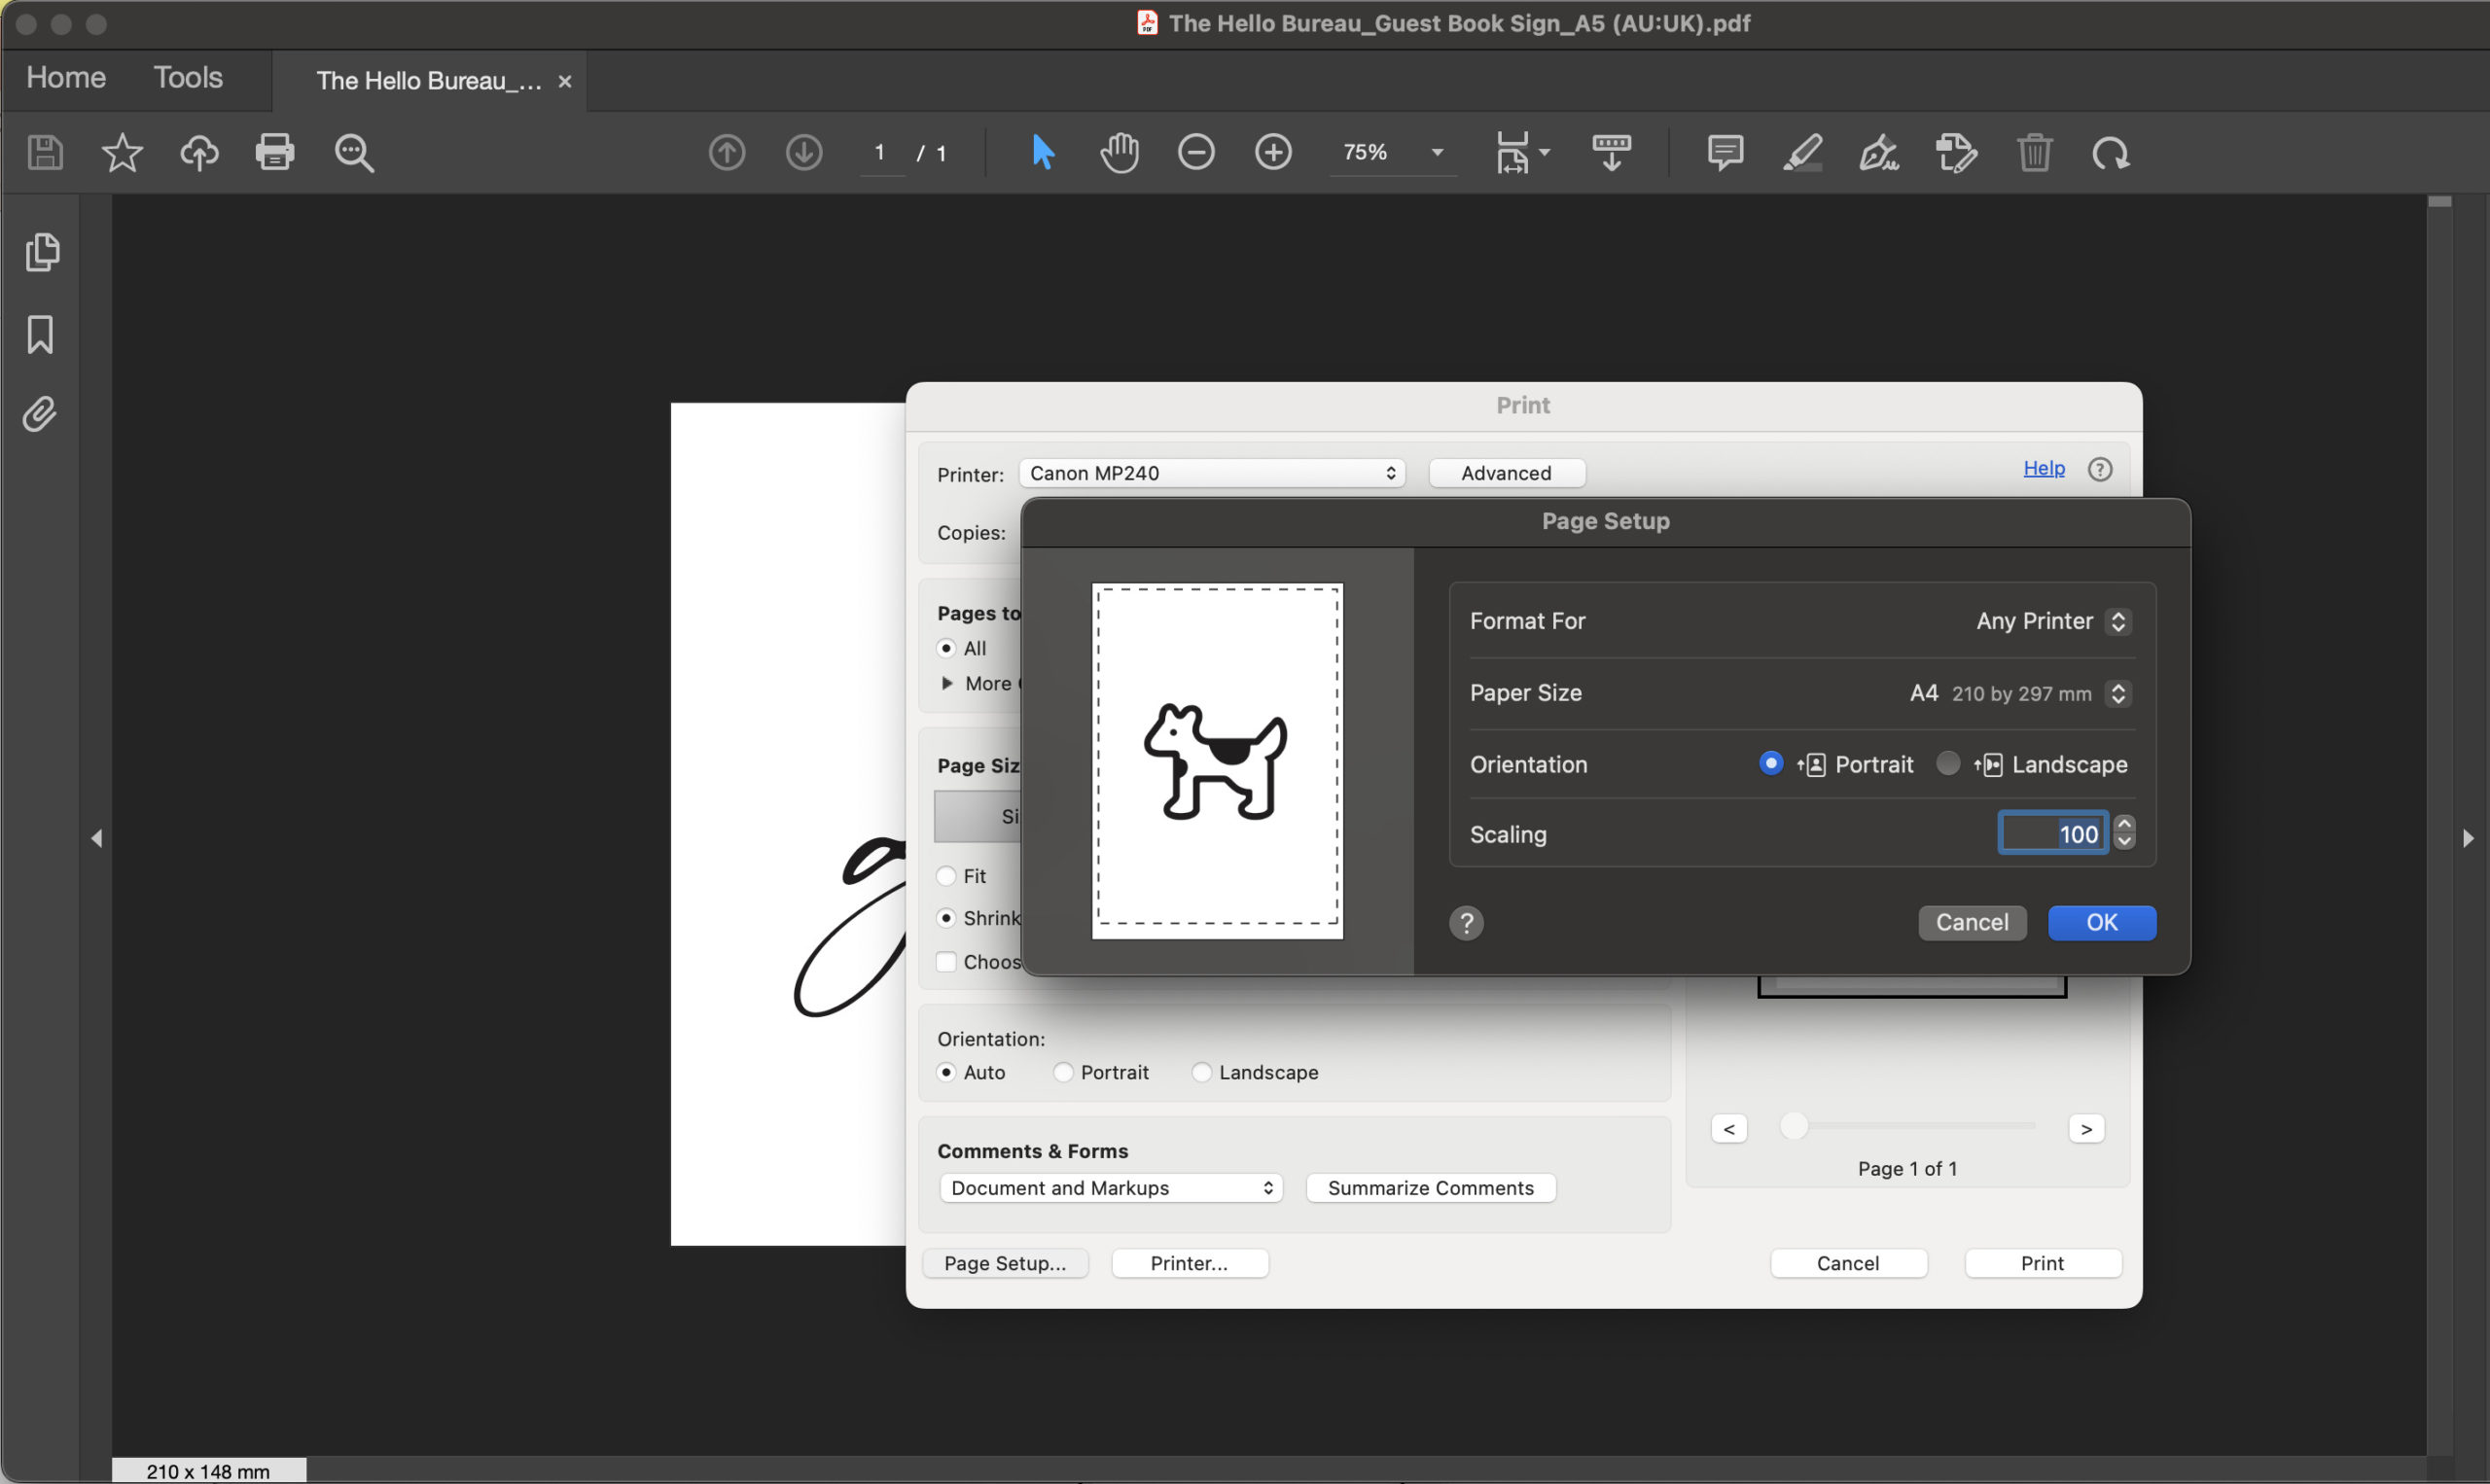
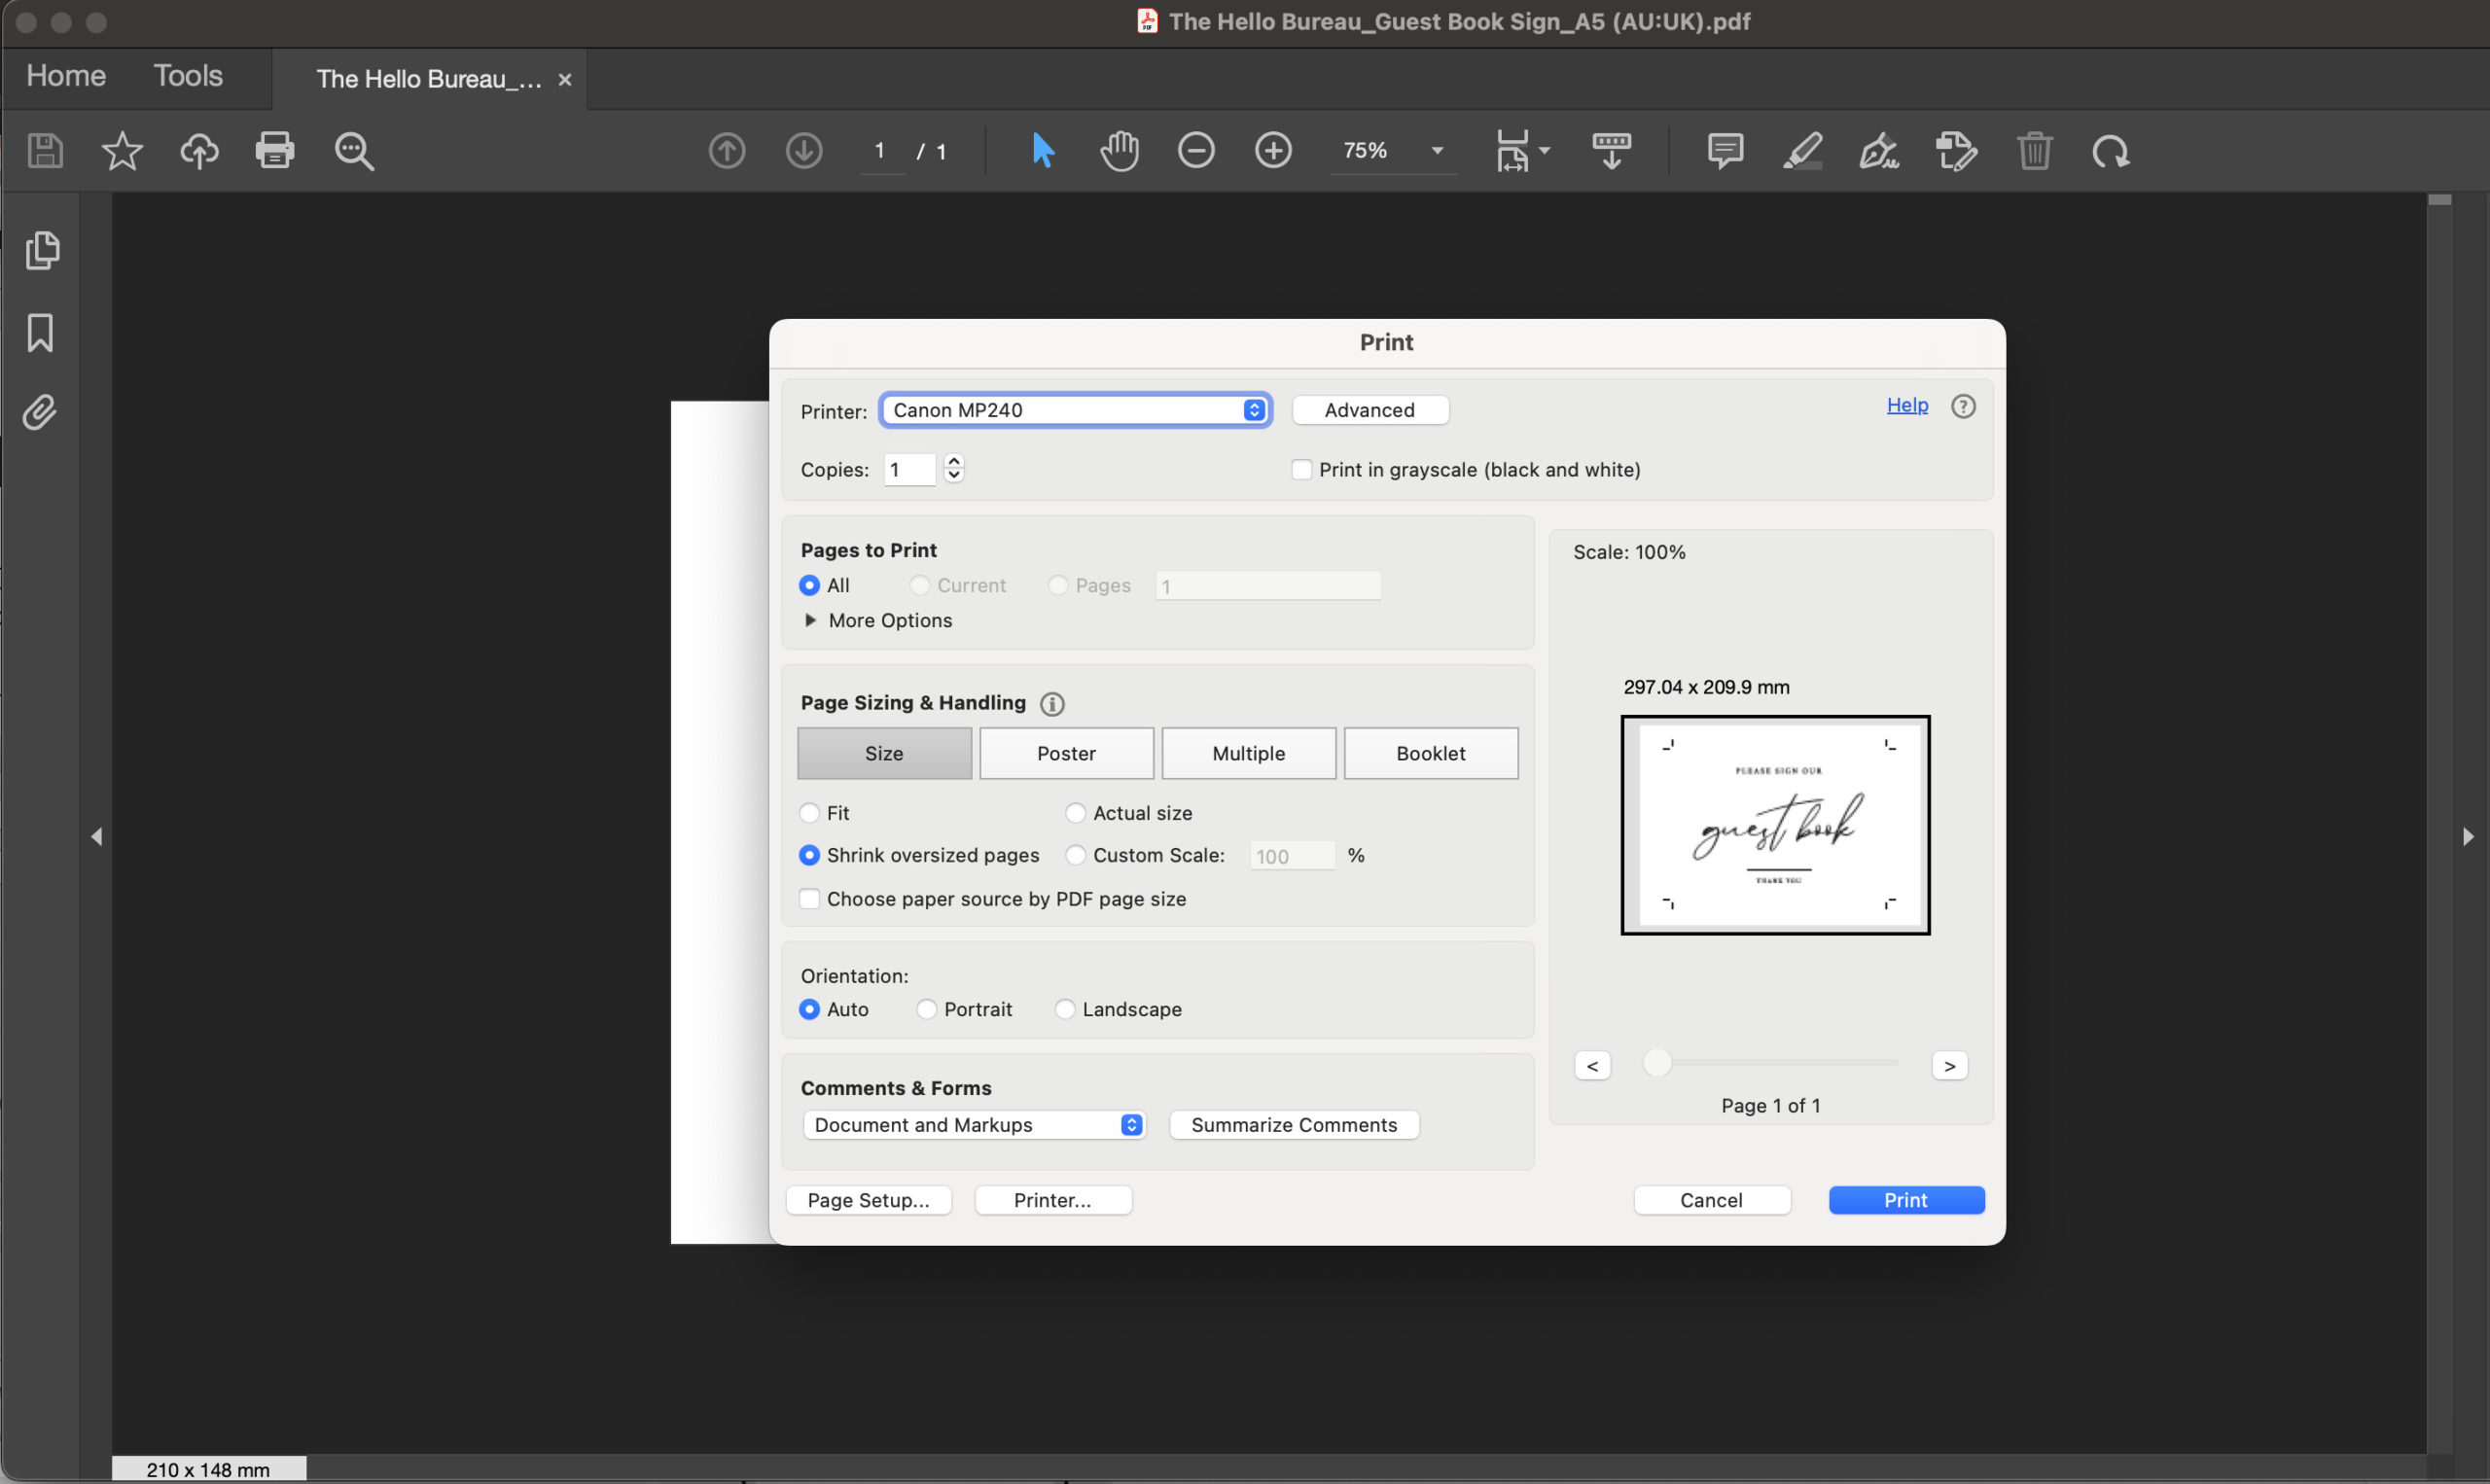
3. Ensure that scaling is set to ‘Actual size’ in the main ‘Print’ window.
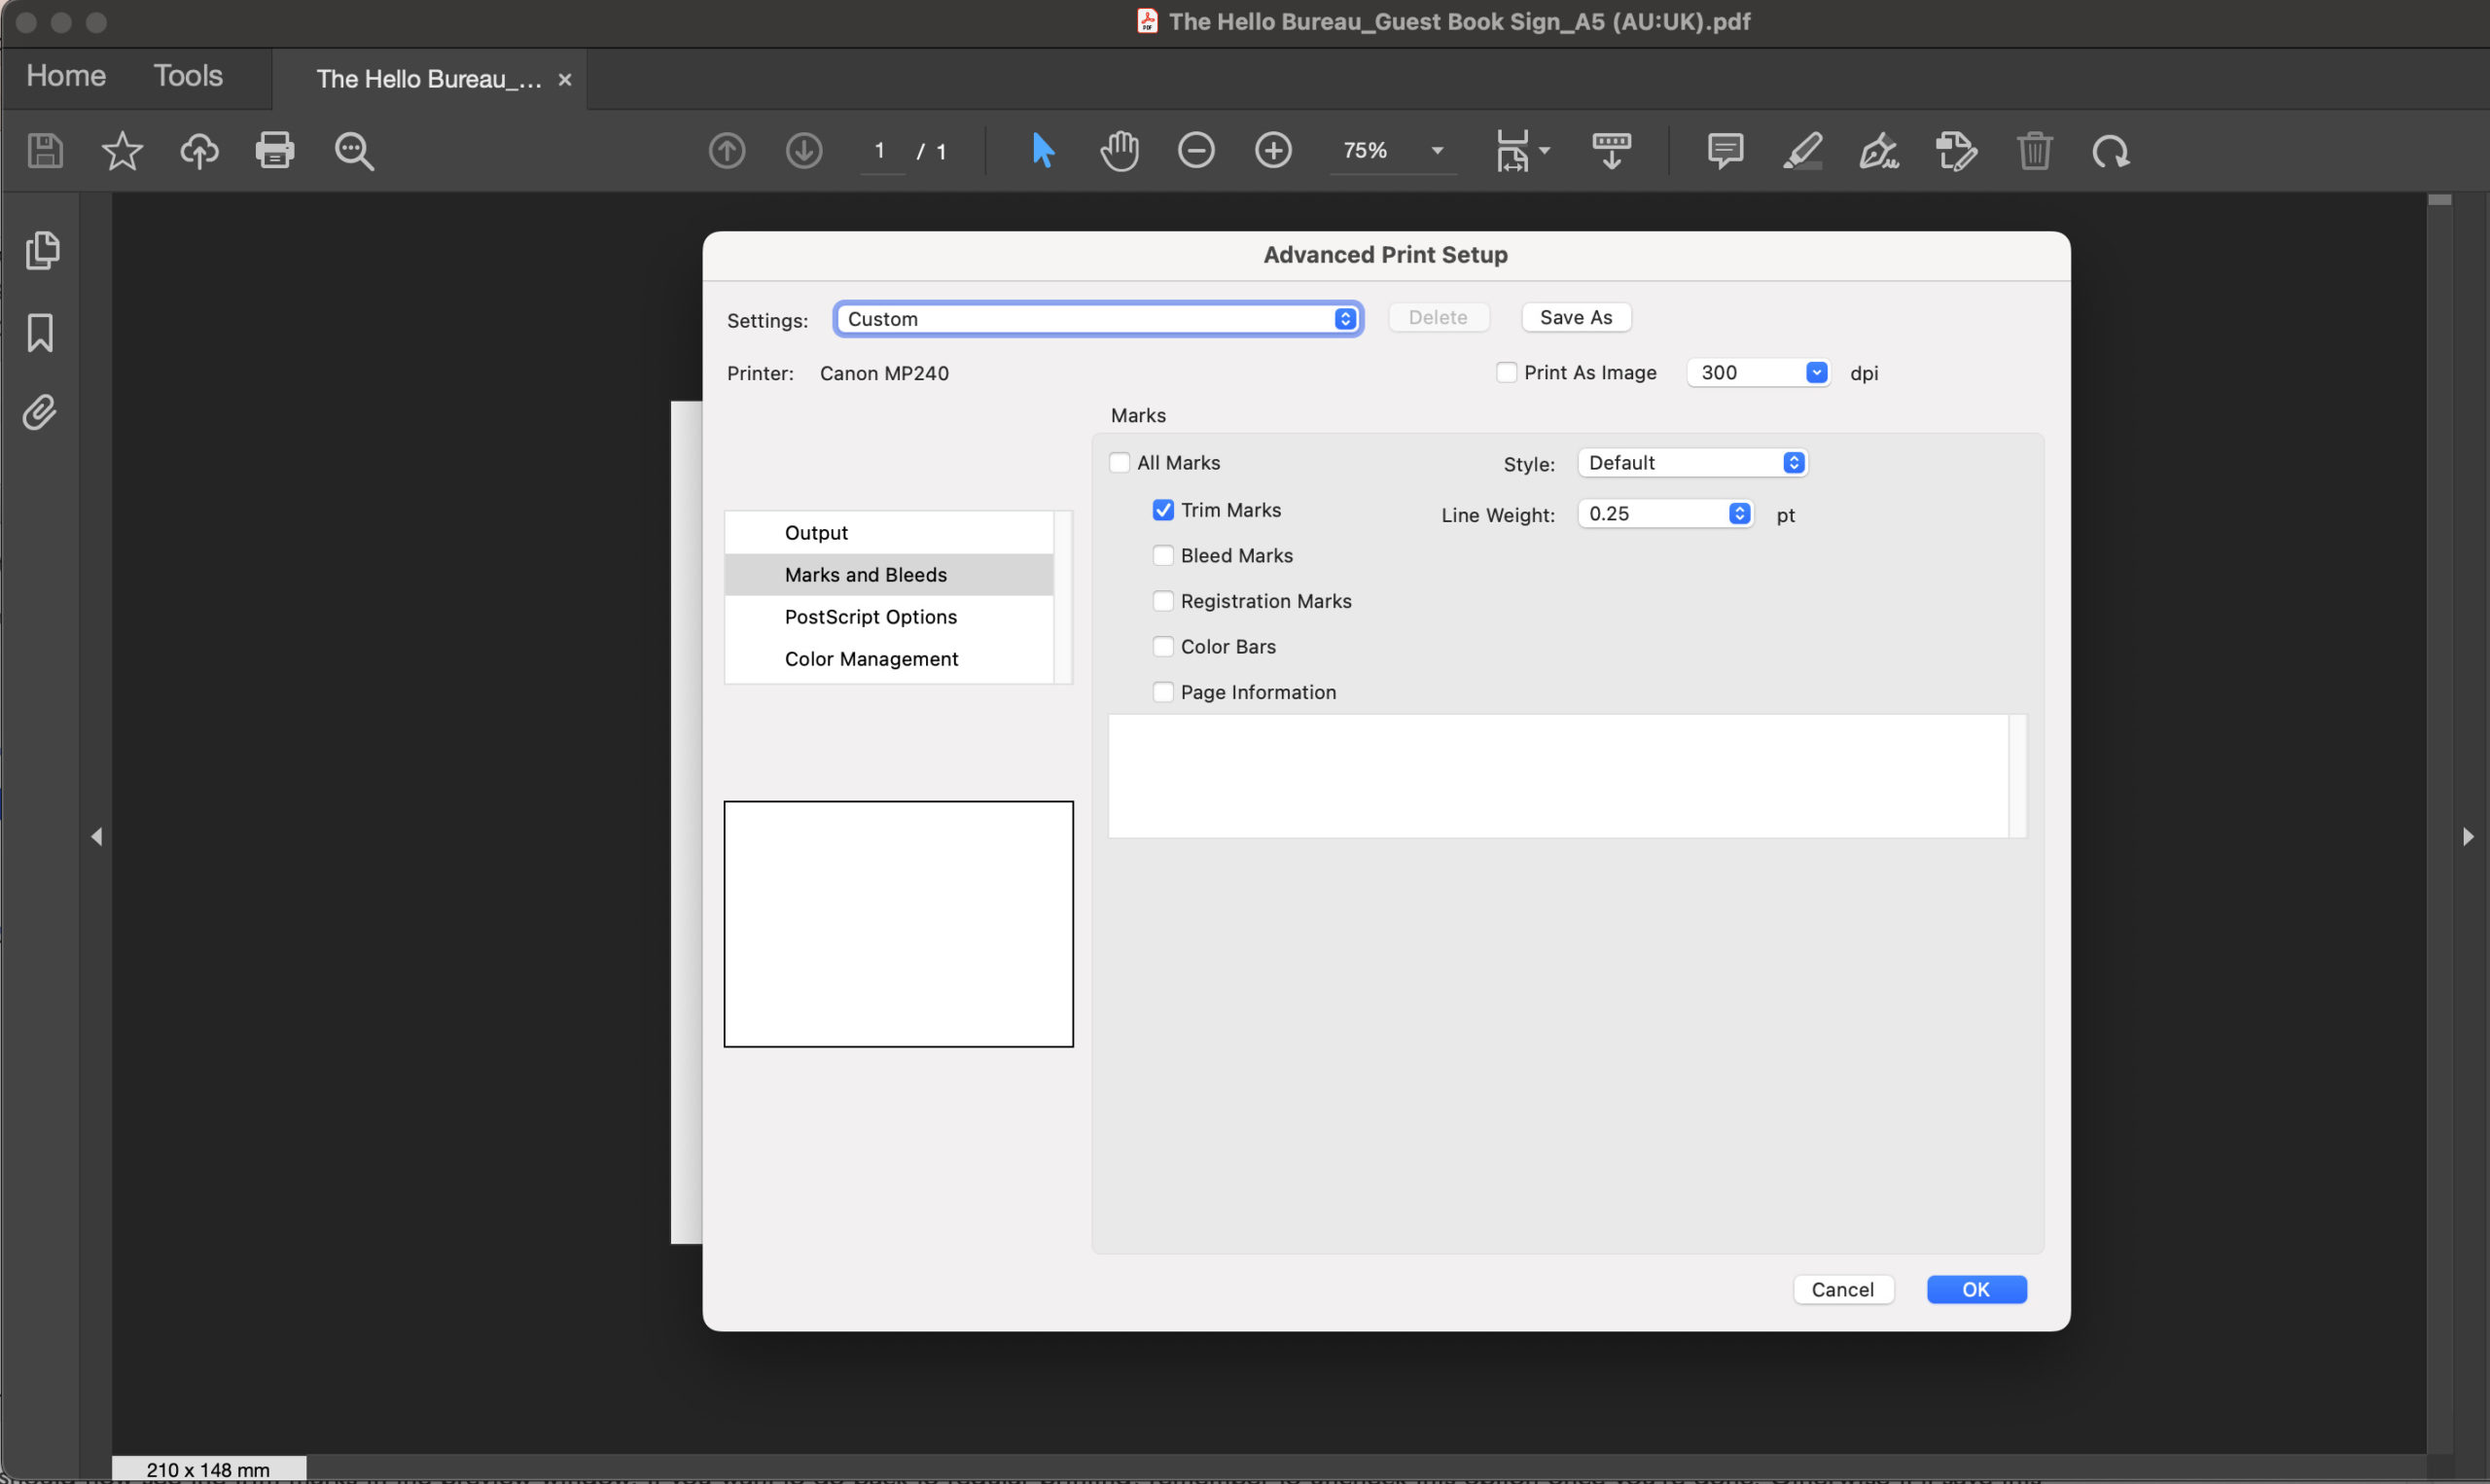
4. Click ‘Advanced’ and then click on ‘Marks and Bleed’. When the options appear, tick the ‘Trim Marks’ option and hit ‘OK’.
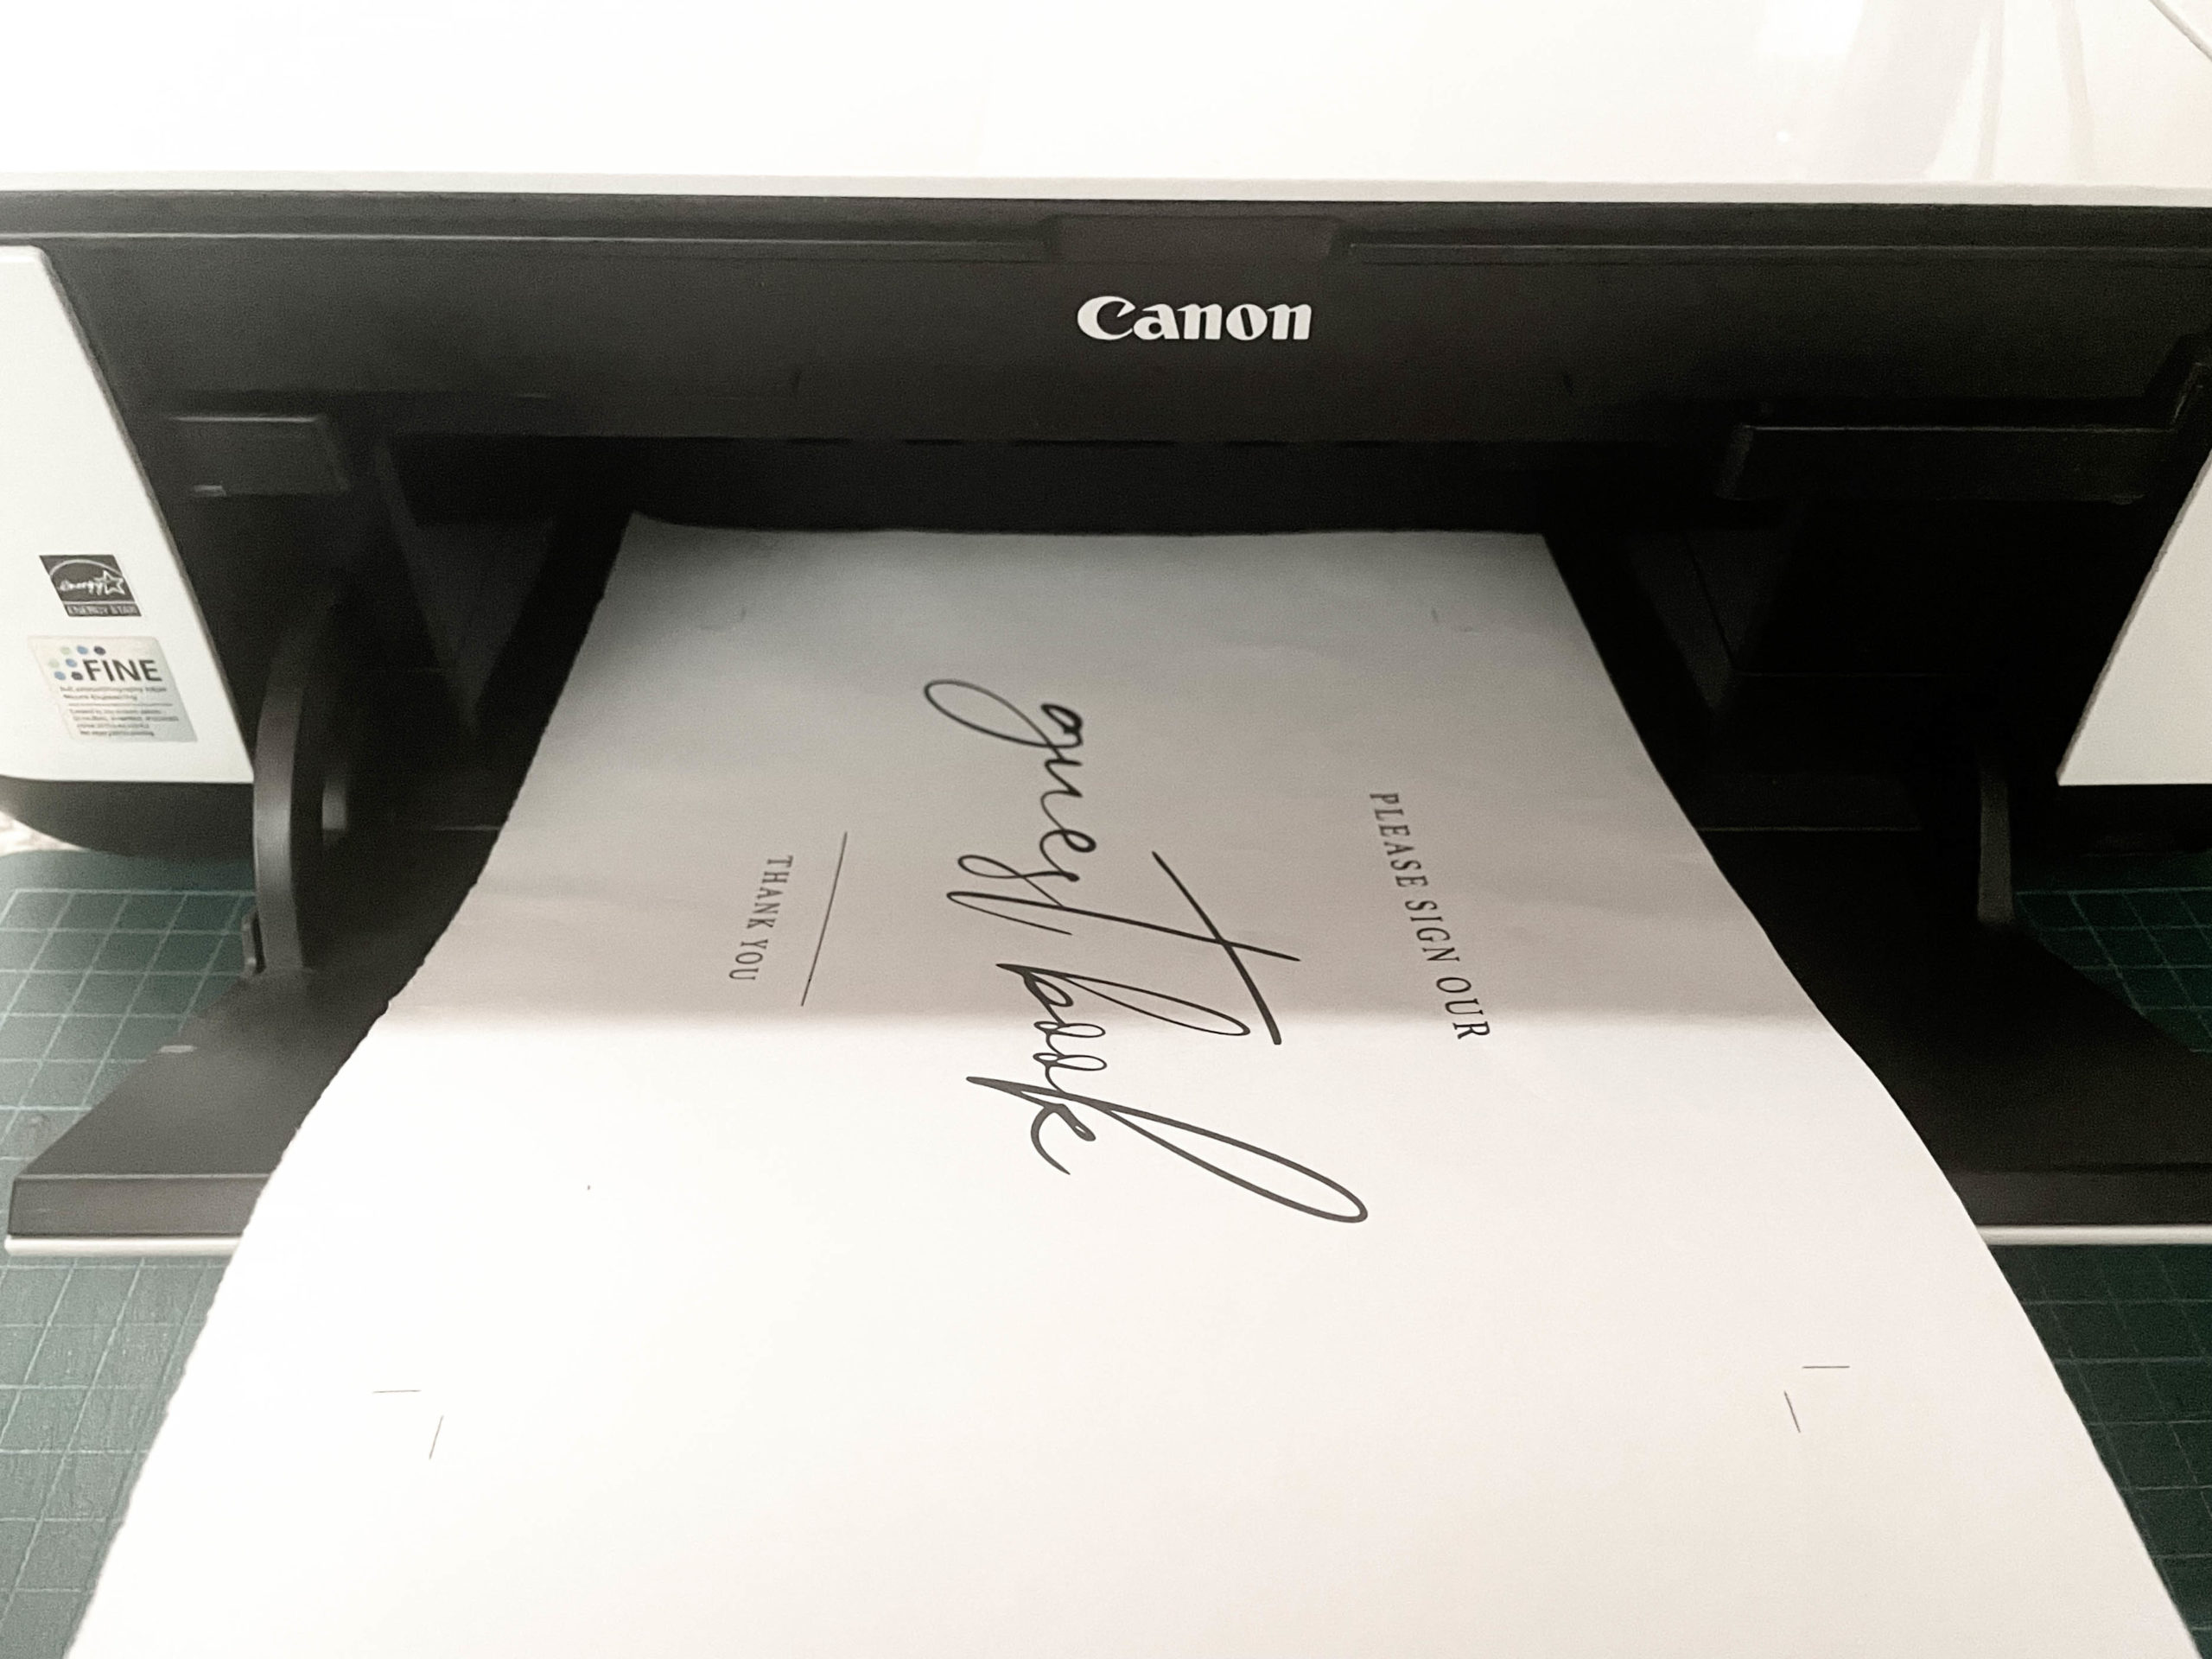
5. You should now see the trim marks in the preview window. Your file is now ready for printing and trimming!
TIP: If you want to go back to regular printing, remember to uncheck the ‘Trim Marks’ option. You will have to click ‘Print’ to save your preferences. Otherwise, it’ll save the ‘Trim Marks’ option until you next print without trim marks.