❗️Important: These instructions are for customers who purchased templates from The Hello Bureau. If you bought a template elsewhere, please refer to your original seller for guidance. We are unable to assist with templates that were not created by us.
This article runs through the functions and options of the Templett text formatting toolbar.
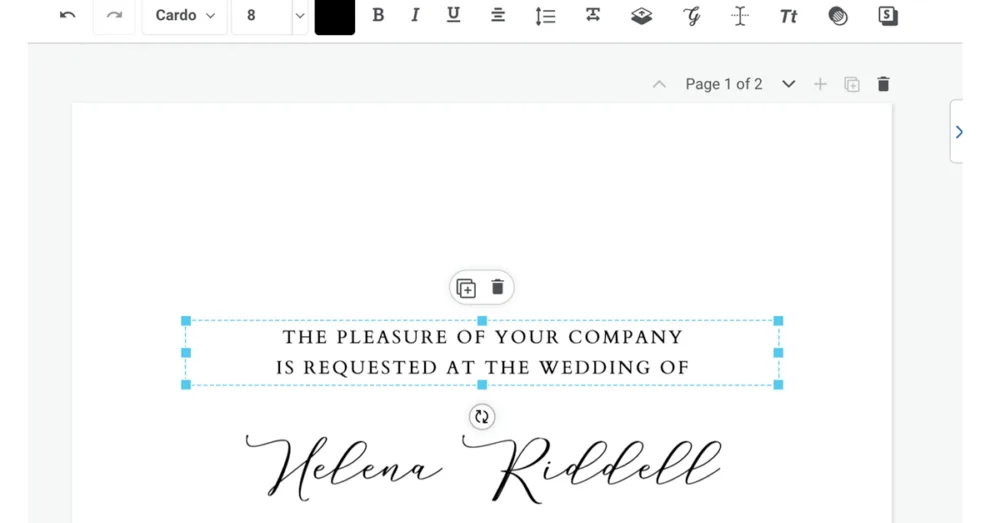
Once you’ve opened your template in Templett, click on any text box to activate it. You’ll see a toolbar appear at the top of the editor with all the formatting controls you need. Here’s what each one does.
Before you start editing, we recommend keeping a separate document with your original text. This gives you an easy reference to copy and paste from if you need to start over or undo any formatting changes.
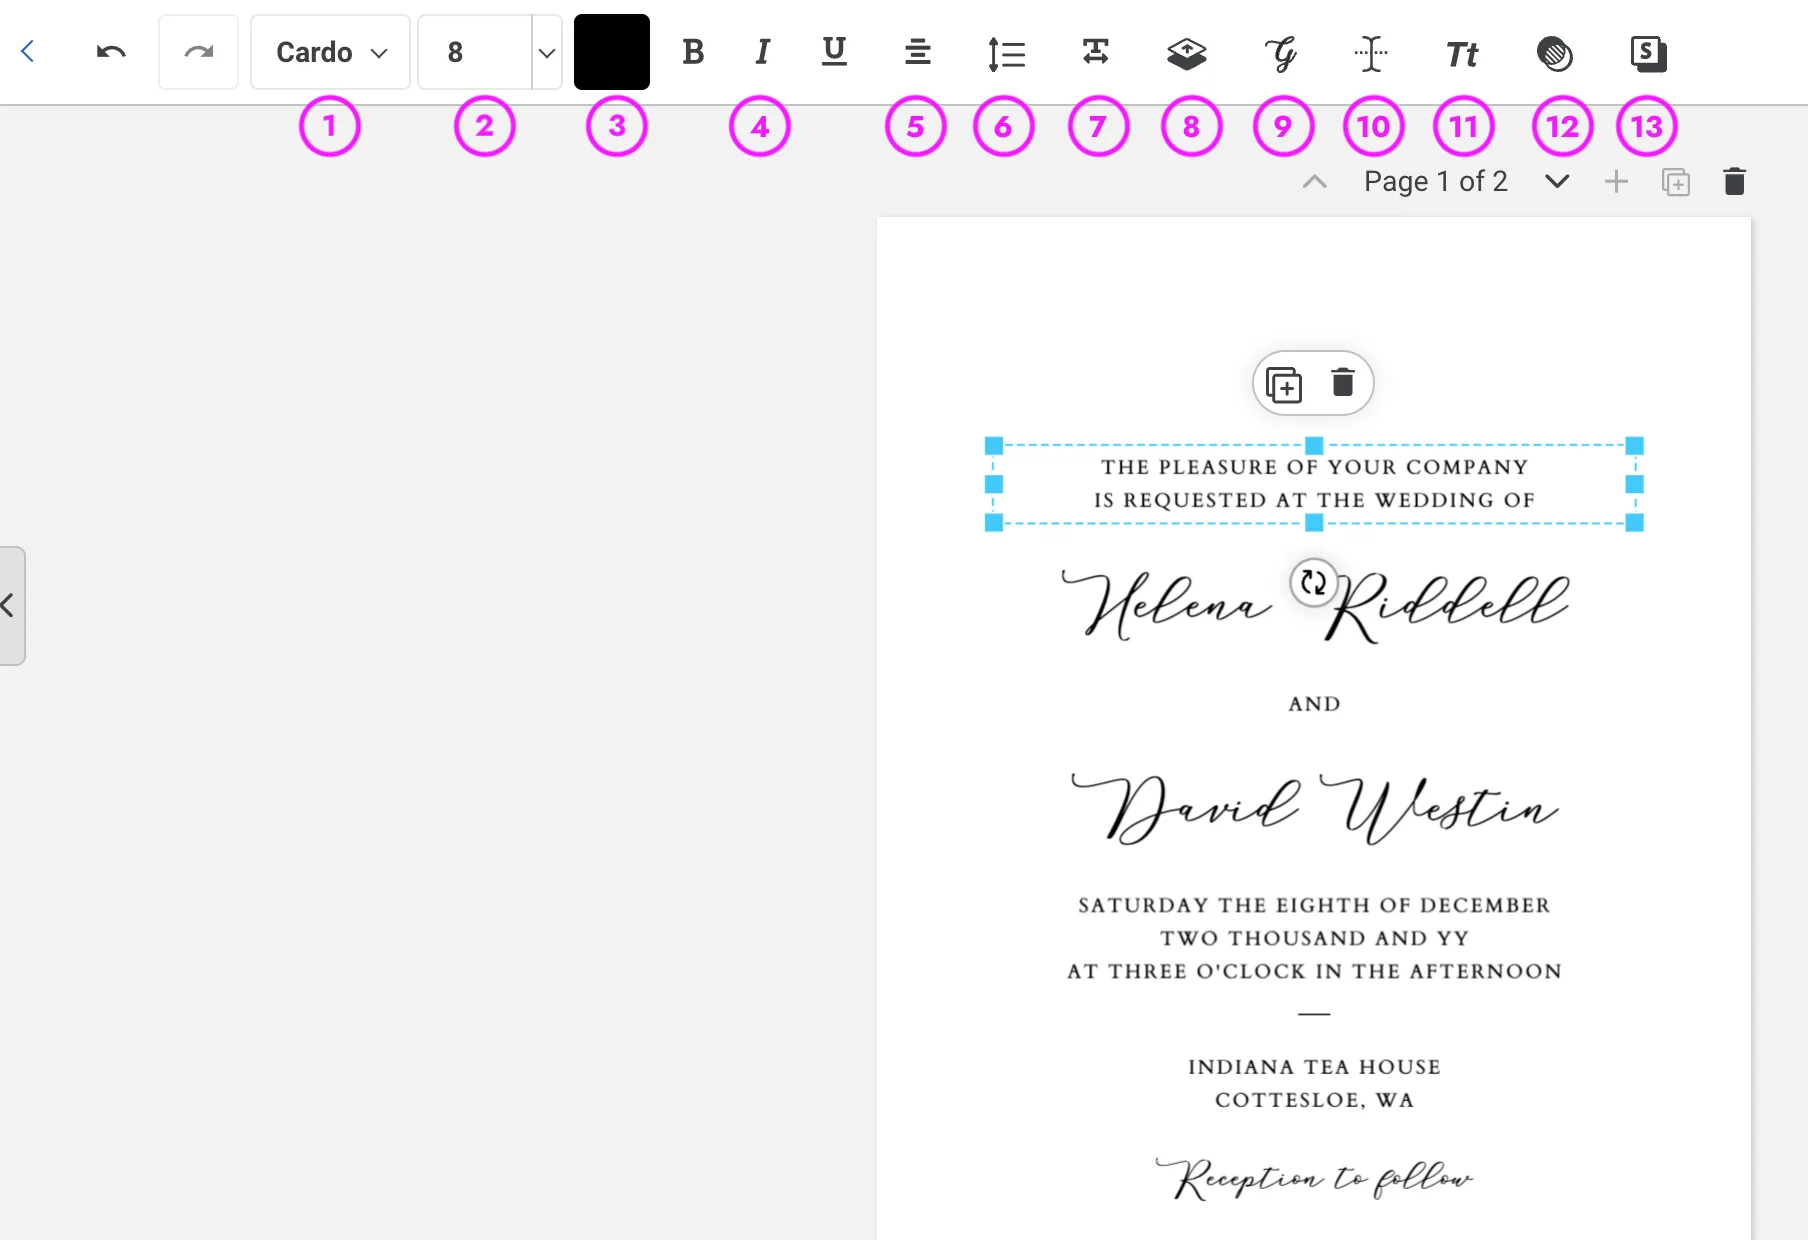
1. Typeface / Font Choice
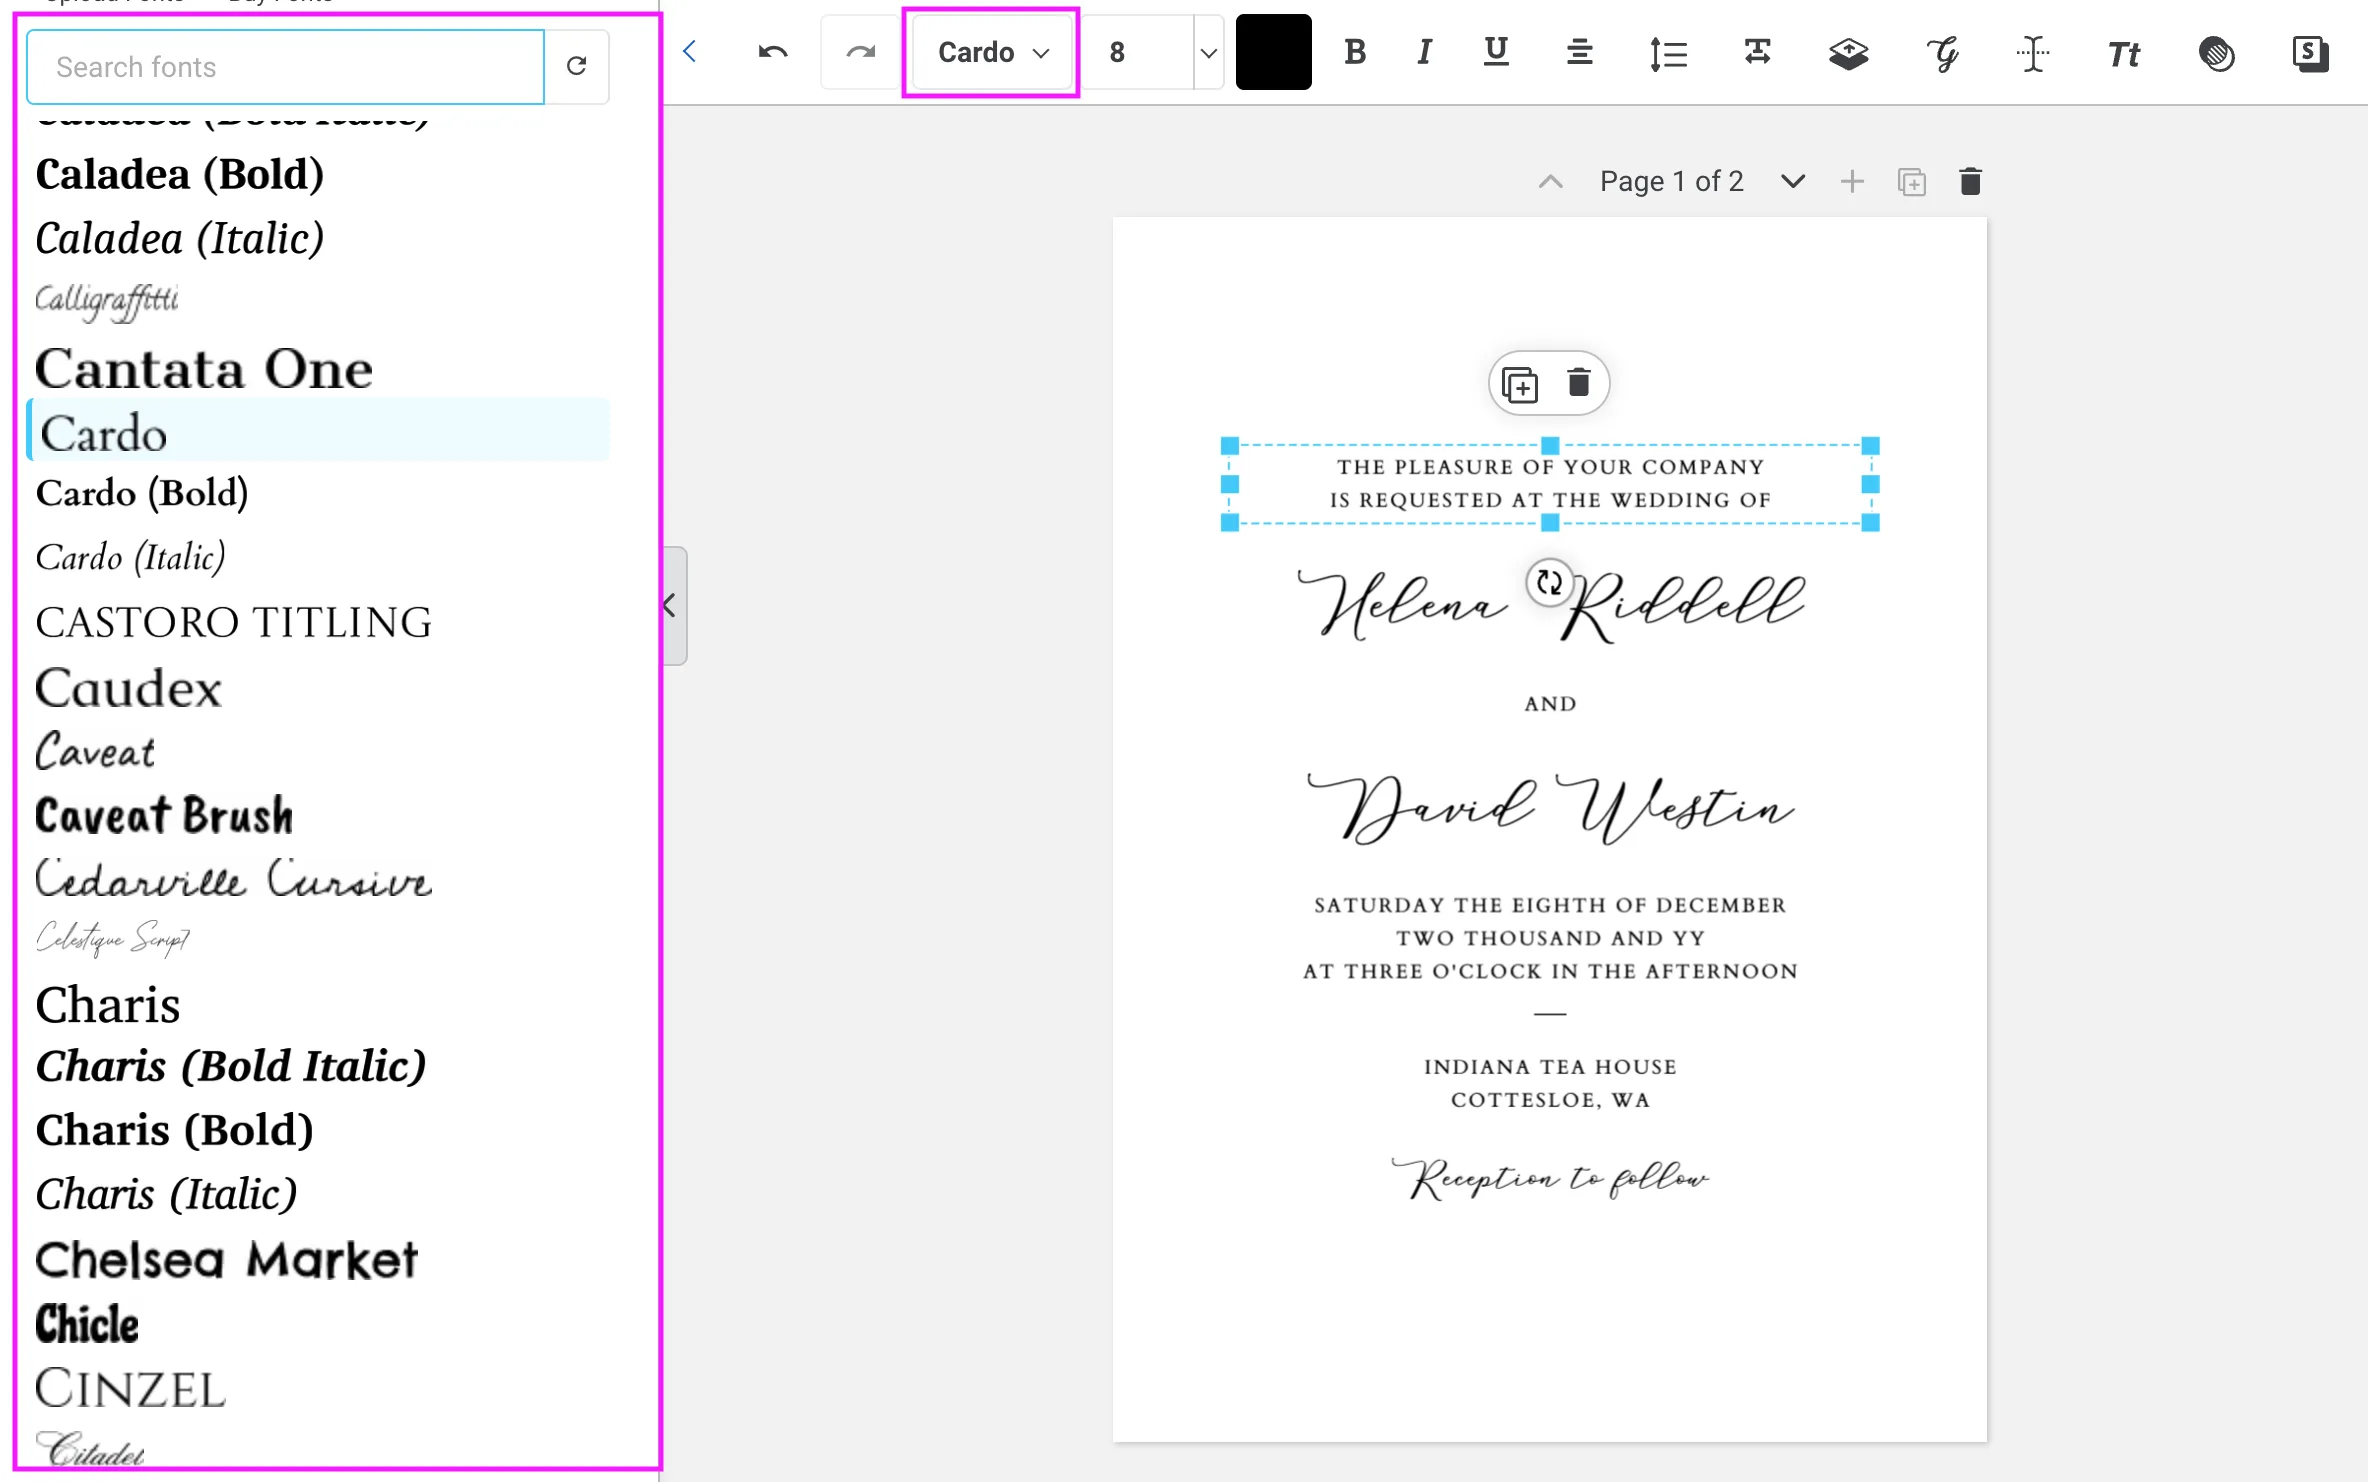
The first dropdown in the toolbar shows the name of the current font (for example, “Cardo”). Click it to open a list of available fonts. The Templett text editor includes a wide range of typefaces, from serif and sans-serif to script and display styles. Scroll through or type to search. Your template has been designed with specific fonts in mind, so if you’re swapping fonts, choose something with a similar feel and check that it still fits your text boxes.
2. Font Size
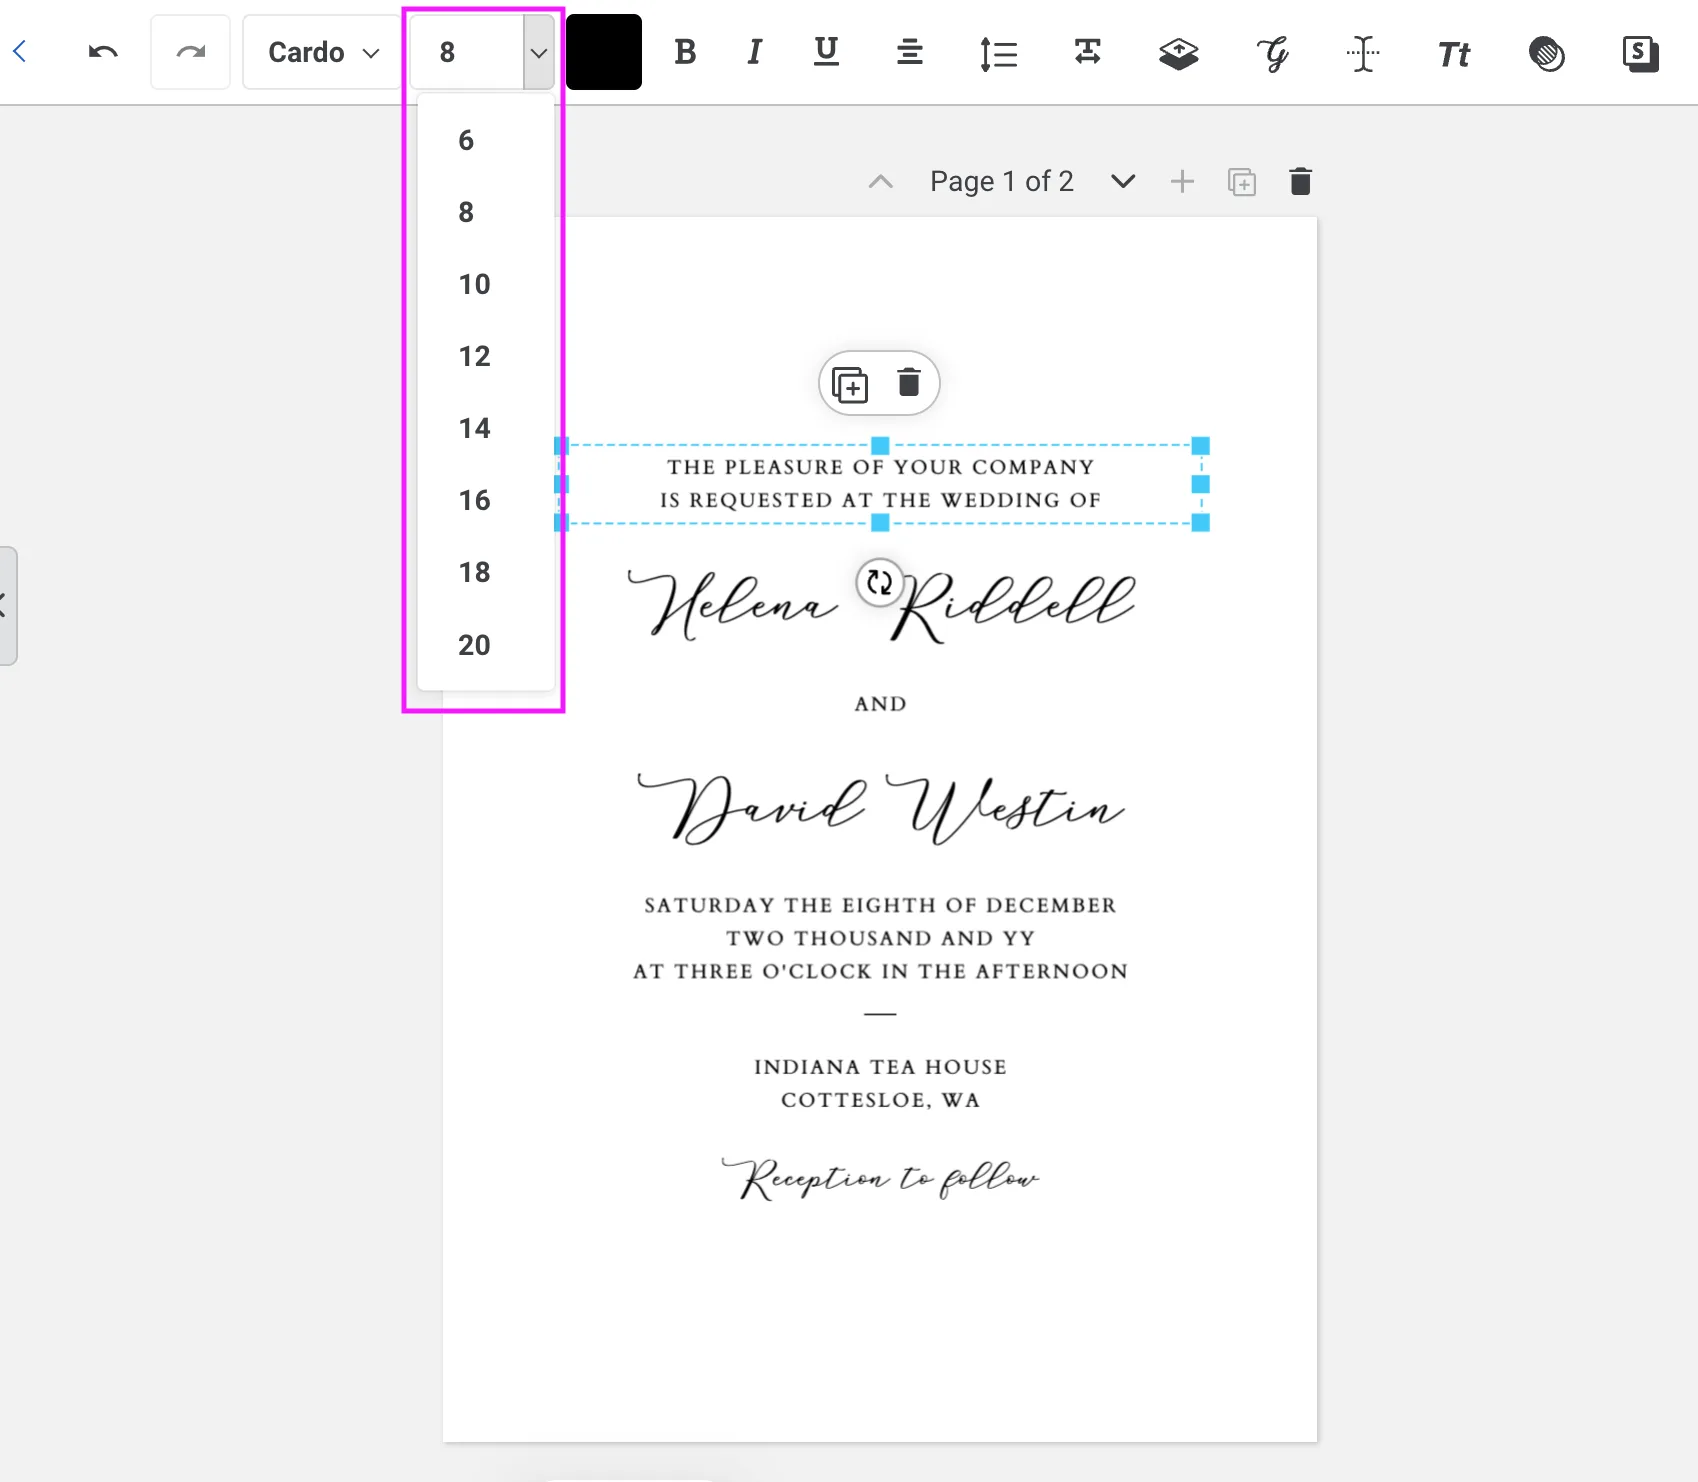
The number next to the font name is your font size. You can type in a specific number or use the arrows to increase or decrease the size. If your text is overflowing its box or looks too small, adjusting the size here is the quickest fix. For legibility, keep your font size at 8pt or above. Any smaller and your text is likely to be difficult to read once printed.
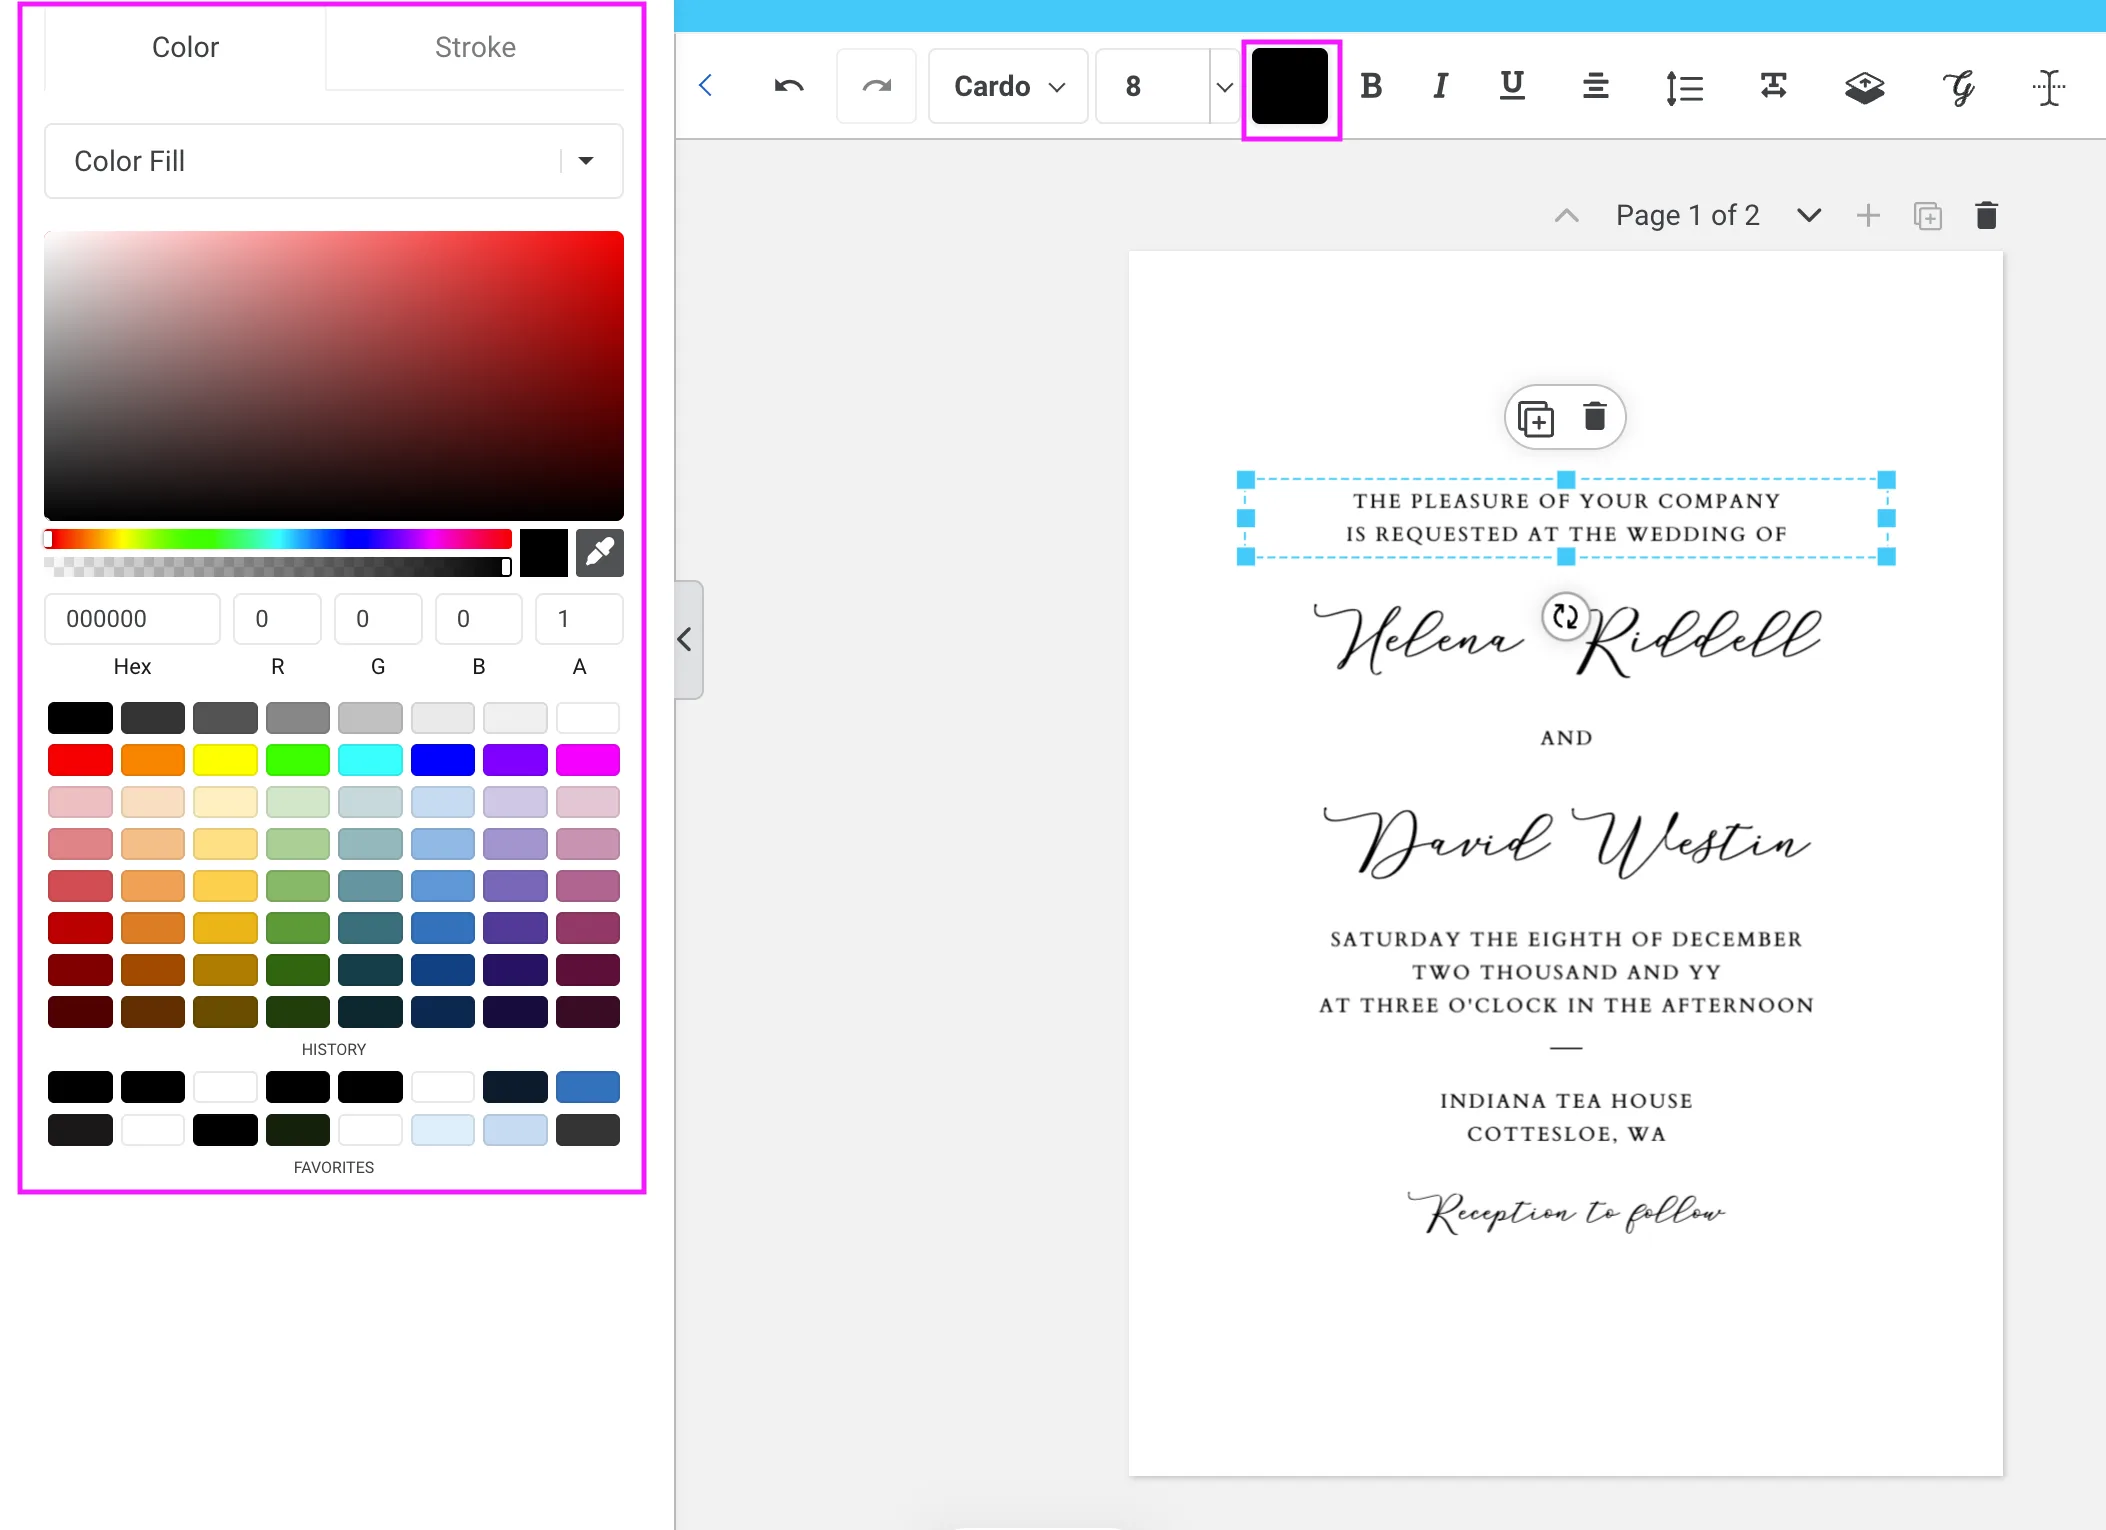
3. Font Colour
The solid square (showing the current colour) opens a colour picker. You can choose a colour from the palette, enter a hex code for an exact match, or sample a colour from elsewhere on your design. Note that Templett works in RGB, so if you’re sending your file to a professional printer, colours may appear slightly different in print than on screen. This is particularly noticeable with neon or very bright colours, which will not print as vivid as they appear on your monitor.
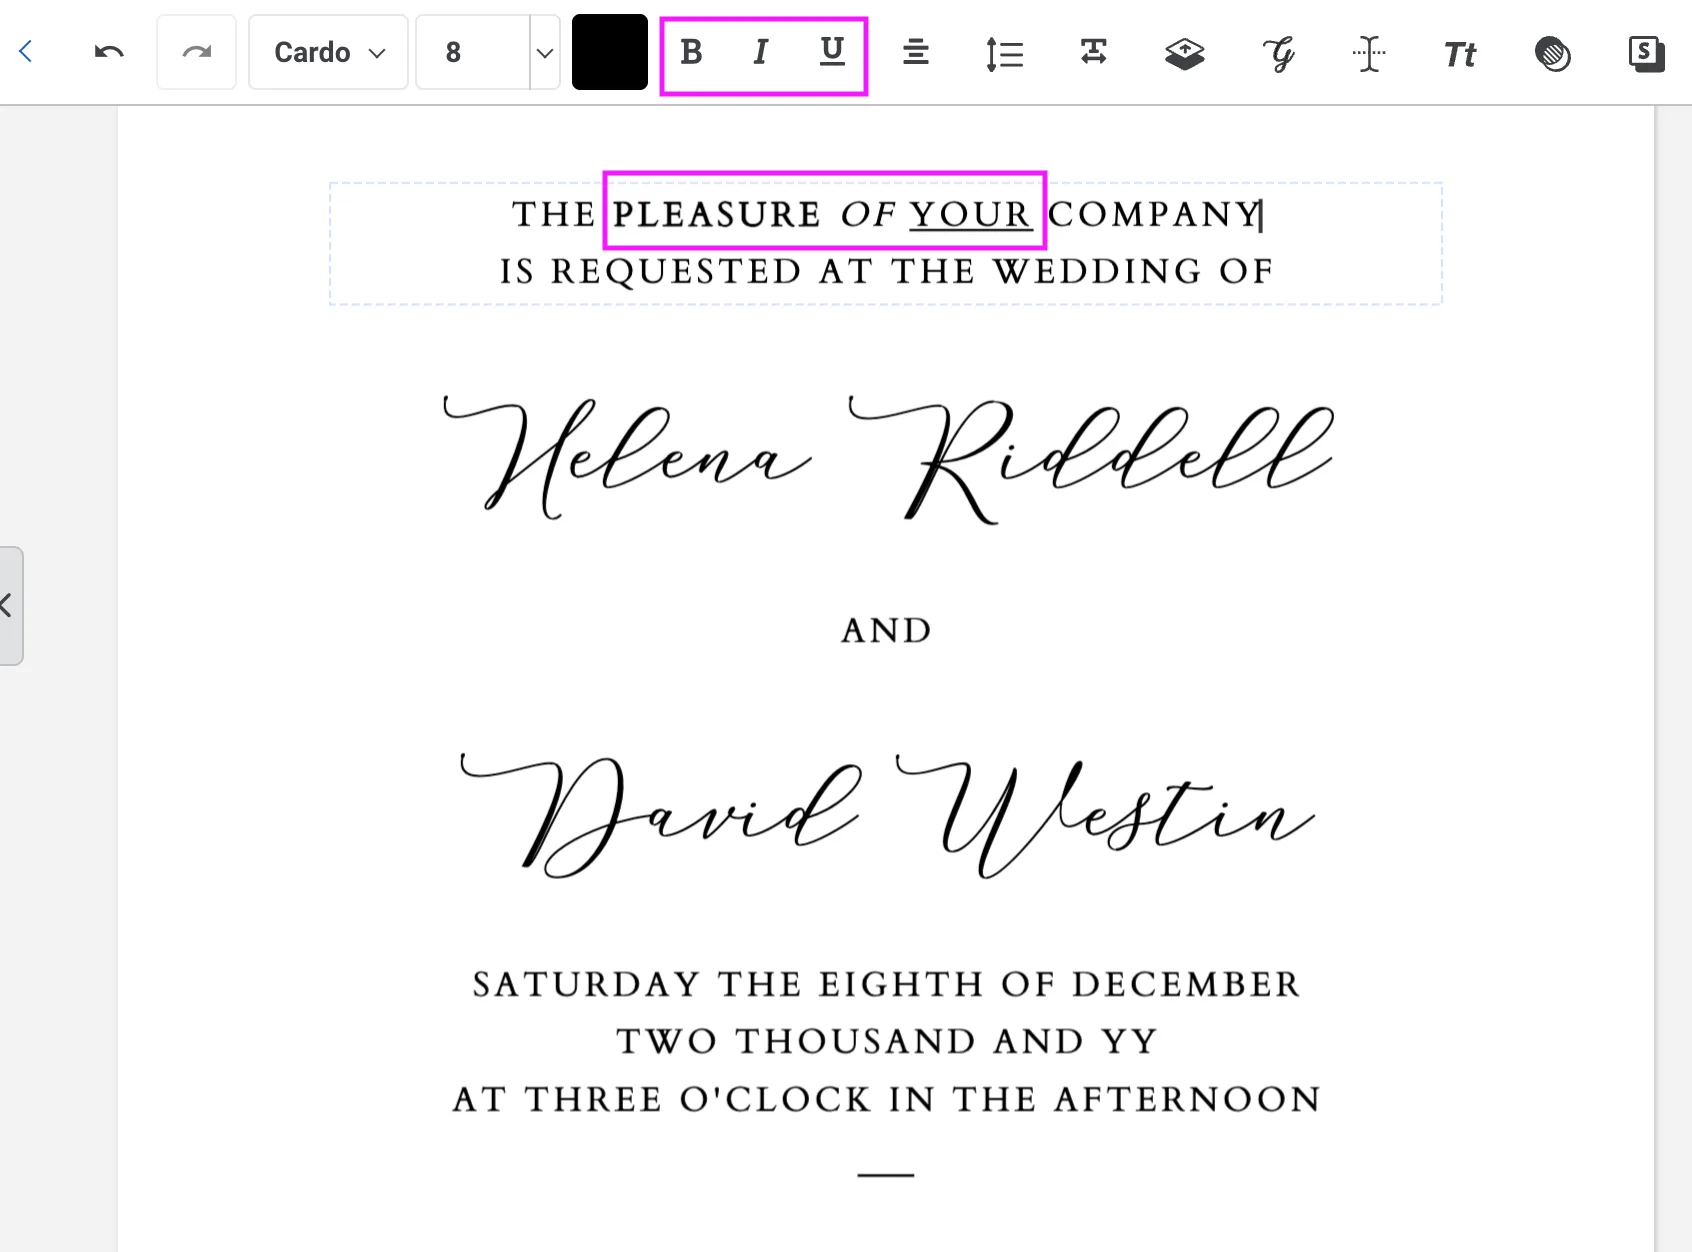
4. Font Style
The B, I, and U buttons apply bold, italic, and underline formatting to your selected text. Highlight the text you want to change before clicking. Not all fonts support all three styles, so if a button doesn’t appear to work, the font you’re using may not have a bold or italic variant.
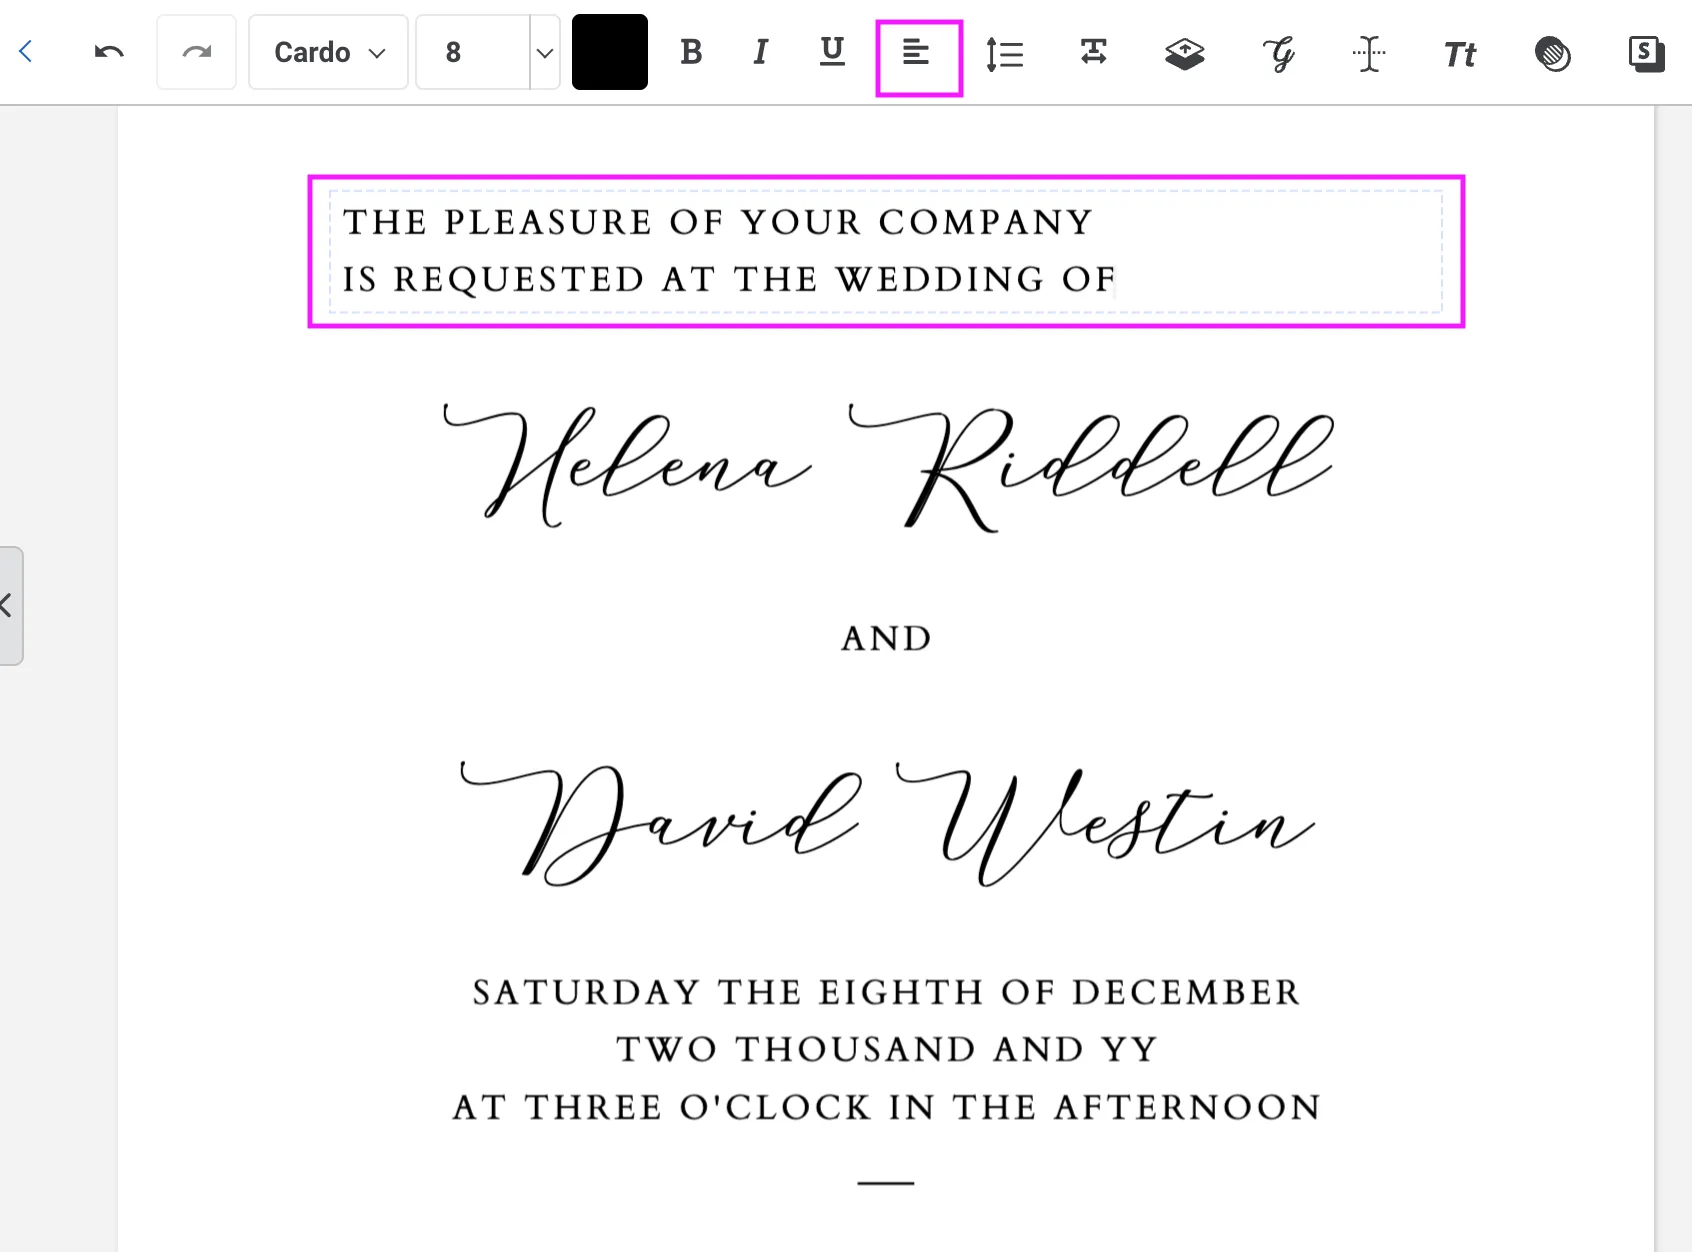
5. Text Alignment
The alignment buttons let you set your text to left, centre, right, or justified. Keep clicking to cycle through all four options.
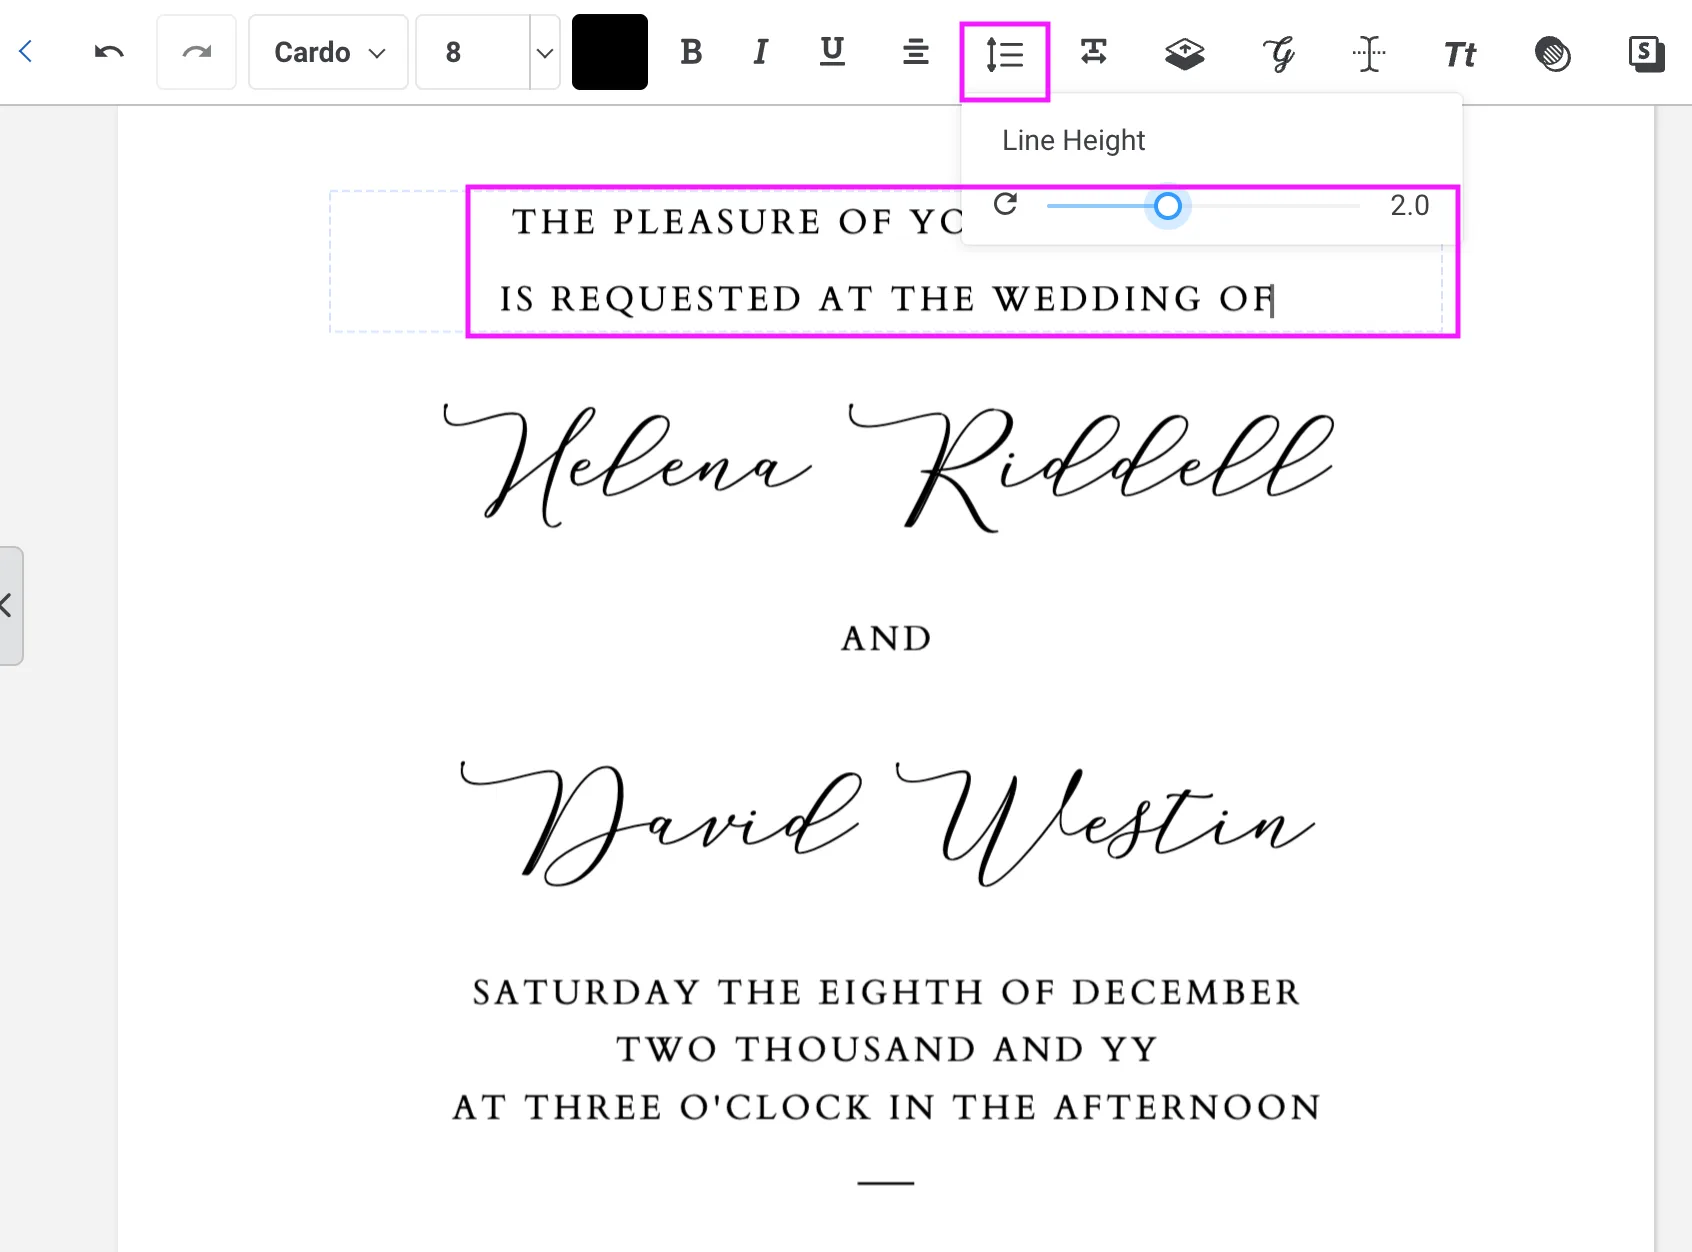
6. Line Height
Line height controls the spacing between lines of text. Increasing it creates a more open, airy look; decreasing it brings lines closer together. This is especially useful when you have multi-line text and need to adjust the overall fit within a text box. Line height varies between typefaces, but as a general rule for printed wedding and event stationery, aim for a line height of at least 1 to 1.5.
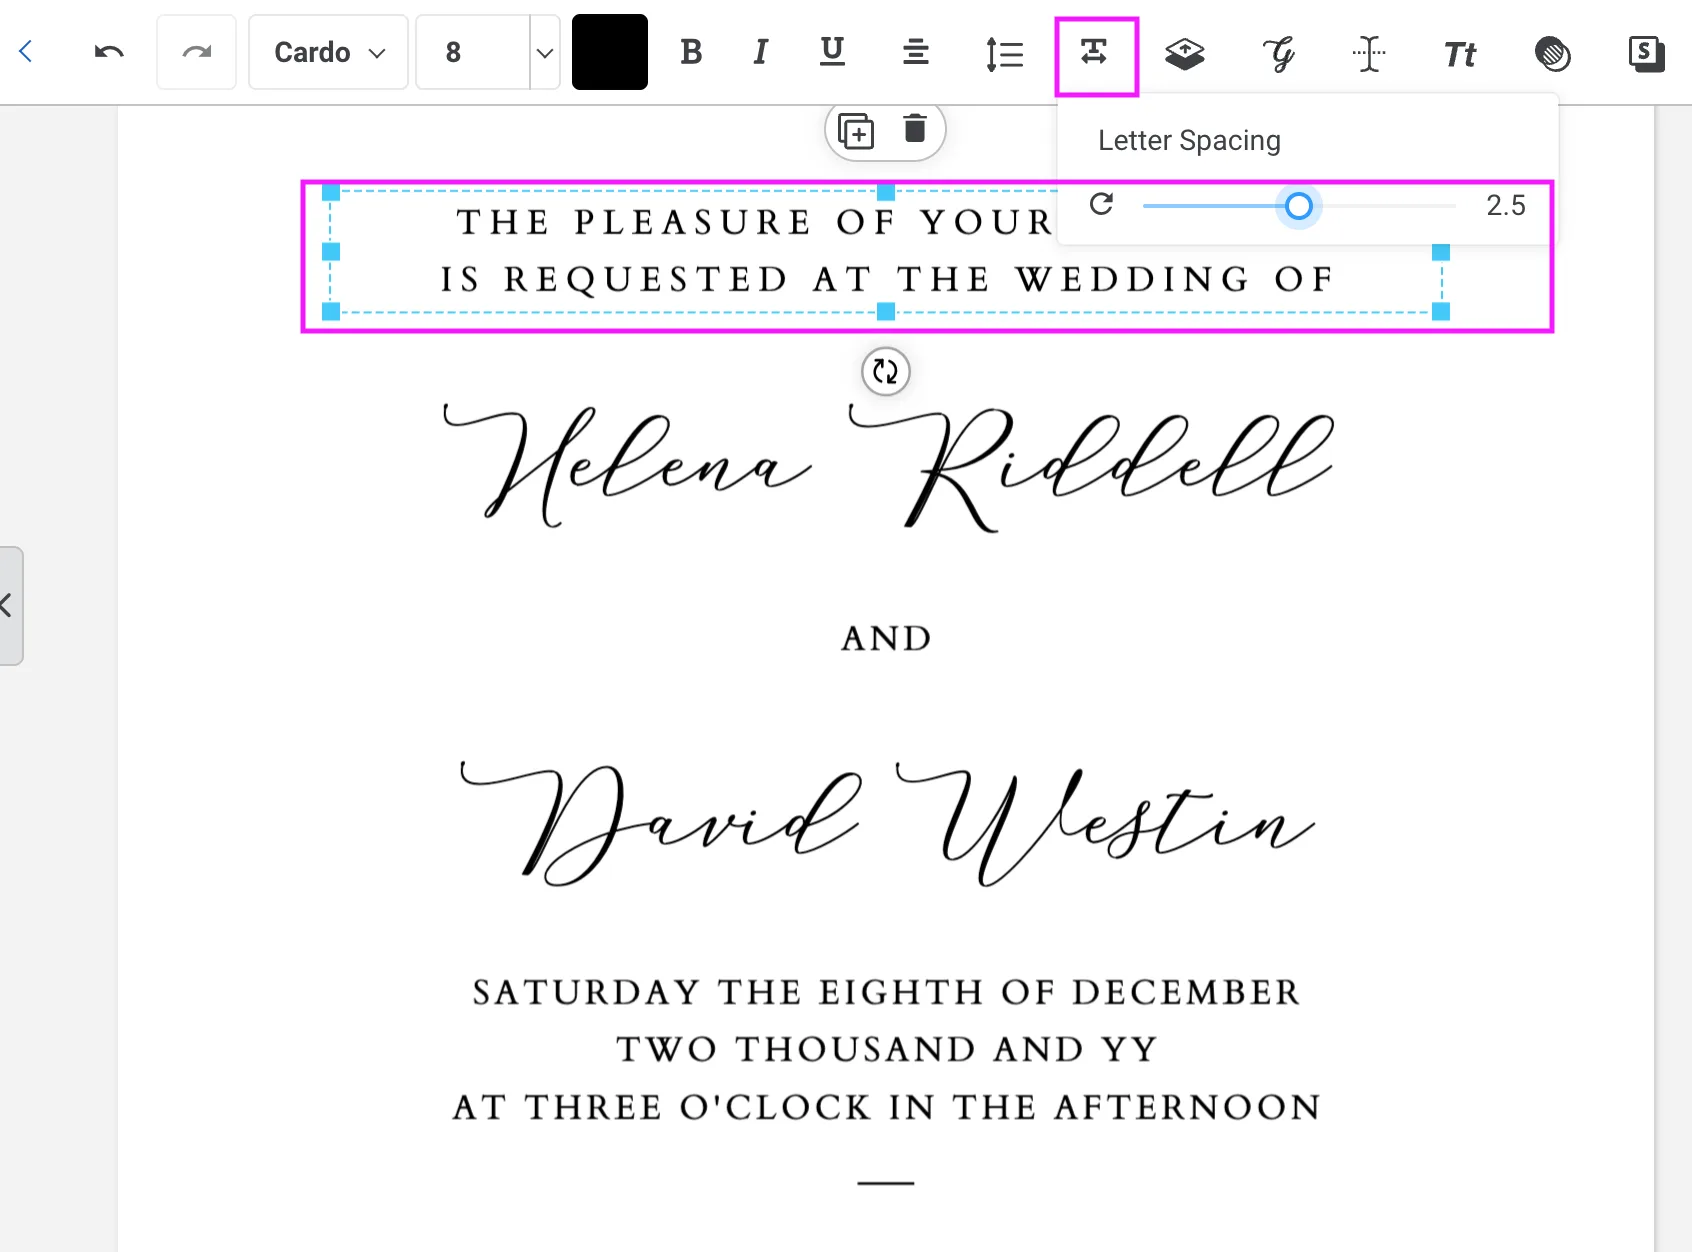
7. Letter Spacing
Letter spacing (also called tracking) adjusts the space between individual characters. Adding a small amount of letter spacing to uppercase or small-cap text is a classic typographic technique and can make your text feel more elegant and intentional. We recommend leaving script text as zero so they appear as intended.
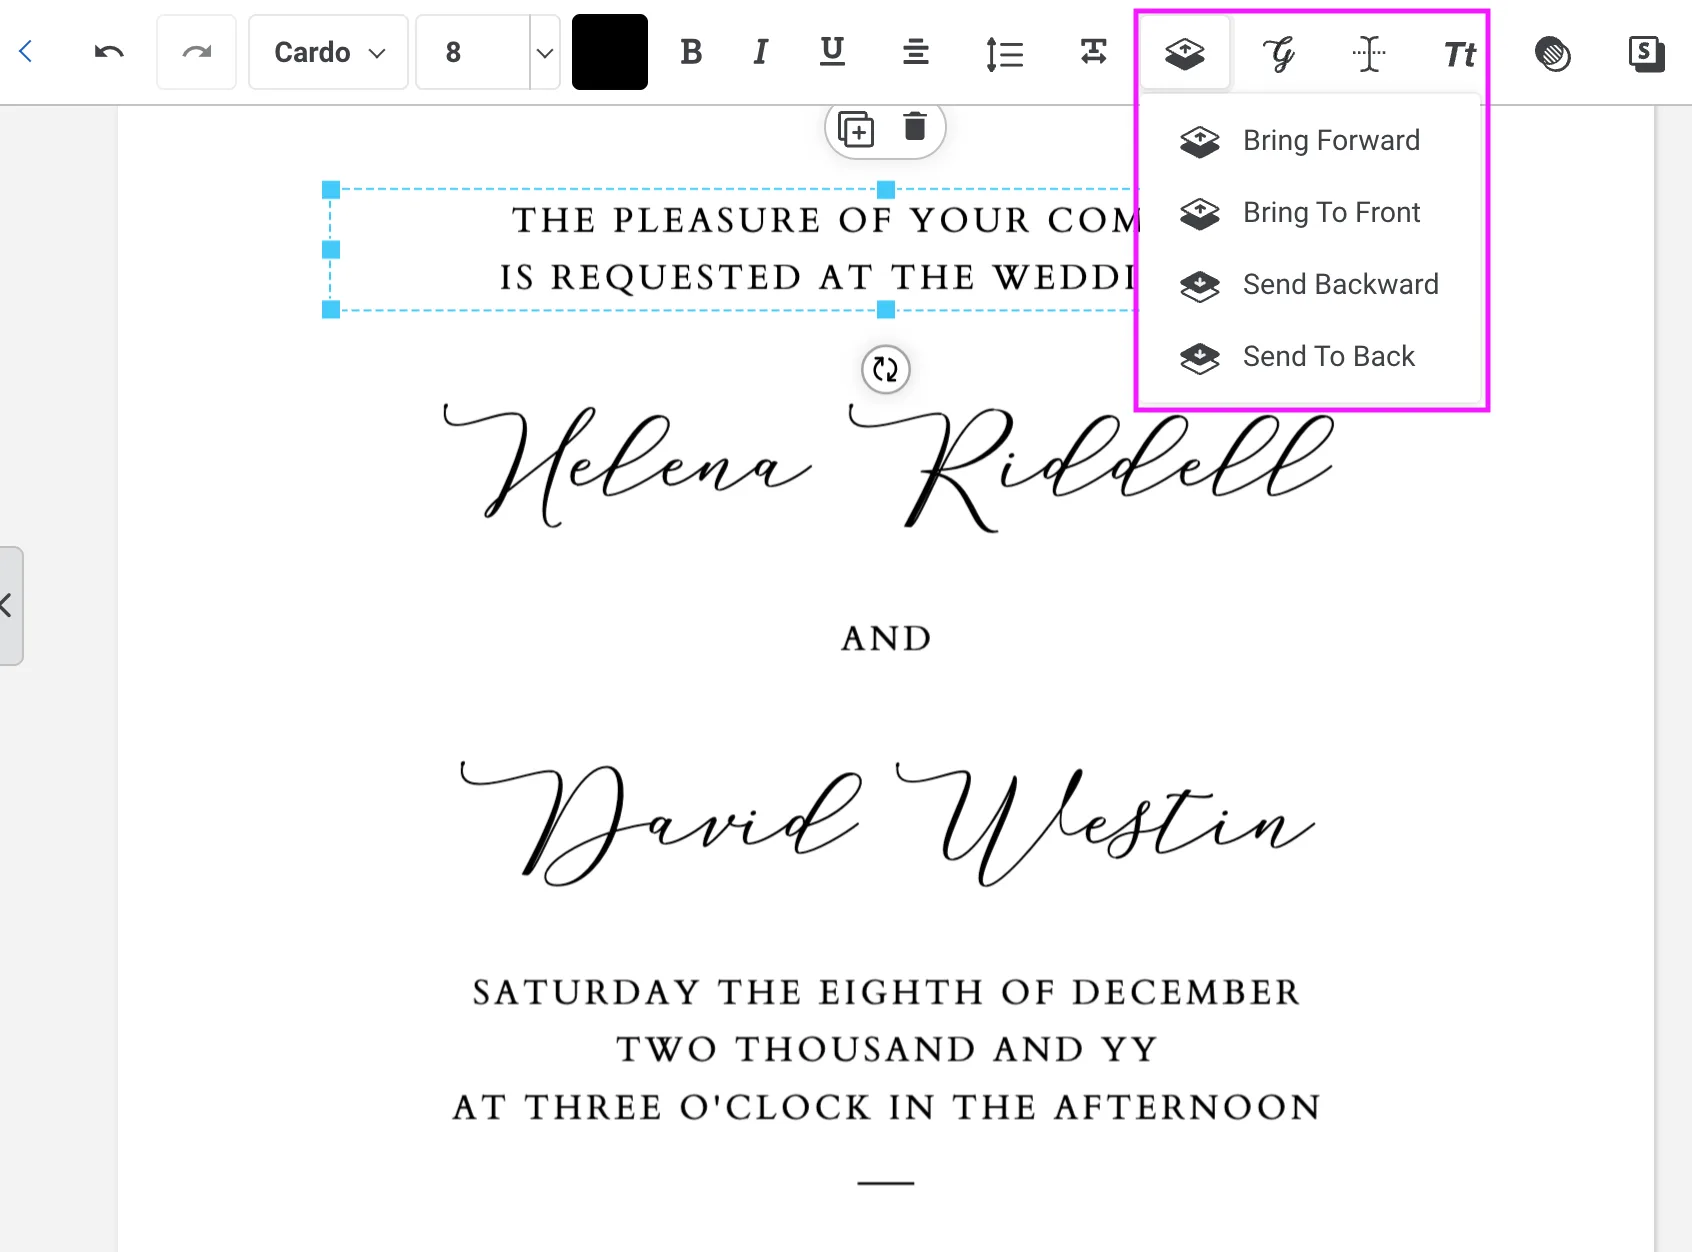
8. Layers
The layers panel shows all the elements in your template stacked in order. You’ll mostly only need this if your template has background elements or illustrations with text sitting on top. You can use it to select elements that are sitting behind others and reordering them.
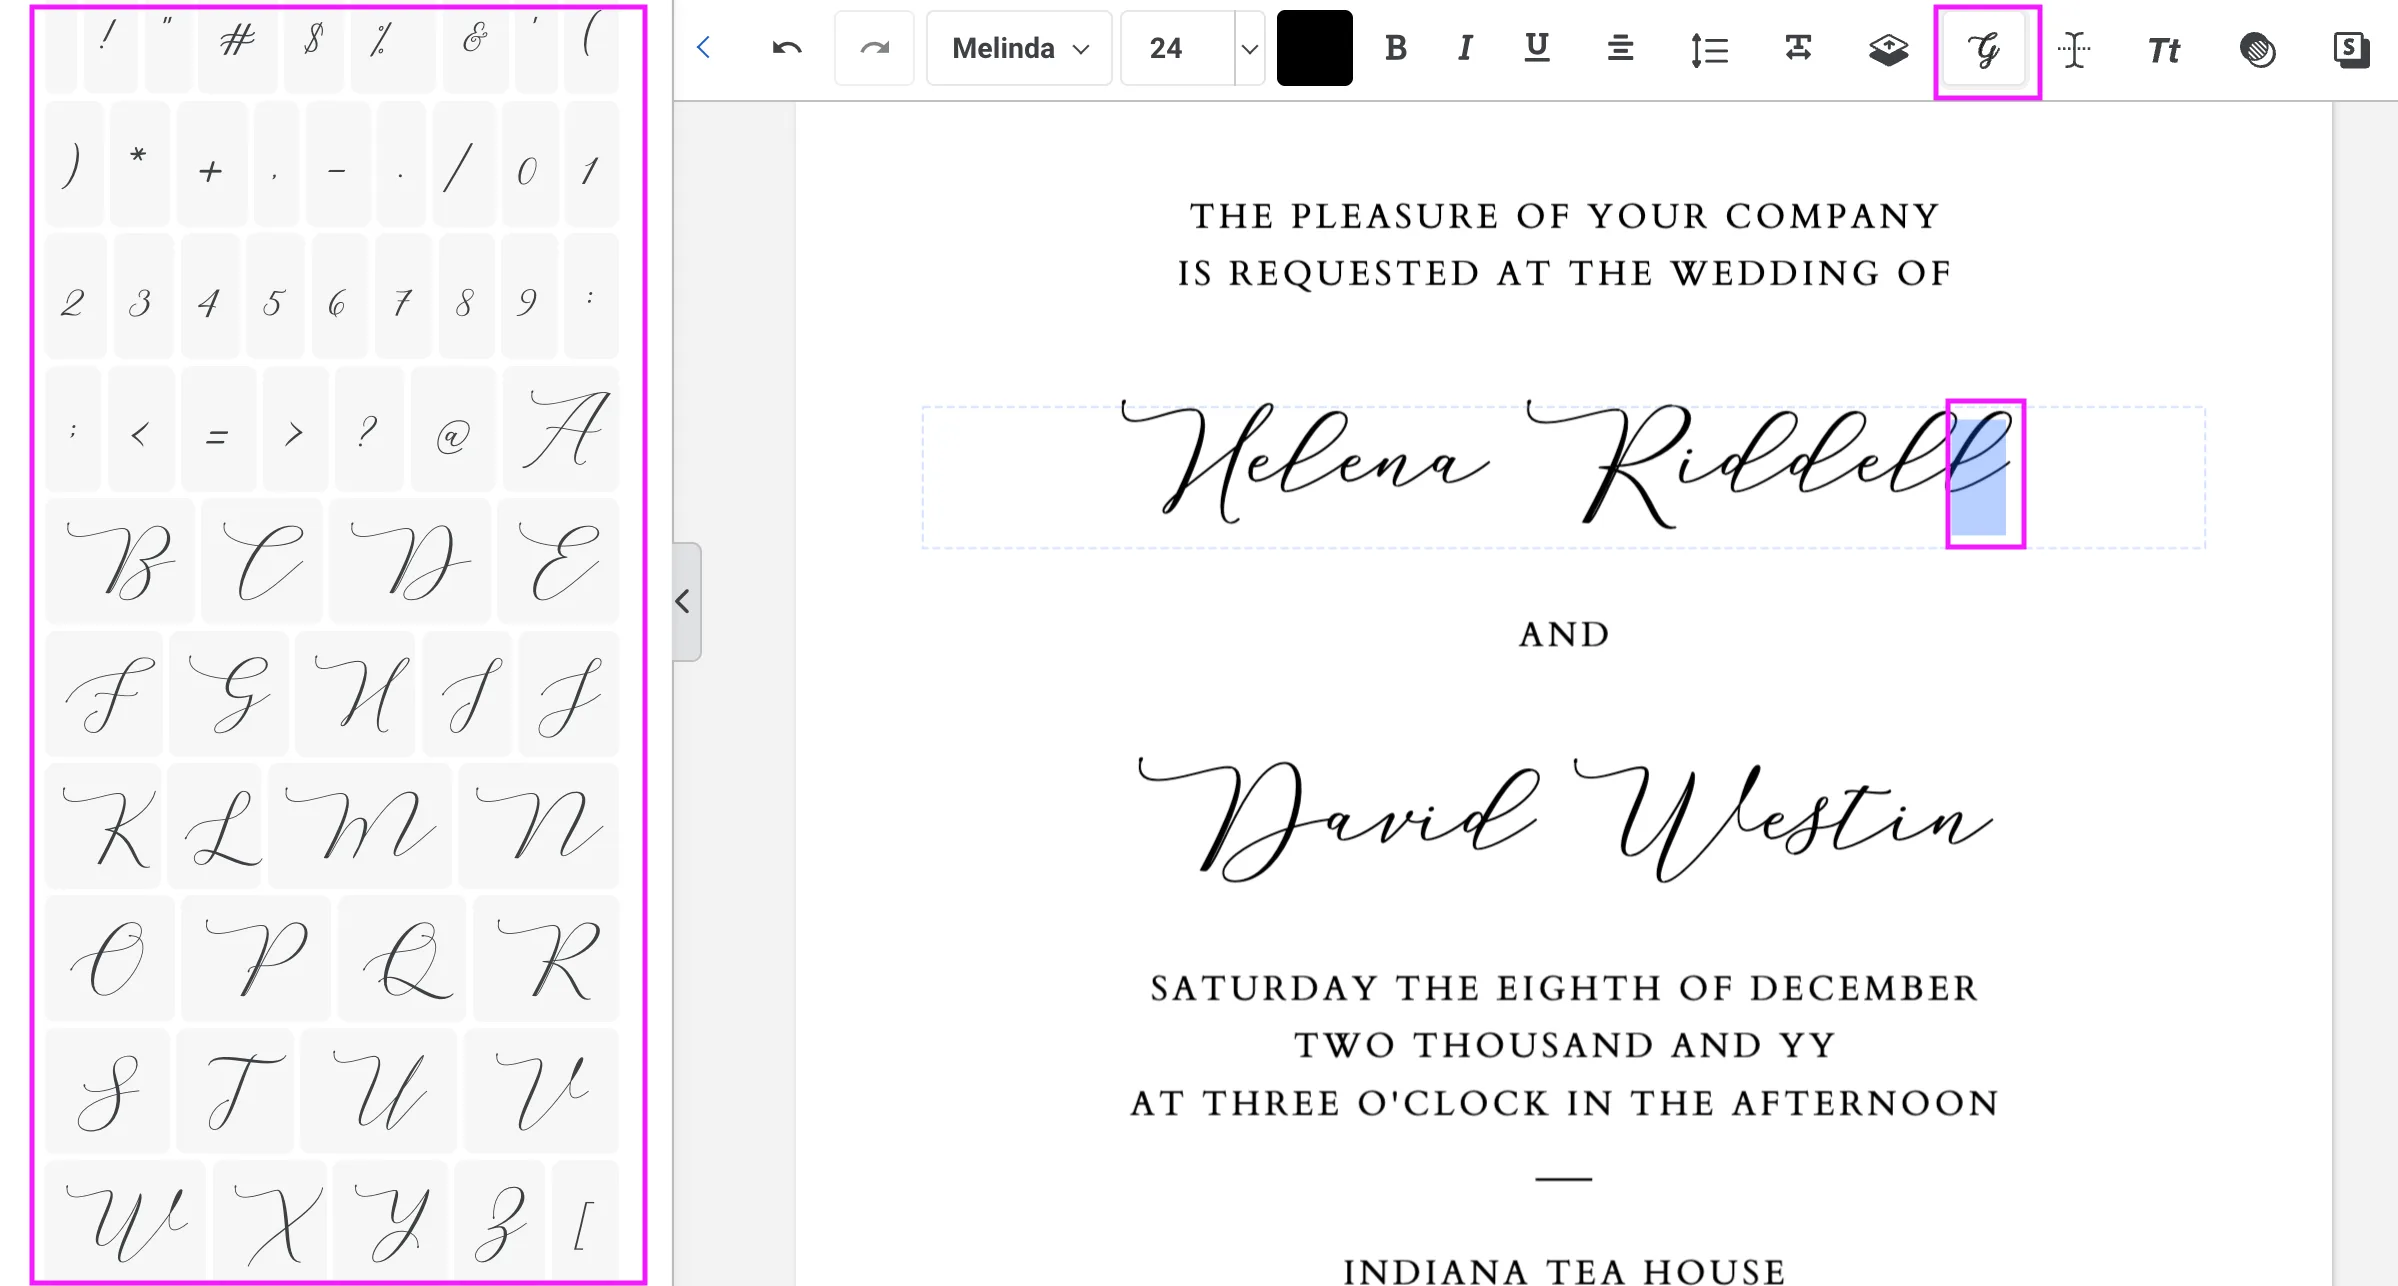
9. Glyphs
Many of the script and decorative fonts in Templett include alternate letterforms called glyphs. The glyphs panel lets you swap individual letters for stylistic variants, such as a more ornate capital letter or a looped ascender. Click the glyph icon while your cursor is positioned on a character to see what alternates are available. This article from Templett explains more about glyphs.
10. Arched Letters
The arched text tool curves your text along an arc. You can adjust the degree of the curve to create anything from a subtle bend to a full circle. This is a popular effect for monograms, logos, and decorative header text.

11. Text Case
The text case button cycles through formatting options such as uppercase, lowercase, title case, and sentence case. This changes how the text displays without you needing to retype it. Note that once you apply uppercase, the text may not revert to its original state (in our experience).
12. Opacity
Opacity controls how transparent a text box appears. At 100% the text is fully visible; reducing it creates a faded or ghost effect. We don’t use opacity adjustments in any of our designs and recommend leaving this at 100%, as reduced opacity can affect legibility when printed.
13. Shadow
The shadow tool adds a drop shadow behind your text. You can usually adjust the shadow’s colour, offset (position), and blur strength. We don’t use shadows in any of our designs and recommend avoiding this setting, as it can look heavy in print, particularly at smaller sizes.
Resizing Text Boxes
Text boxes can be resized individually by clicking and dragging the corner or side points. If you’ve selected multiple text boxes at once, resizing from the corner handles will scale your text boxes proportionally, but resizing from the side edges (top, bottom, left, or right) will distort the letters, squishing or widening them.
After resizing by dragging, we recommend manually typing the resulting font size into the font size field to set it. For example, if you drag a heading from size 26 to approximately size 36, type 36 into the font size field to confirm it. This ensures the size saves correctly.
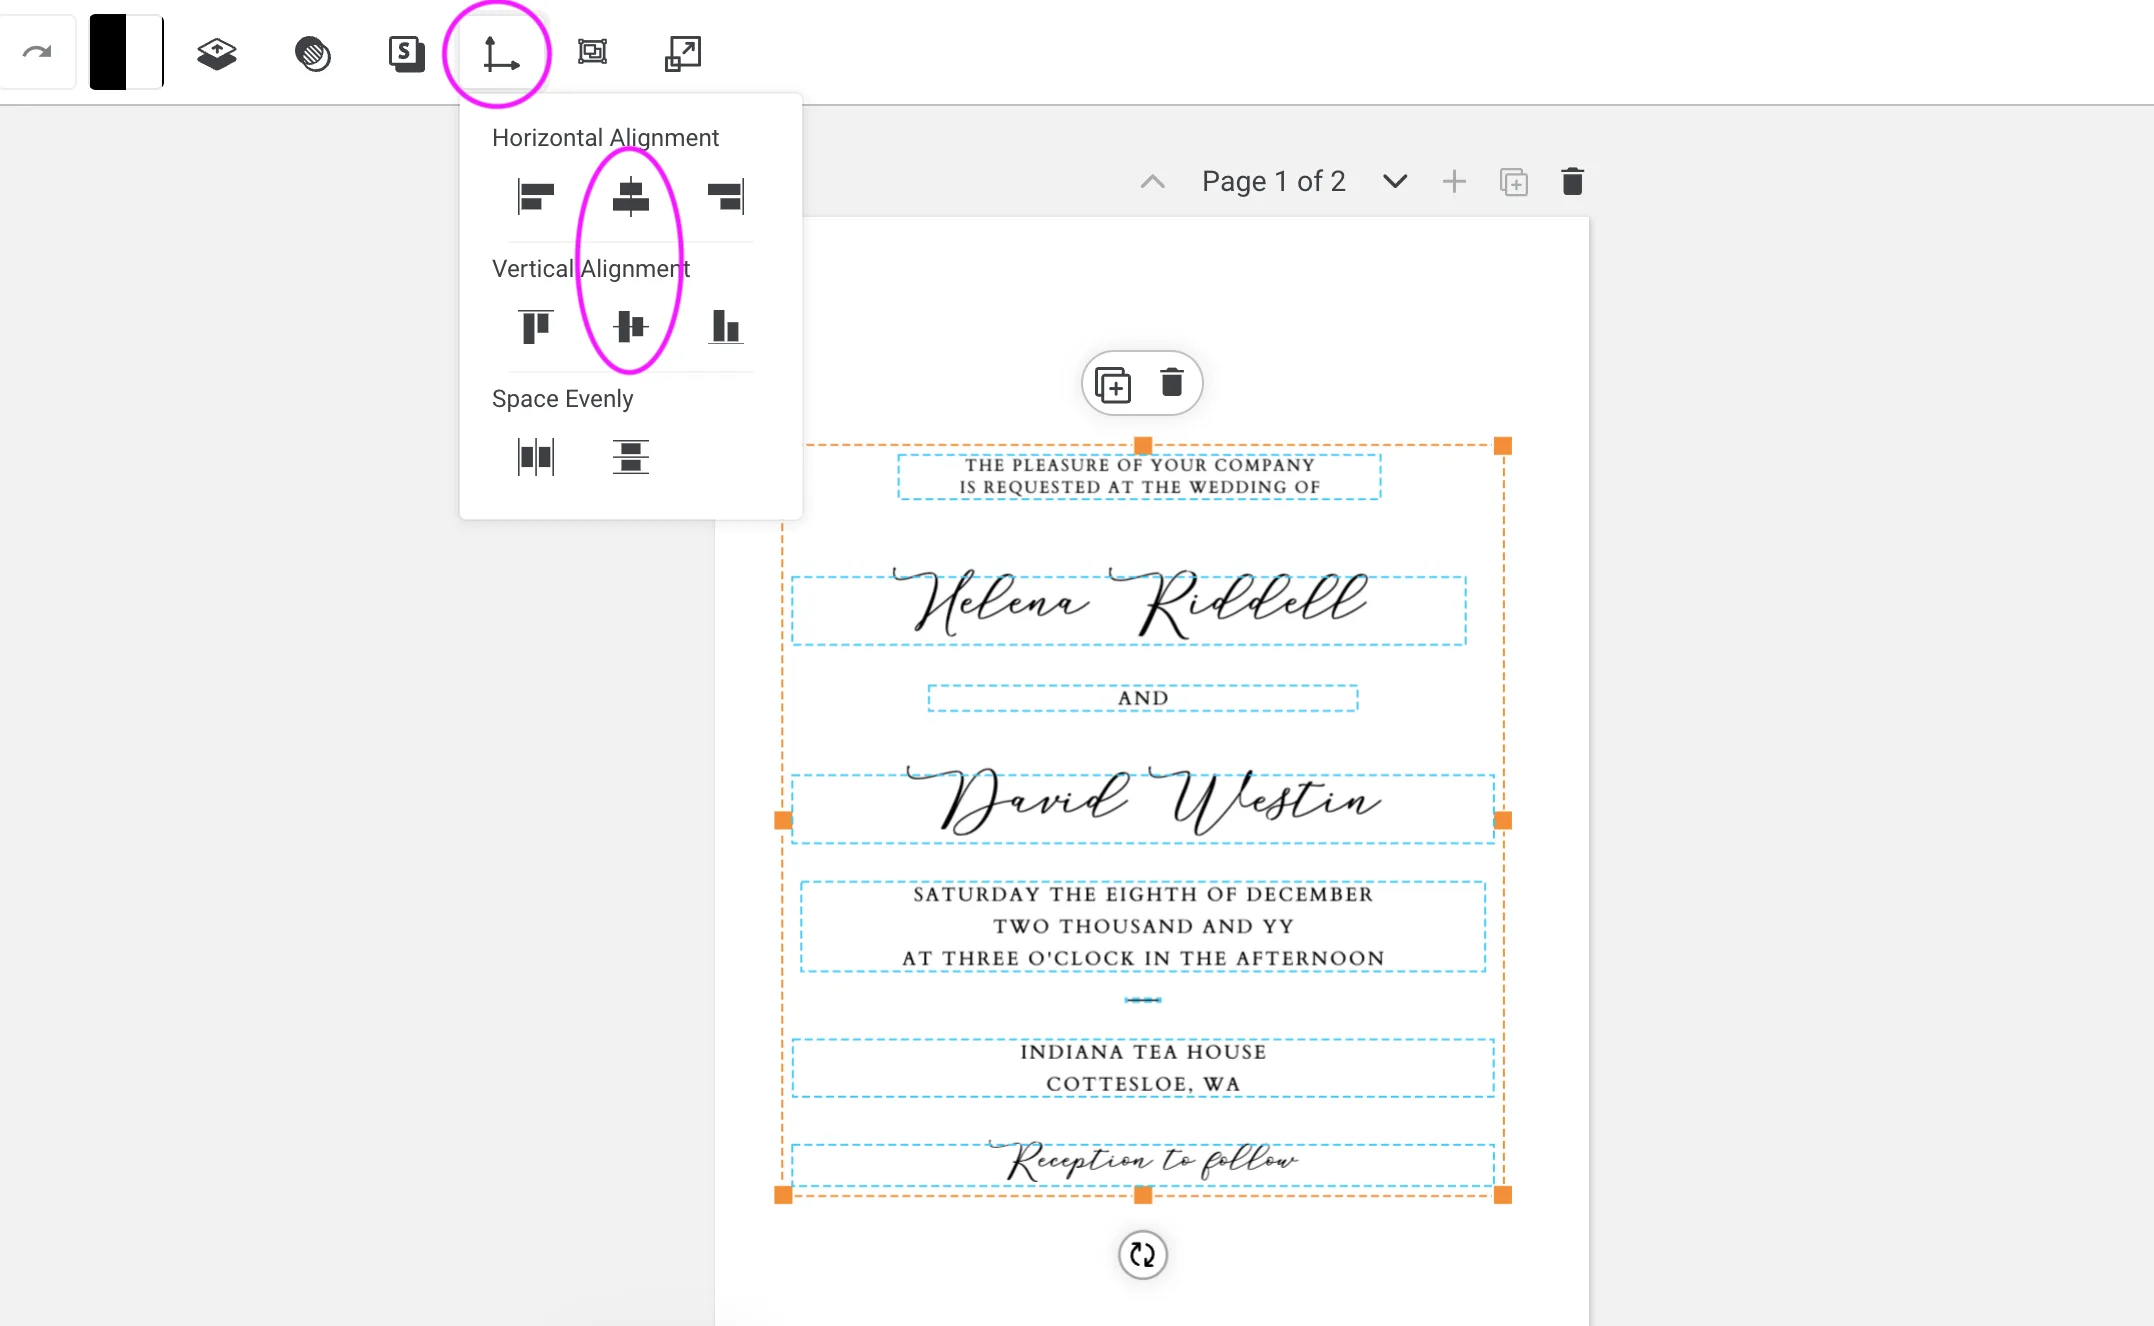
Centring Objects to the Page
This is our favourite layout tool for making sure everything is perfectly centred before you export. Click and drag over all elements to select them, then click the Group Objects tool in the top toolbar. Once grouped, you’ll see an orange selection box around everything.
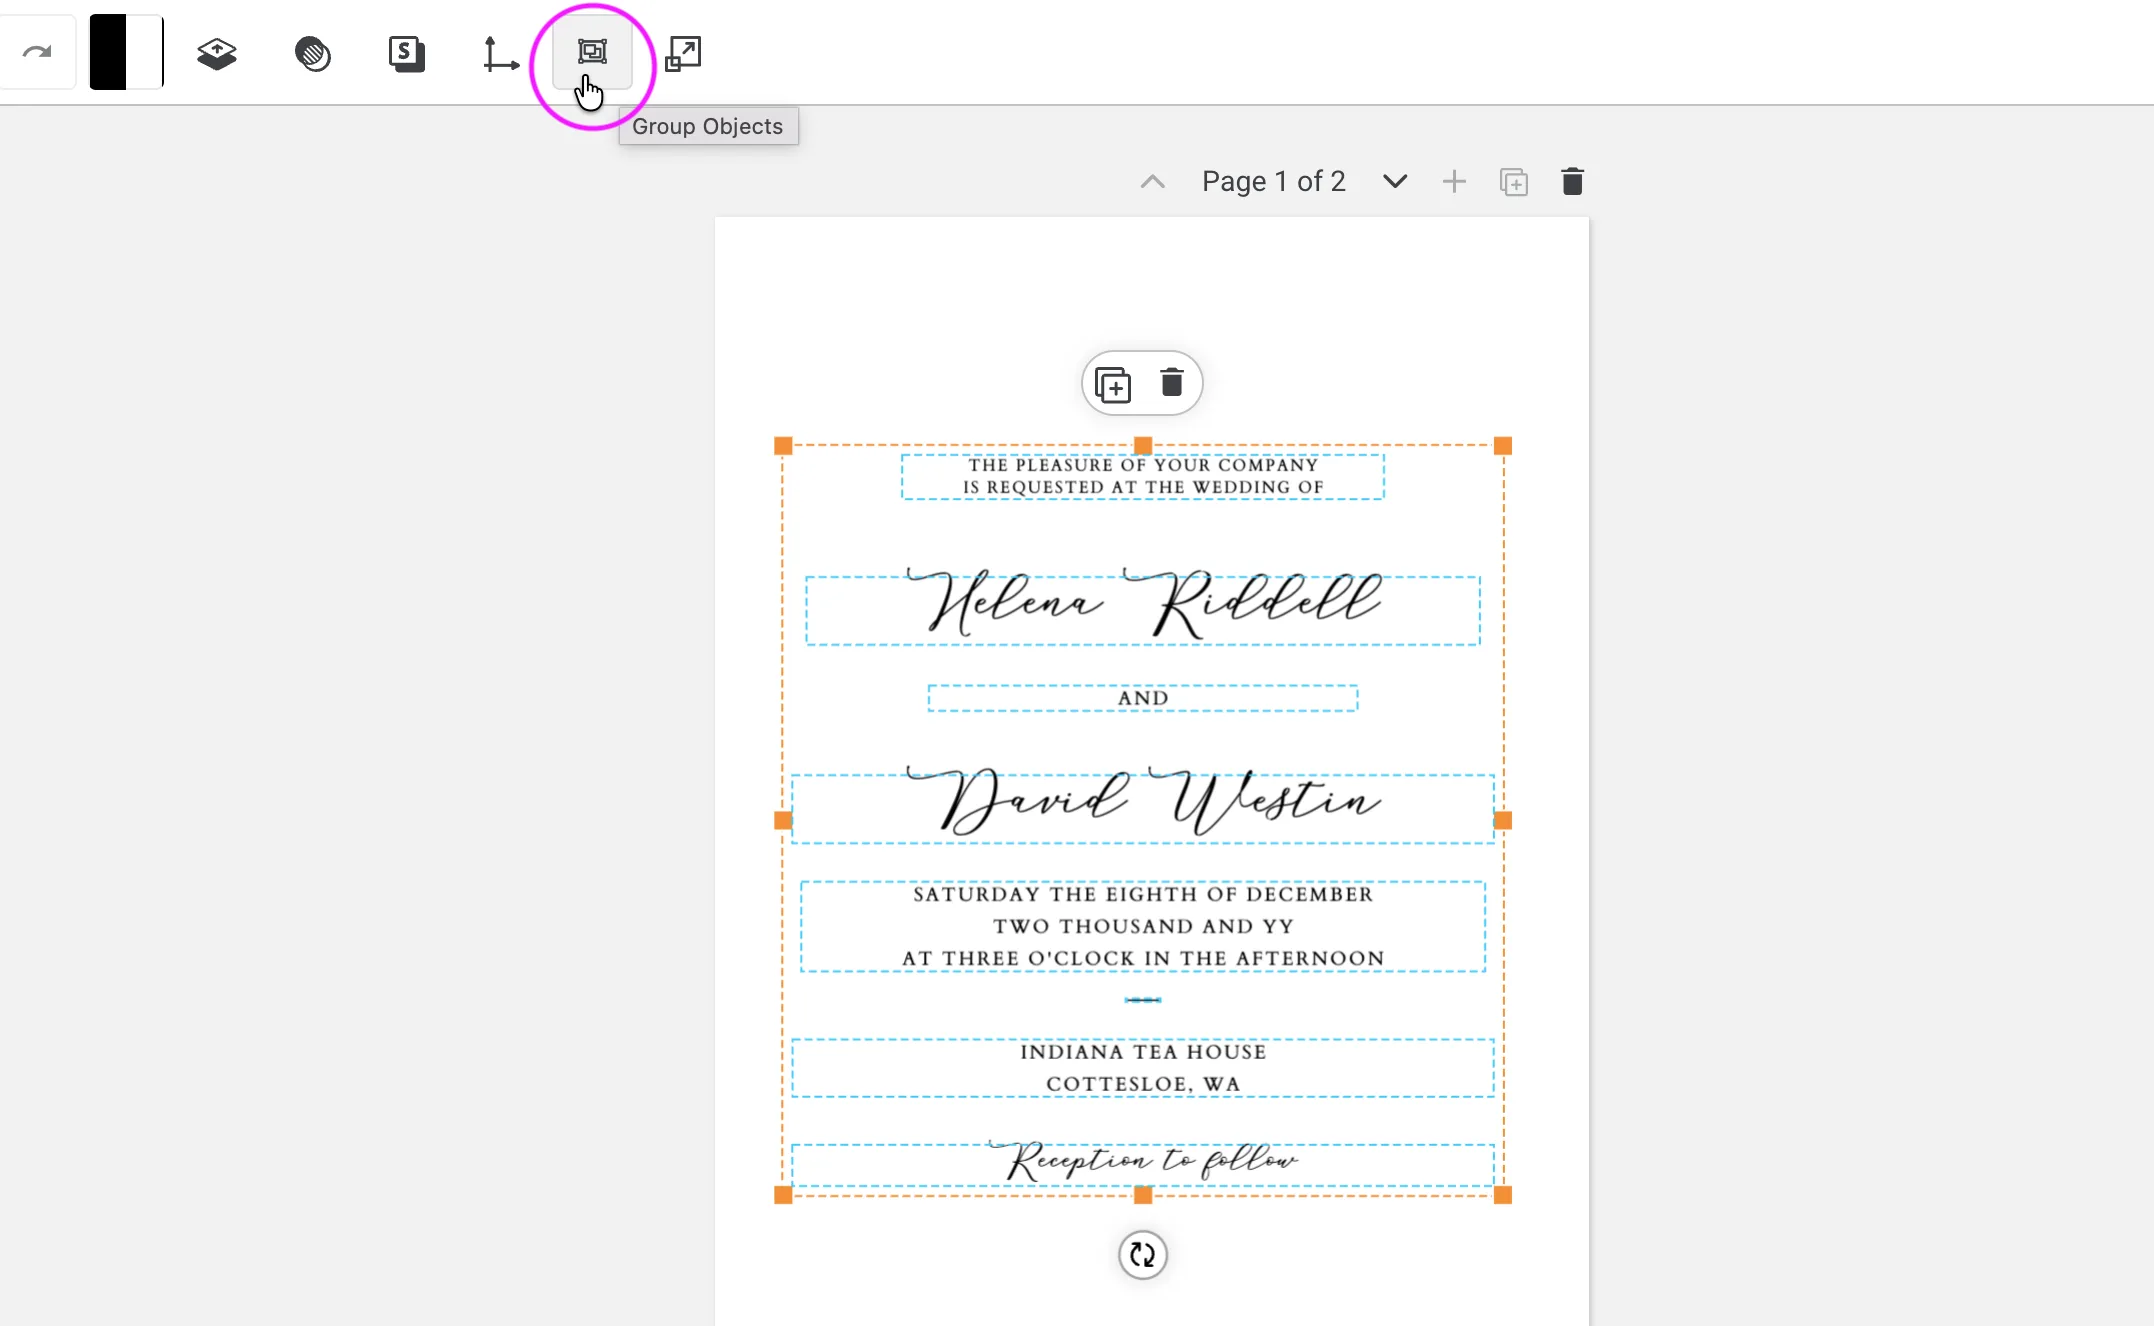
Then click the Align Objects tool and select both the horizontal centre and vertical centre options. This will centre your entire design on the page in one click.
Note that you’ll need to ungroup the objects again before you can edit any text or typography.
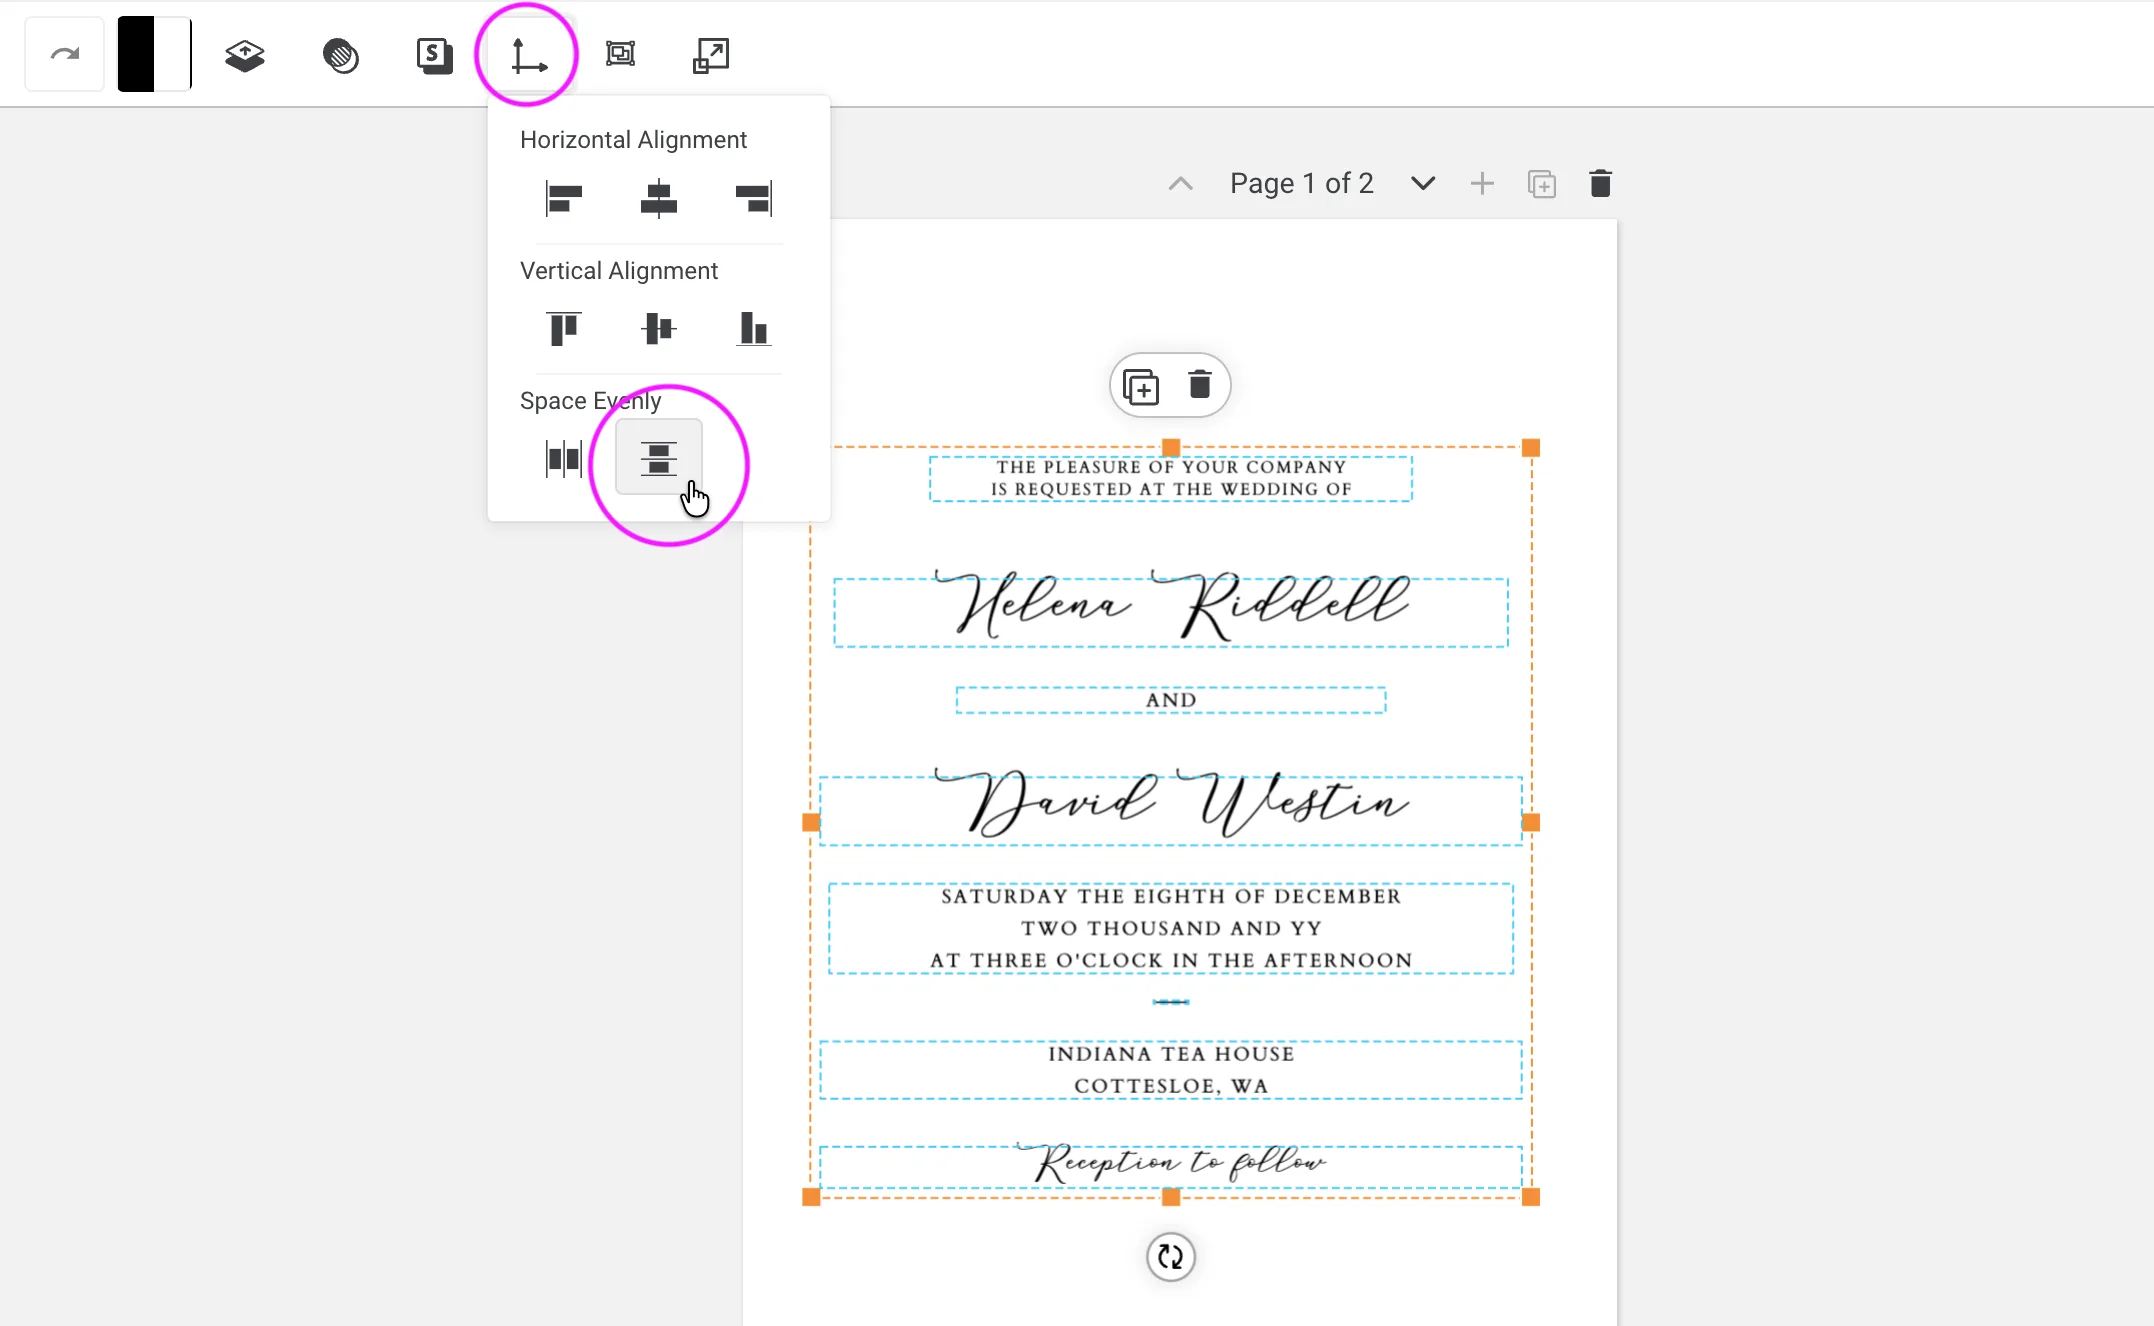
Spacing Elements Evenly
If you’re particular about even spacing, you’ll love this one. Select all the elements you want to distribute, then click the Align Objects tool and choose Space Evenly. Templett will automatically distribute equal spacing between everything in your selection.
If you want certain elements to stay grouped together at a fixed distance, group them before applying Space Evenly. For example, if you want “Helena Riddell”, “and”, and “David Westin” to remain spaced exactly as designed, group those elements first, then apply Space Evenly to the broader selection.
Keep in mind that the tool works from metrics rather than visual perception, so you may still need to make small optical adjustments afterwards.