❗️Important: These instructions are for customers who purchased templates from The Hello Bureau. If you bought a template elsewhere, please refer to your original seller for guidance. We are unable to assist with templates that were not created by us.
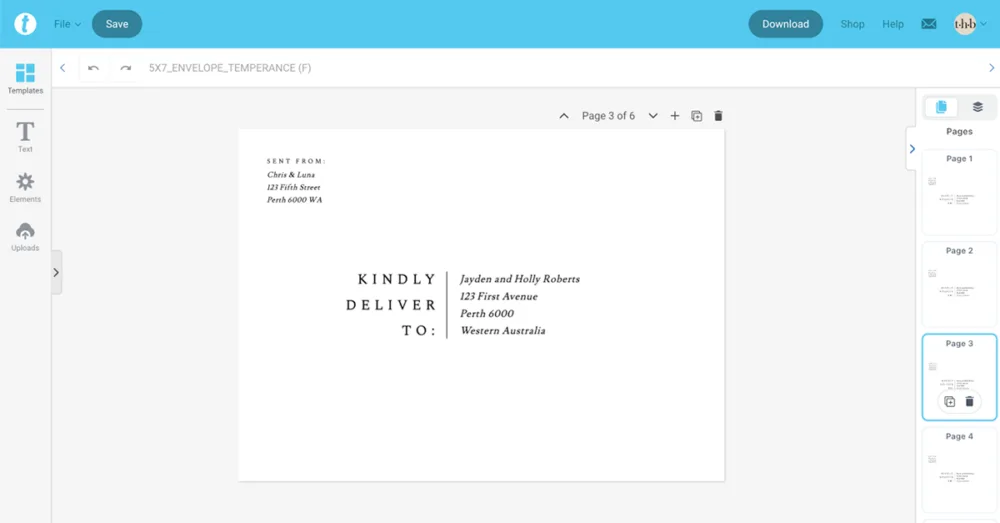
Templett is a browser-based design tool that works well for envelope addressing. However, data merge is not supported, which means you will need to manually type or copy and paste each guest’s name and address into the template. This guide walks you through the editing process of our envelope address templates so you can get it done efficiently.
Prepare Your Design on Page 1 First
Before entering any guest details, set up your design on page 1 of the template. This includes your fonts, colours, and layout. Once you’re happy with how it looks, duplicate the page for each guest and fill in their details from there. We recommend this approach because if you decide to make any changes to your design after duplicating, you will need to update each page manually. Getting your design right on page 1 first saves you from having to do that.
A reminder: Templett doesn’t autosave. Click the Save button after every change.
Guides
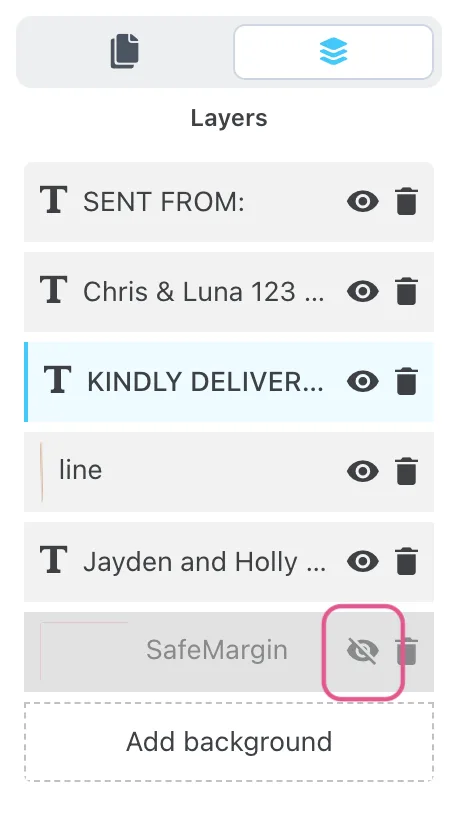
Templett doesn’t have native guide features, so we’ve created our own. Each envelope front and back has a guide, hidden by default. To turn them on, open the Layers panel on the right-hand side and click the eye icon next to the guide you want to show. Remember to hide them all again before exporting — any visible guides will appear in your PDF.
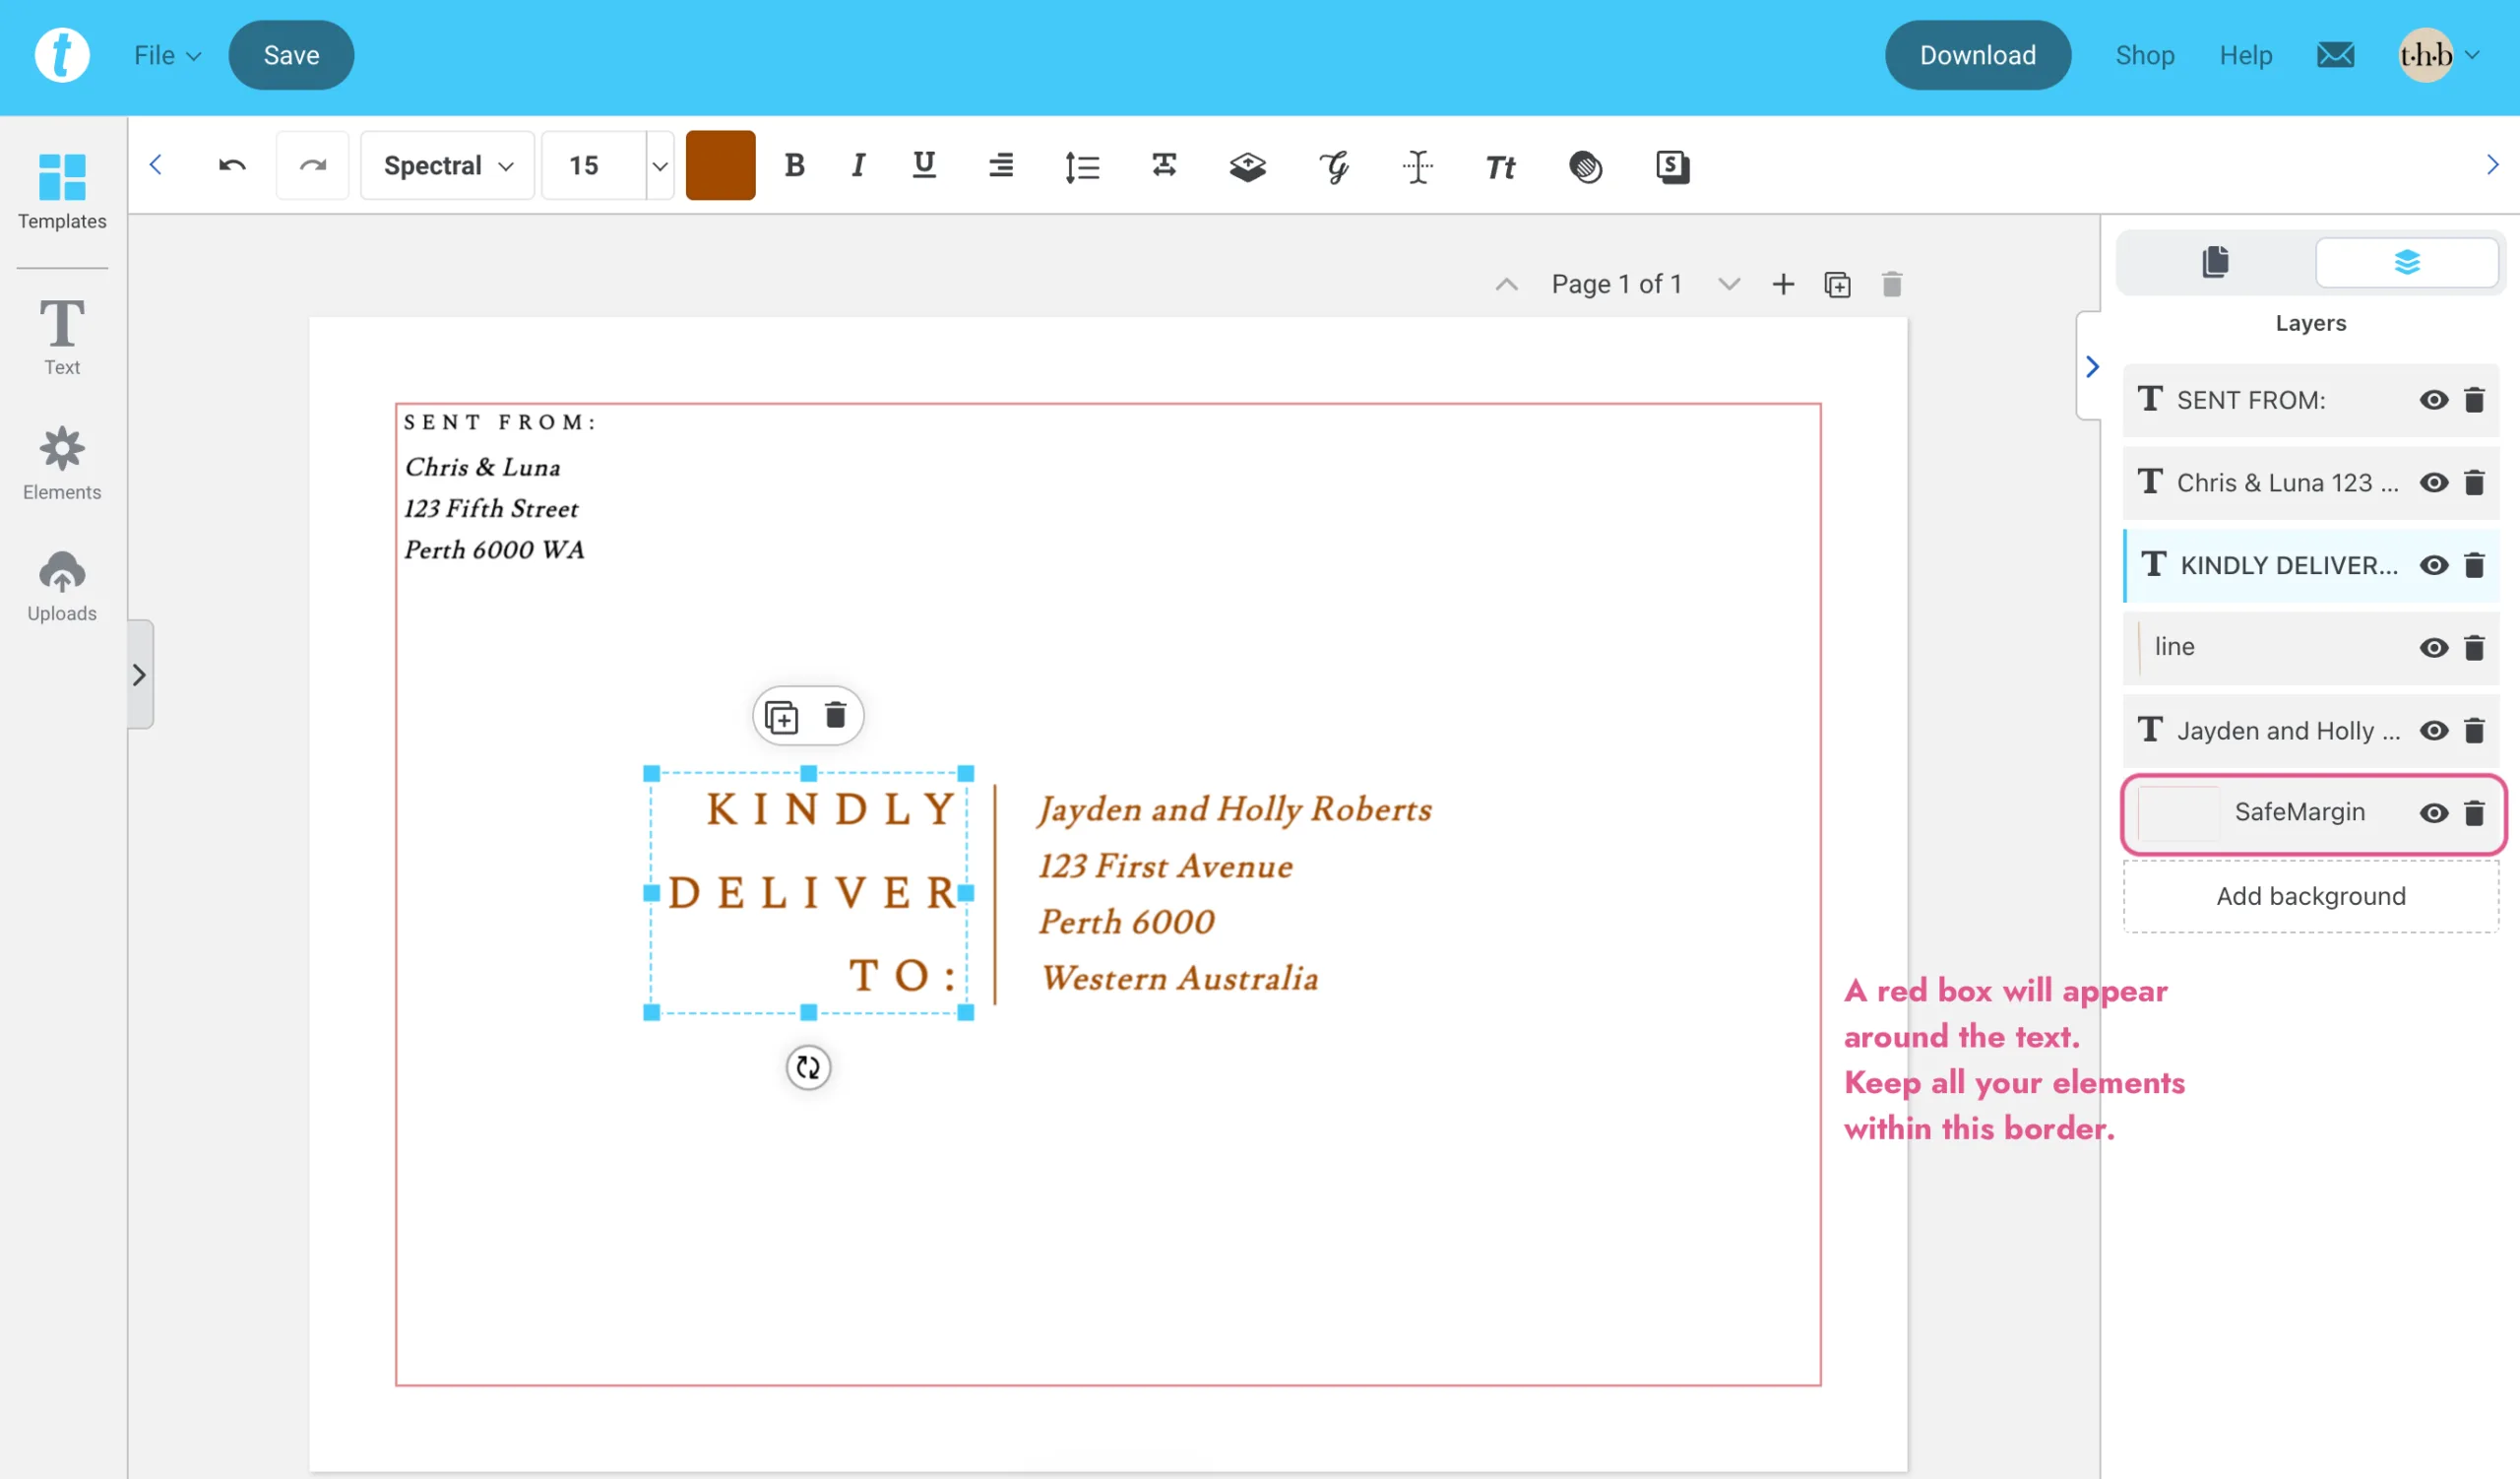
Envelope Front Safe Margin (red)
A border showing the safe print area. Keep all your text within this box to ensure nothing gets cut off when your envelope is printed.
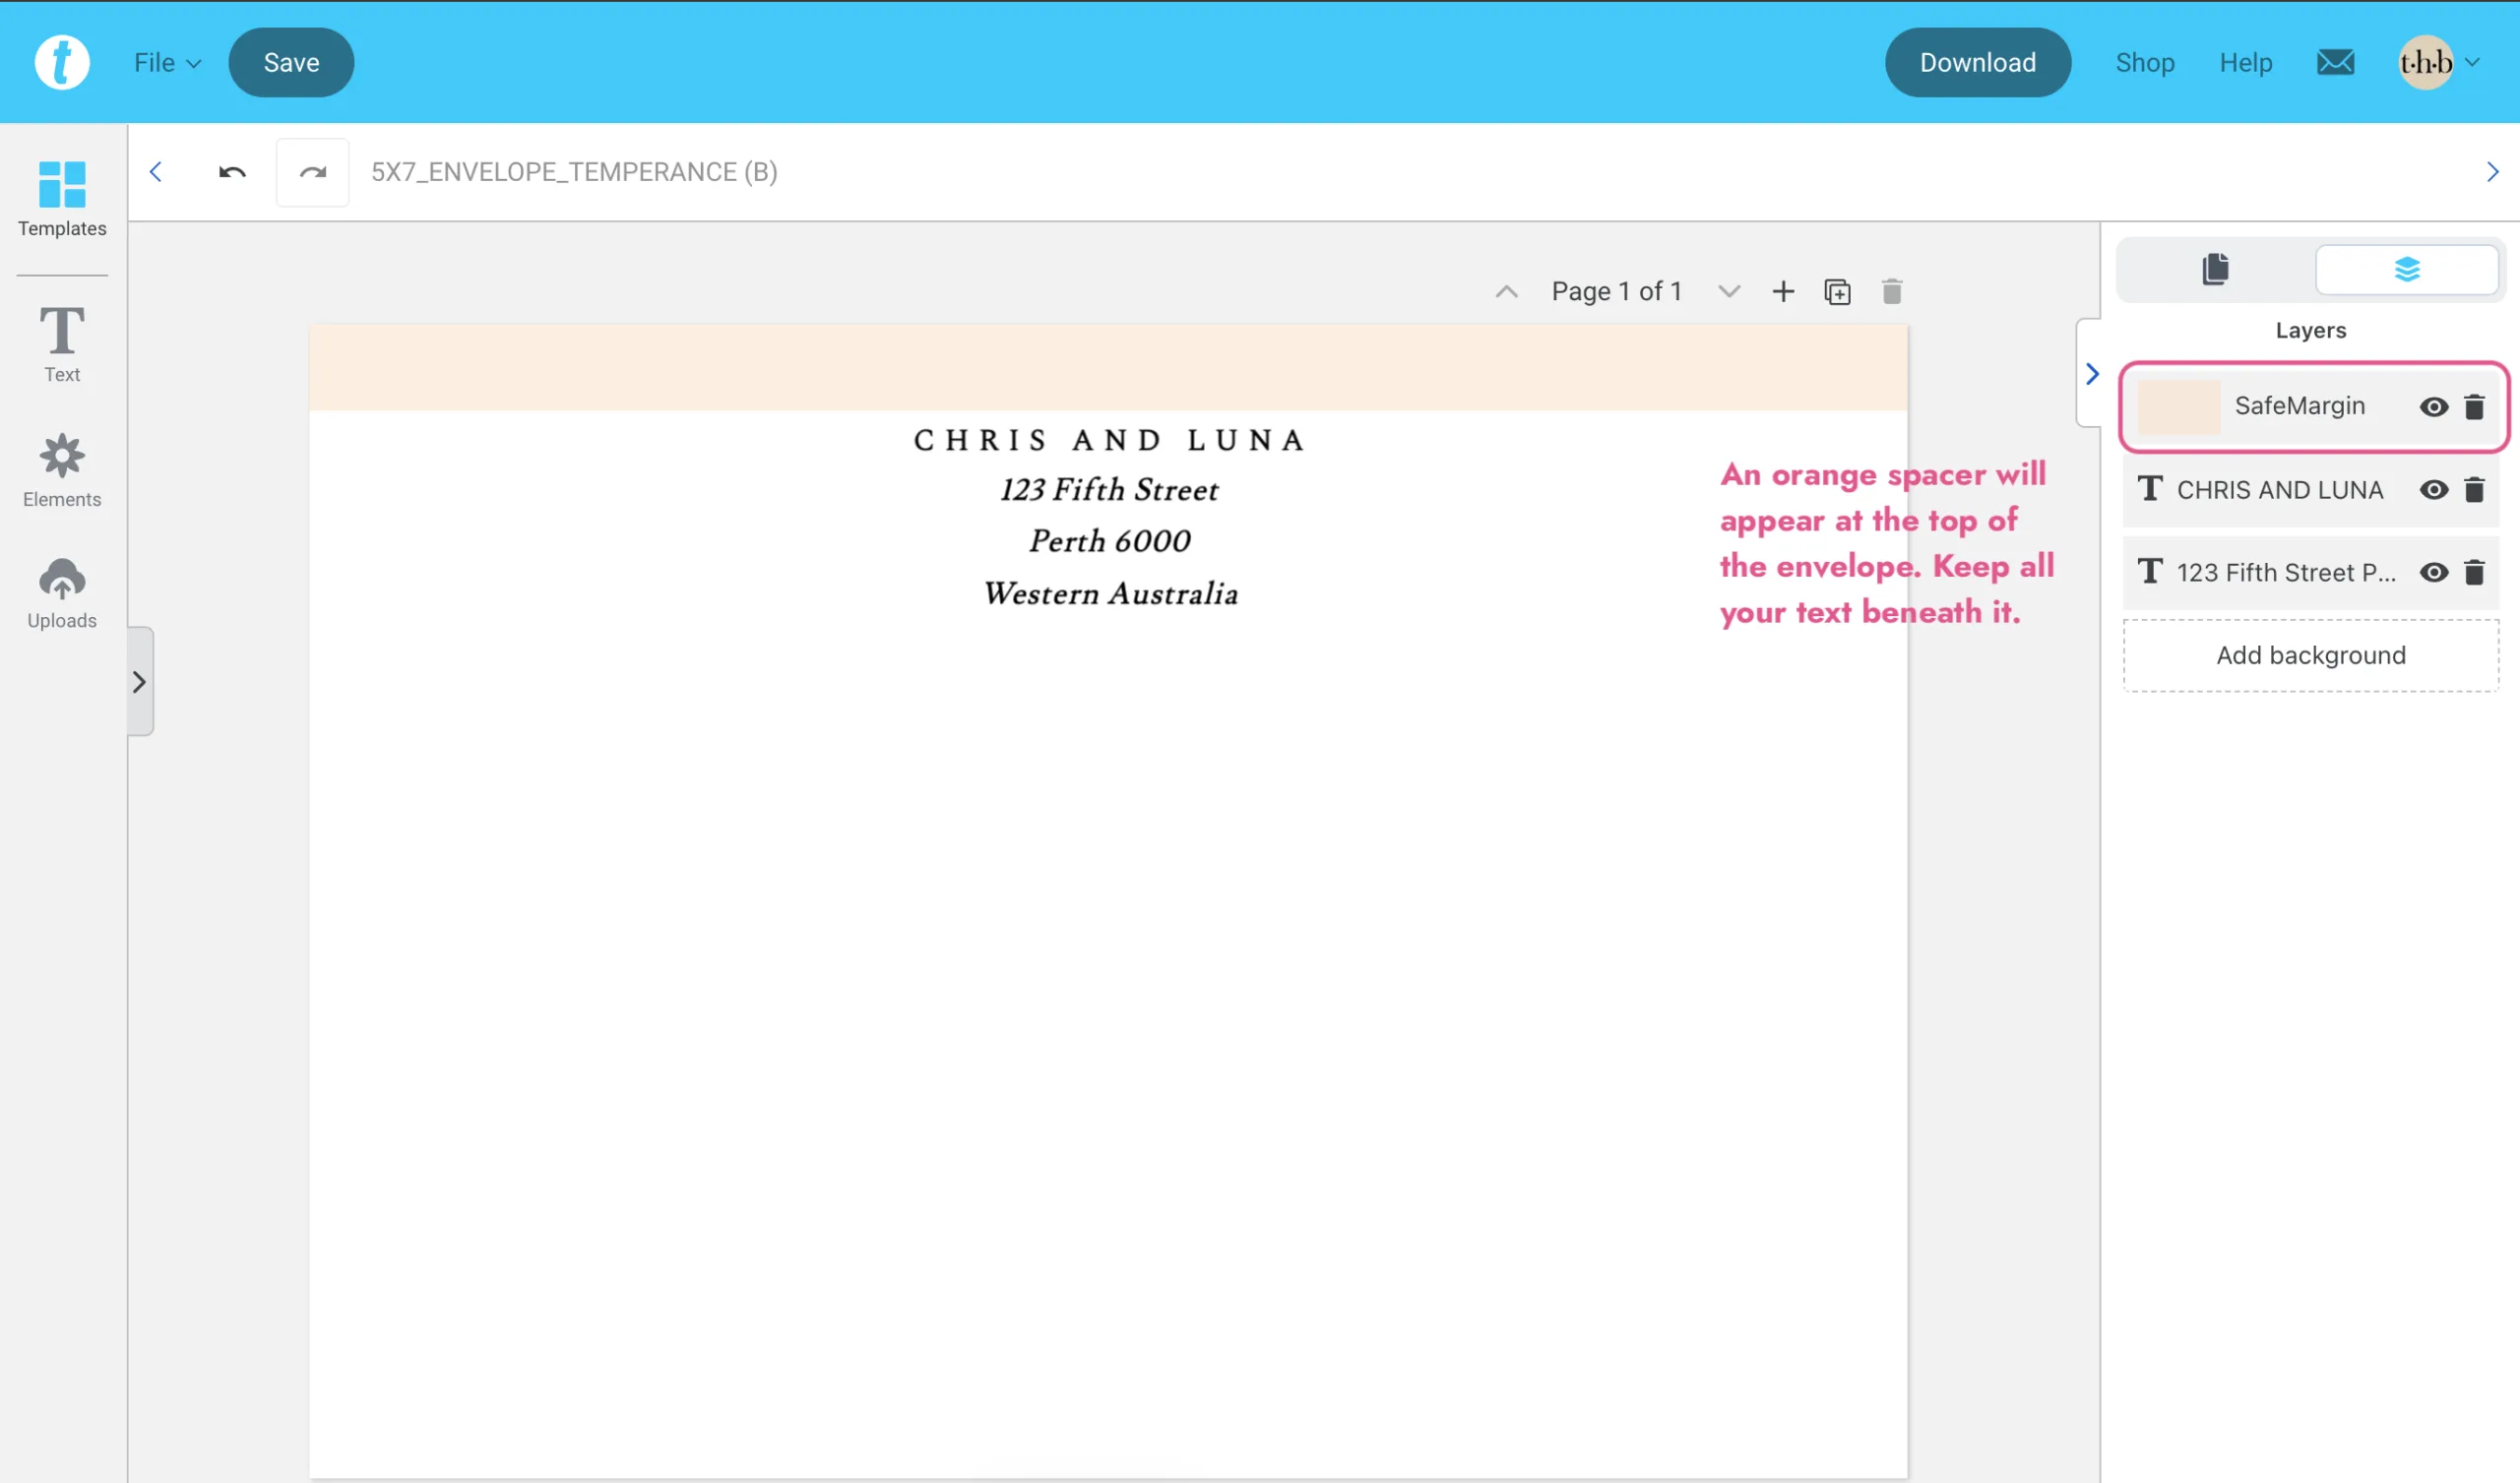
Envelope Back Safe Margin (orange)
A guide bar that maintains safe spacing from the top edge of the envelope. It sits at approximately 1 cm (0.4 in) in height. Keep all your text below this guide to ensure nothing gets cut off when your envelopes are printed.
Measure Your Envelopes
Our guides are based on standard printer requirements, but we recommend measuring your envelopes before you begin. This will help you determine how much margin you actually need.
Custom Guides and Margins
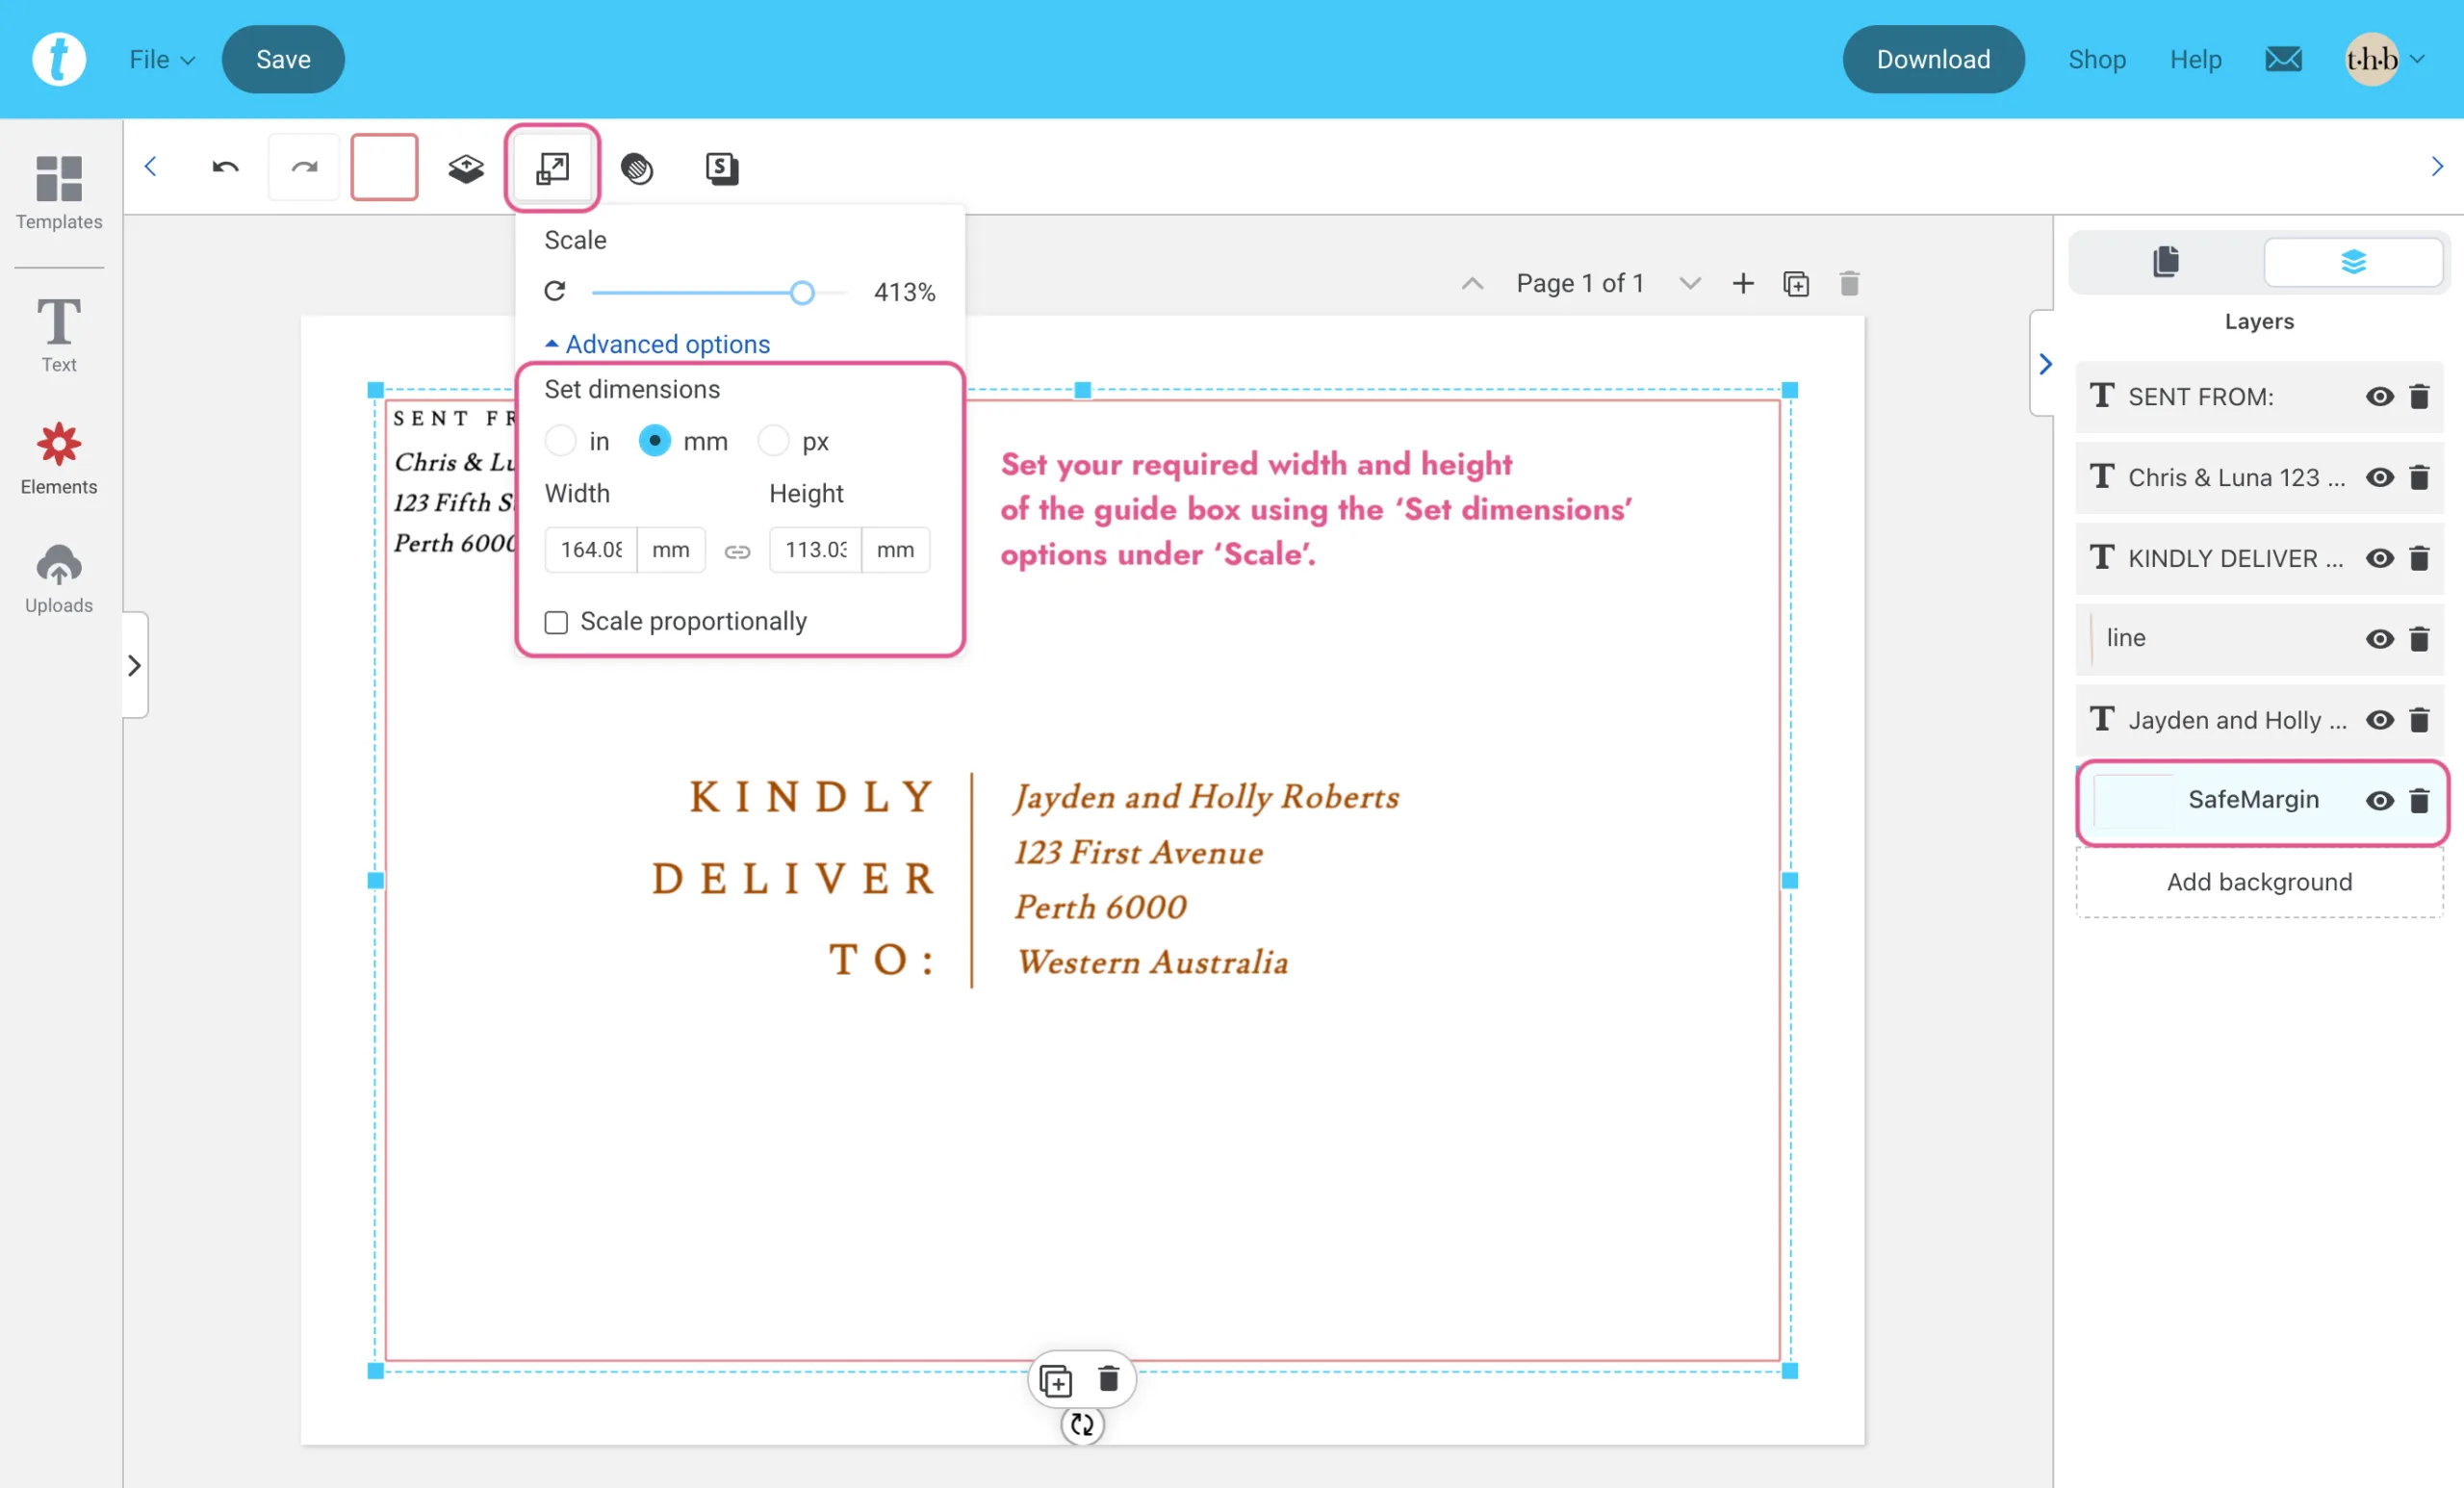
Adjusting the margin is straightforward. First, unhide the guide, click on it, then click the Scale option. Expand the Advanced options menu. The Set dimensions settings will appear. Make sure Scale proportionally is unchecked.
For the back of the envelope, adjust the height of the bar to match the spacing you need.
For the front, you can set both the width and height of the guide box to suit your envelope dimensions.
Duplicating Your Pages for Each Address
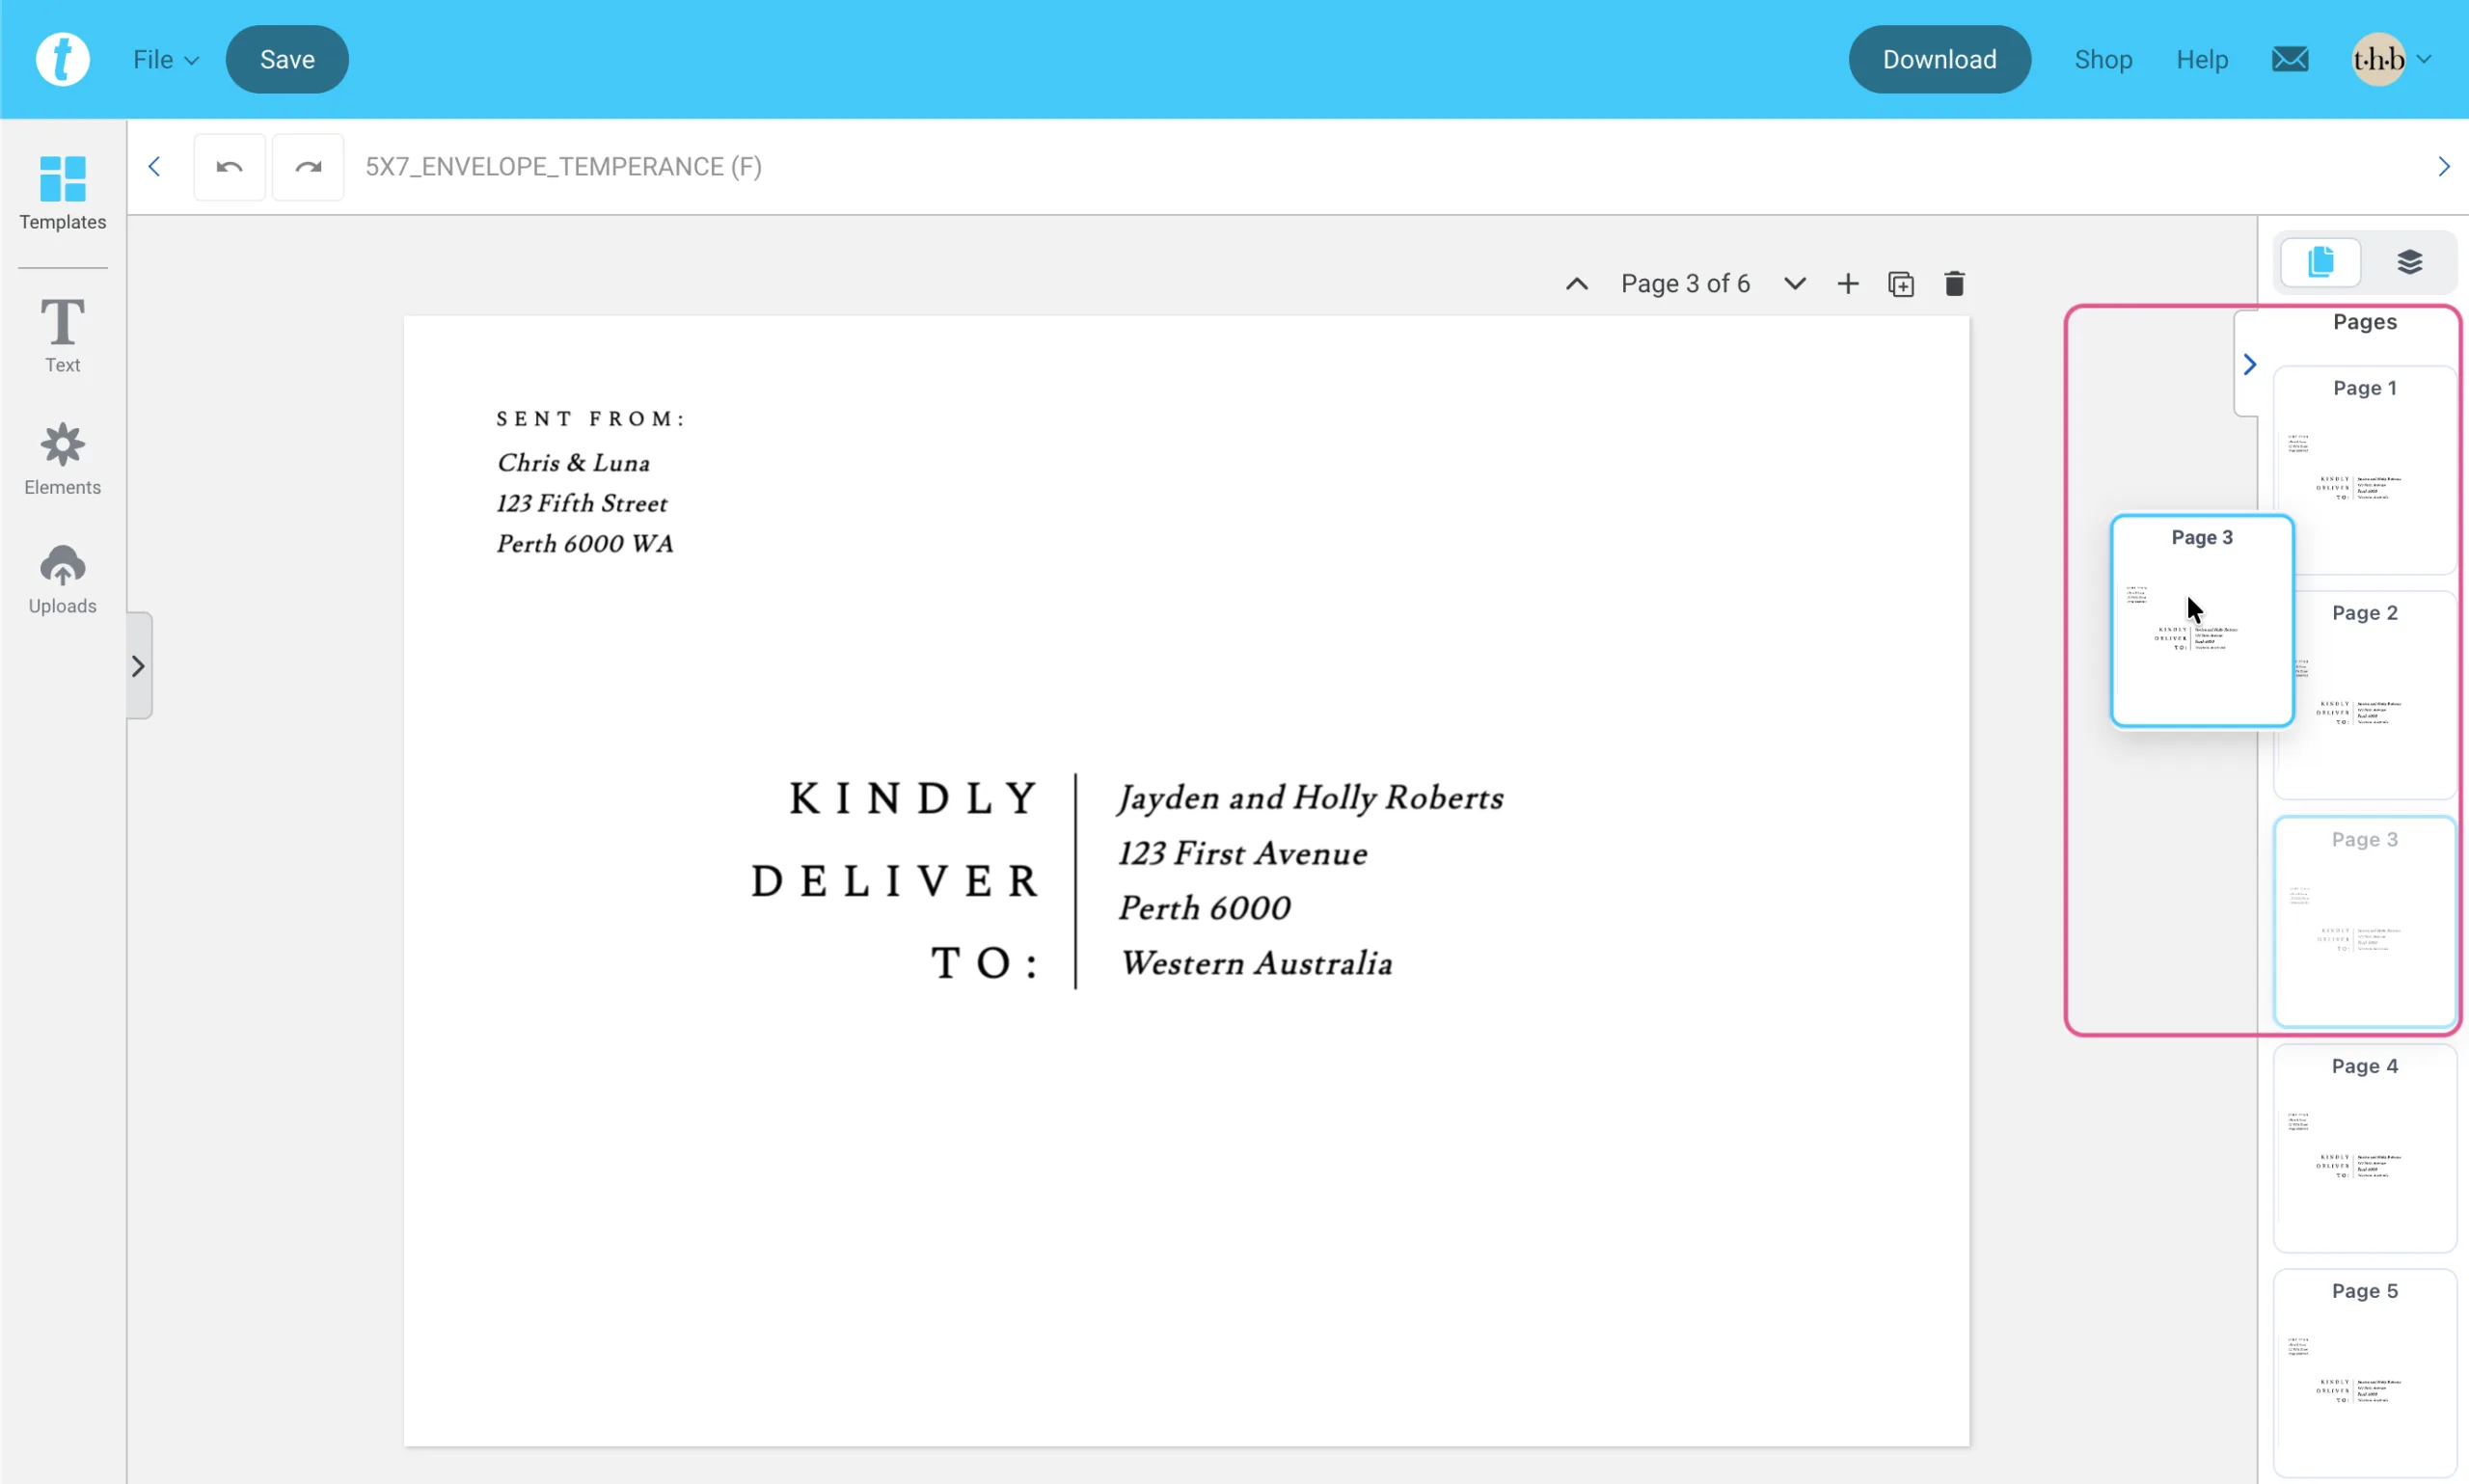
To duplicate a page, hover over it and click the Duplicate Page option. This creates a complete copy of your design, ready for you to enter your next guest’s details. We recommend saving after every five addresses in case the page freezes and you lose your work.
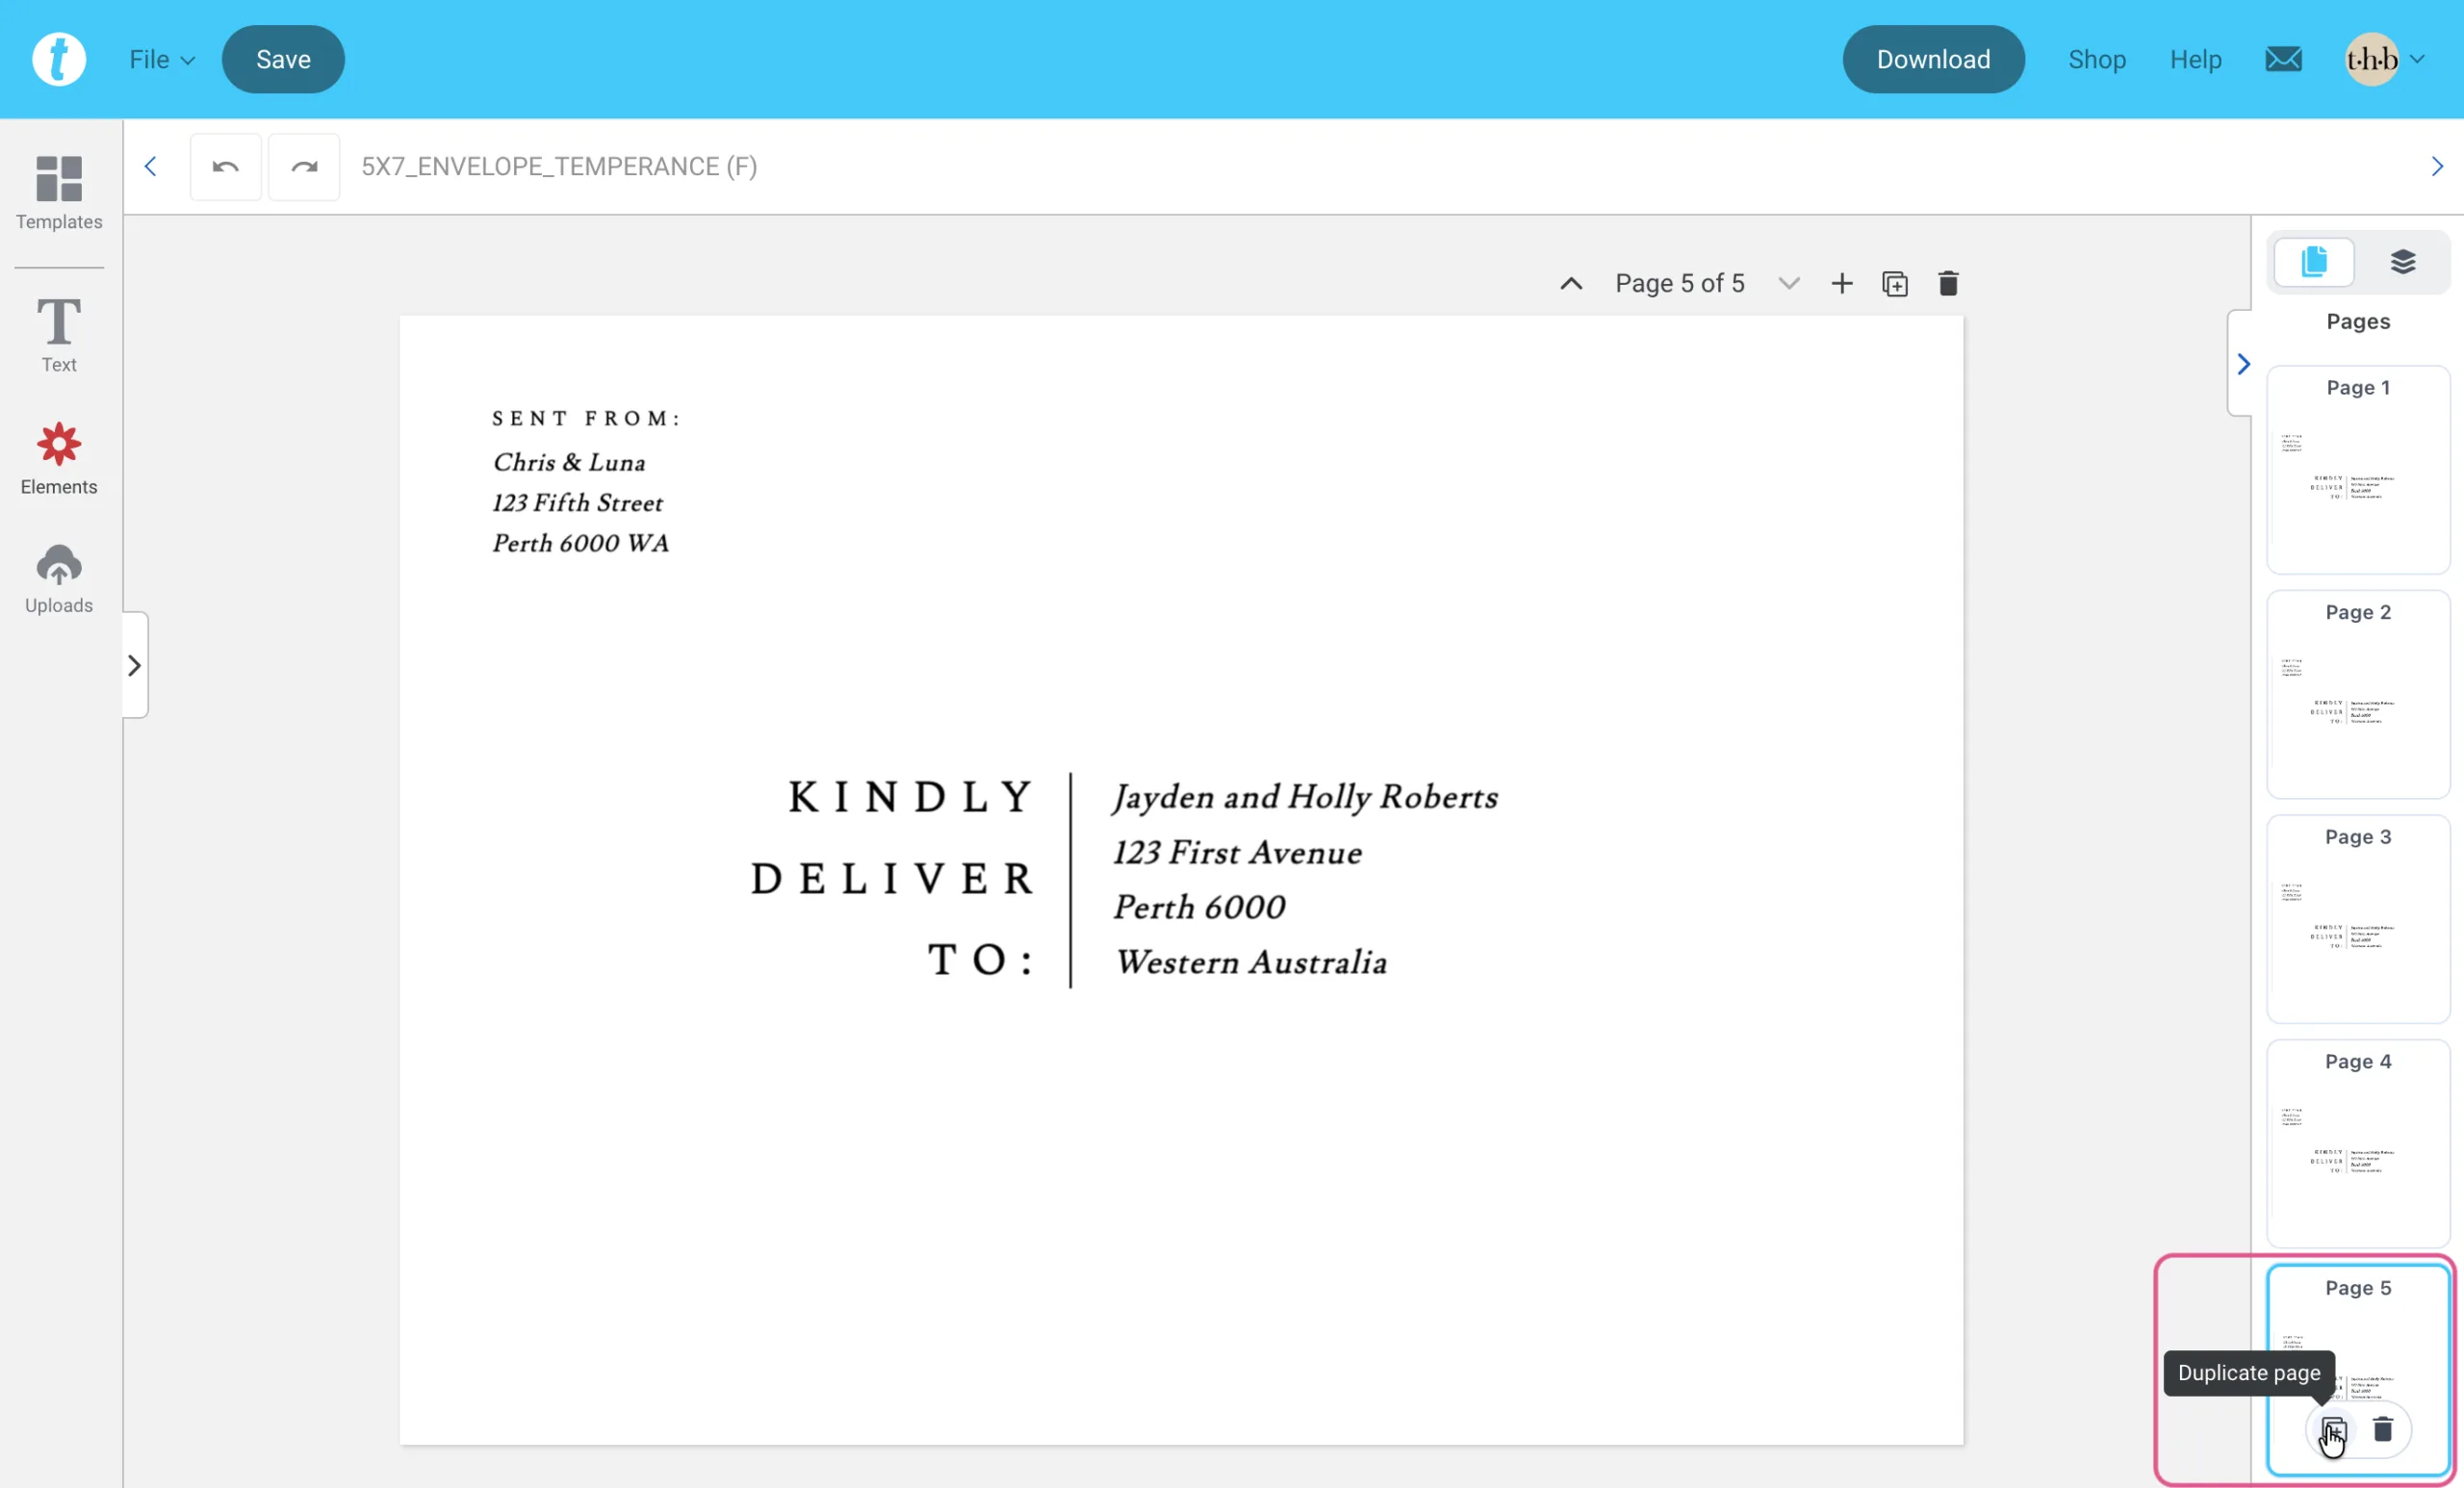
To rearrange pages, click and drag the thumbnails into position.
Templett’s 36-Page Limit
Templett automatically creates a new file after 36 pages. You can continue adding addresses in the new file without any issues. When it comes time to export, you will need to download each file individually as a PDF.
Typography
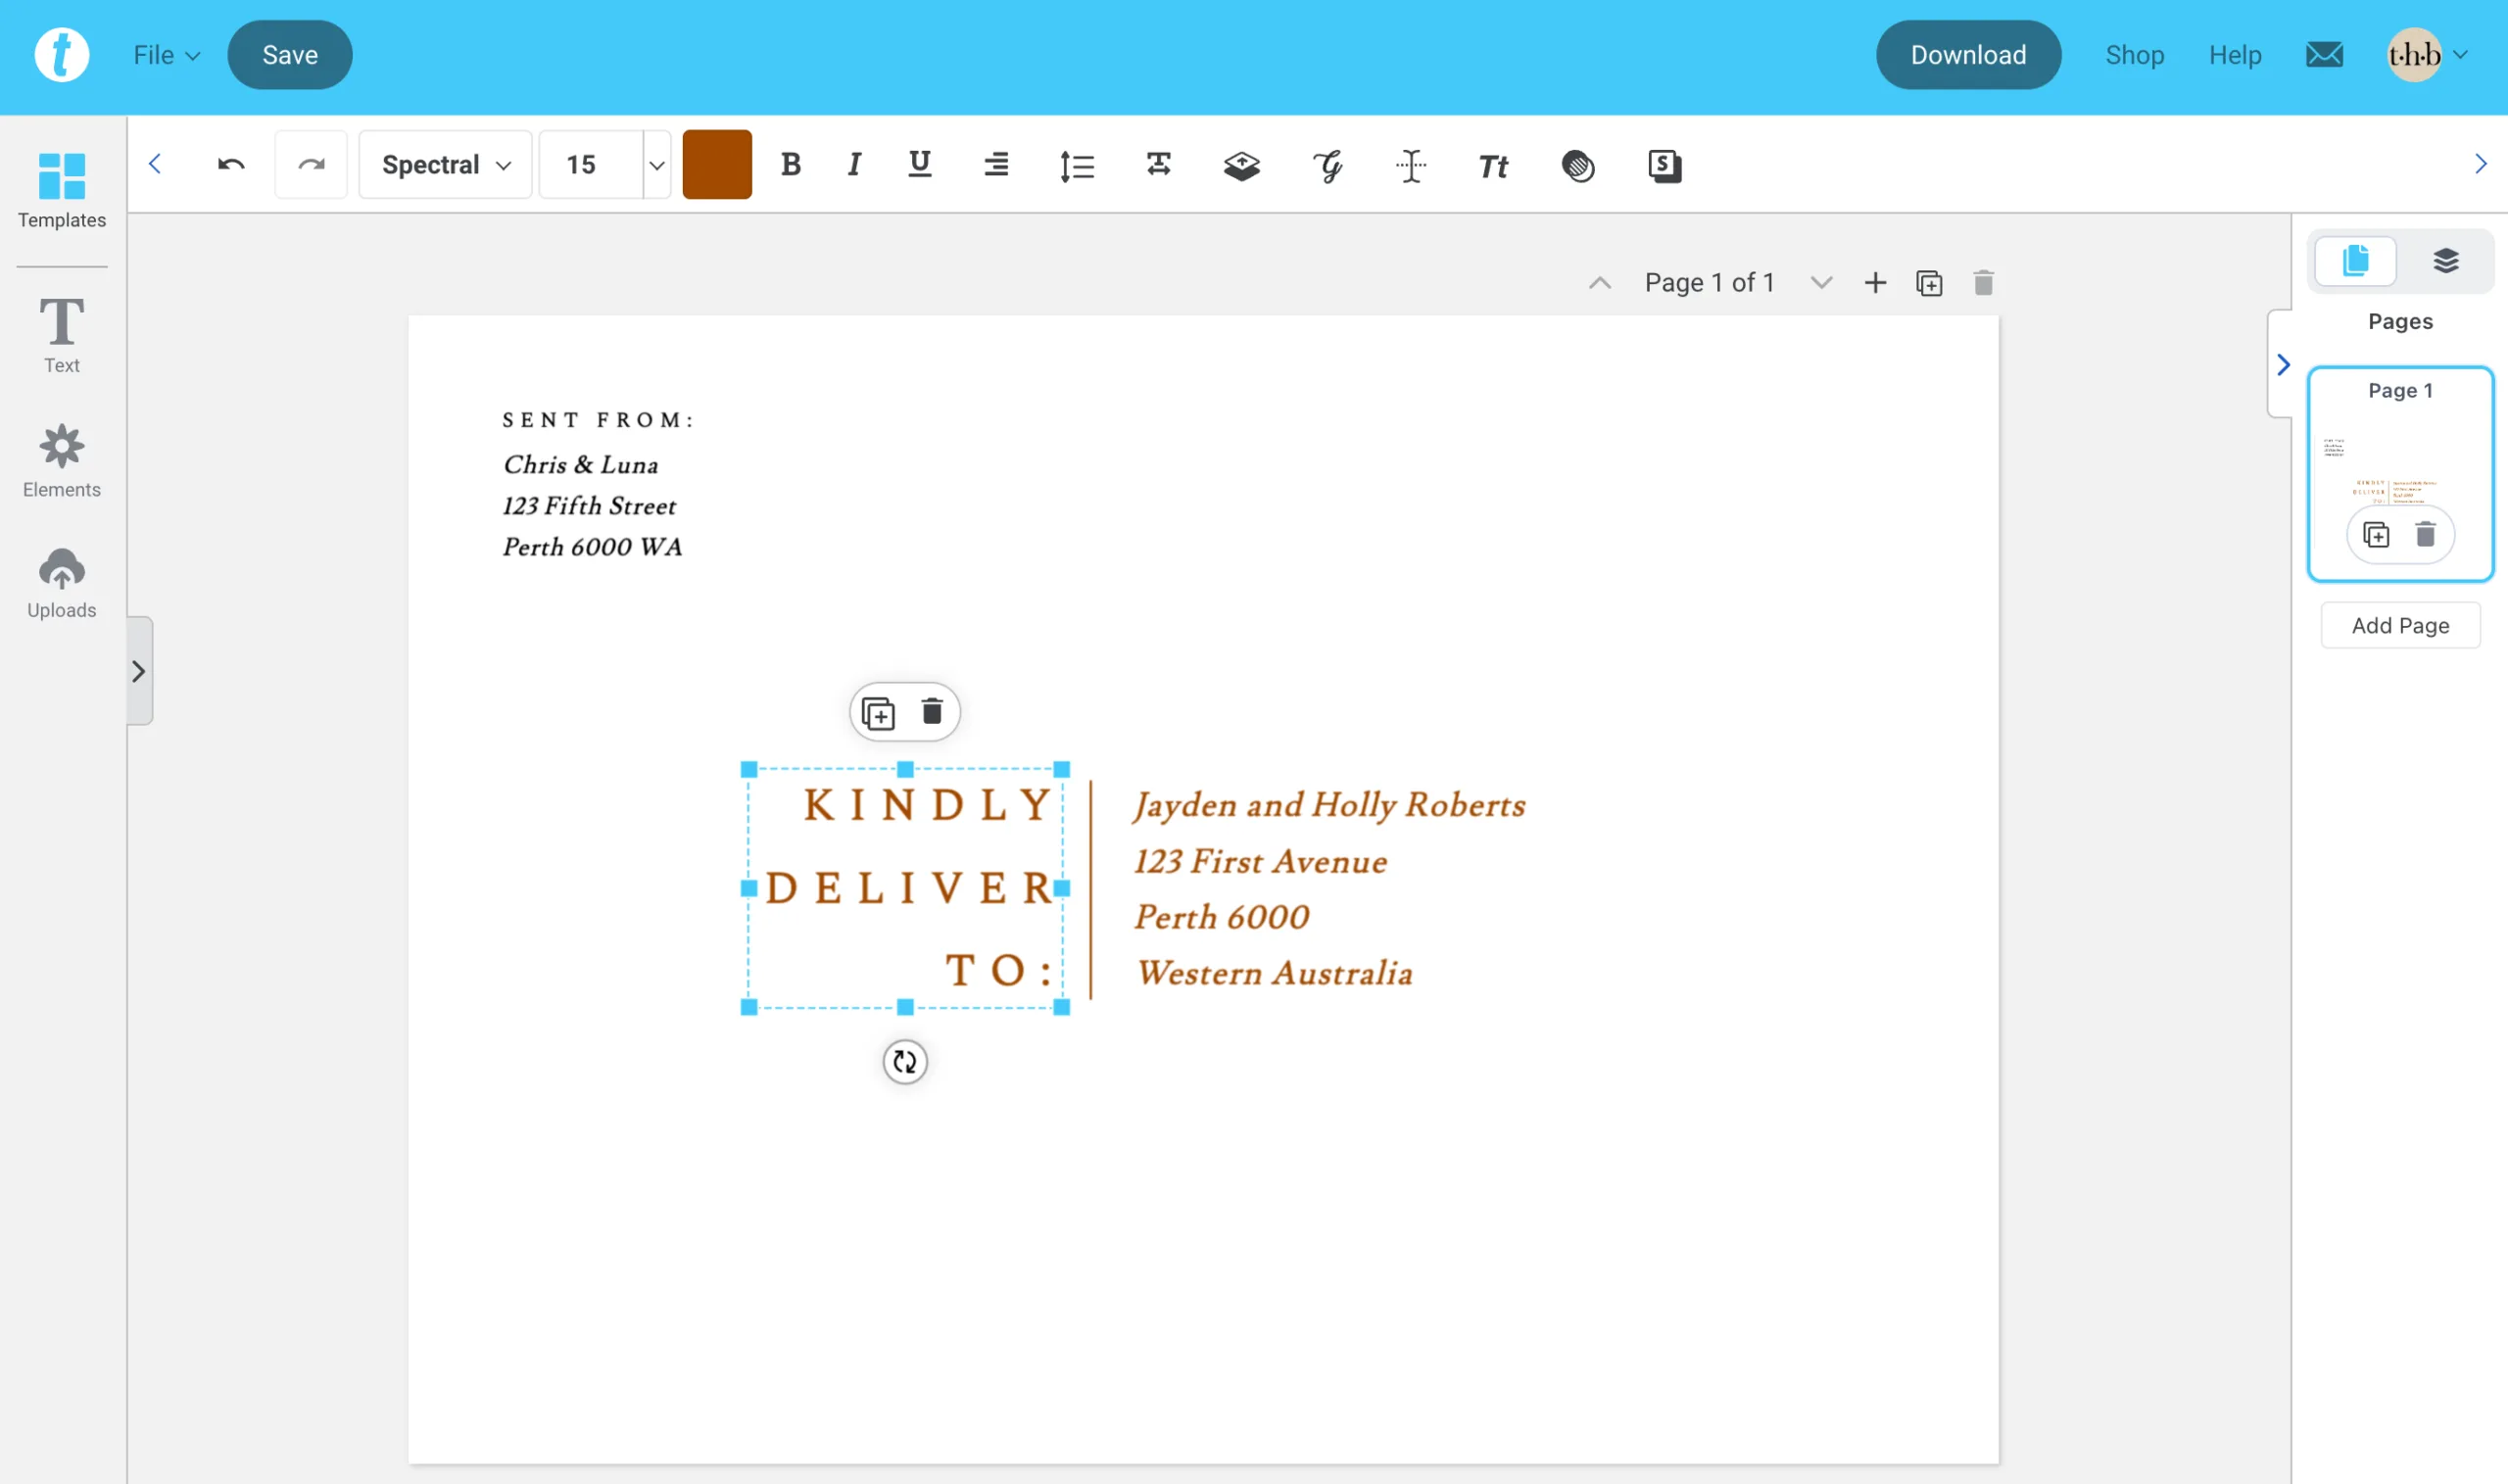
Text boxes in Templett expand downward as you type, growing or shrinking as you add or remove lines. If a text box shifts, use your guides as a reference to check that everything still sits within the safe area.
If you need to adjust how your text fits, try tweaking the following settings:
- Font size — Go larger to fill space or smaller to fit more in.
- Line height — Increase it to add breathing room or decrease it to tighten things up.
- Letter spacing — Increase it to spread characters further apart, or decrease it to bring them closer together.

Changing Fonts
You’re welcome to change the fonts in your template to suit your style. We recommend exporting your first page as a PDF to check everything looks right before committing to a font across all your envelopes.
To learn more about text formatting, check out our post on Templett Text Formatting Basics.
Downloading Your Completed Addresses
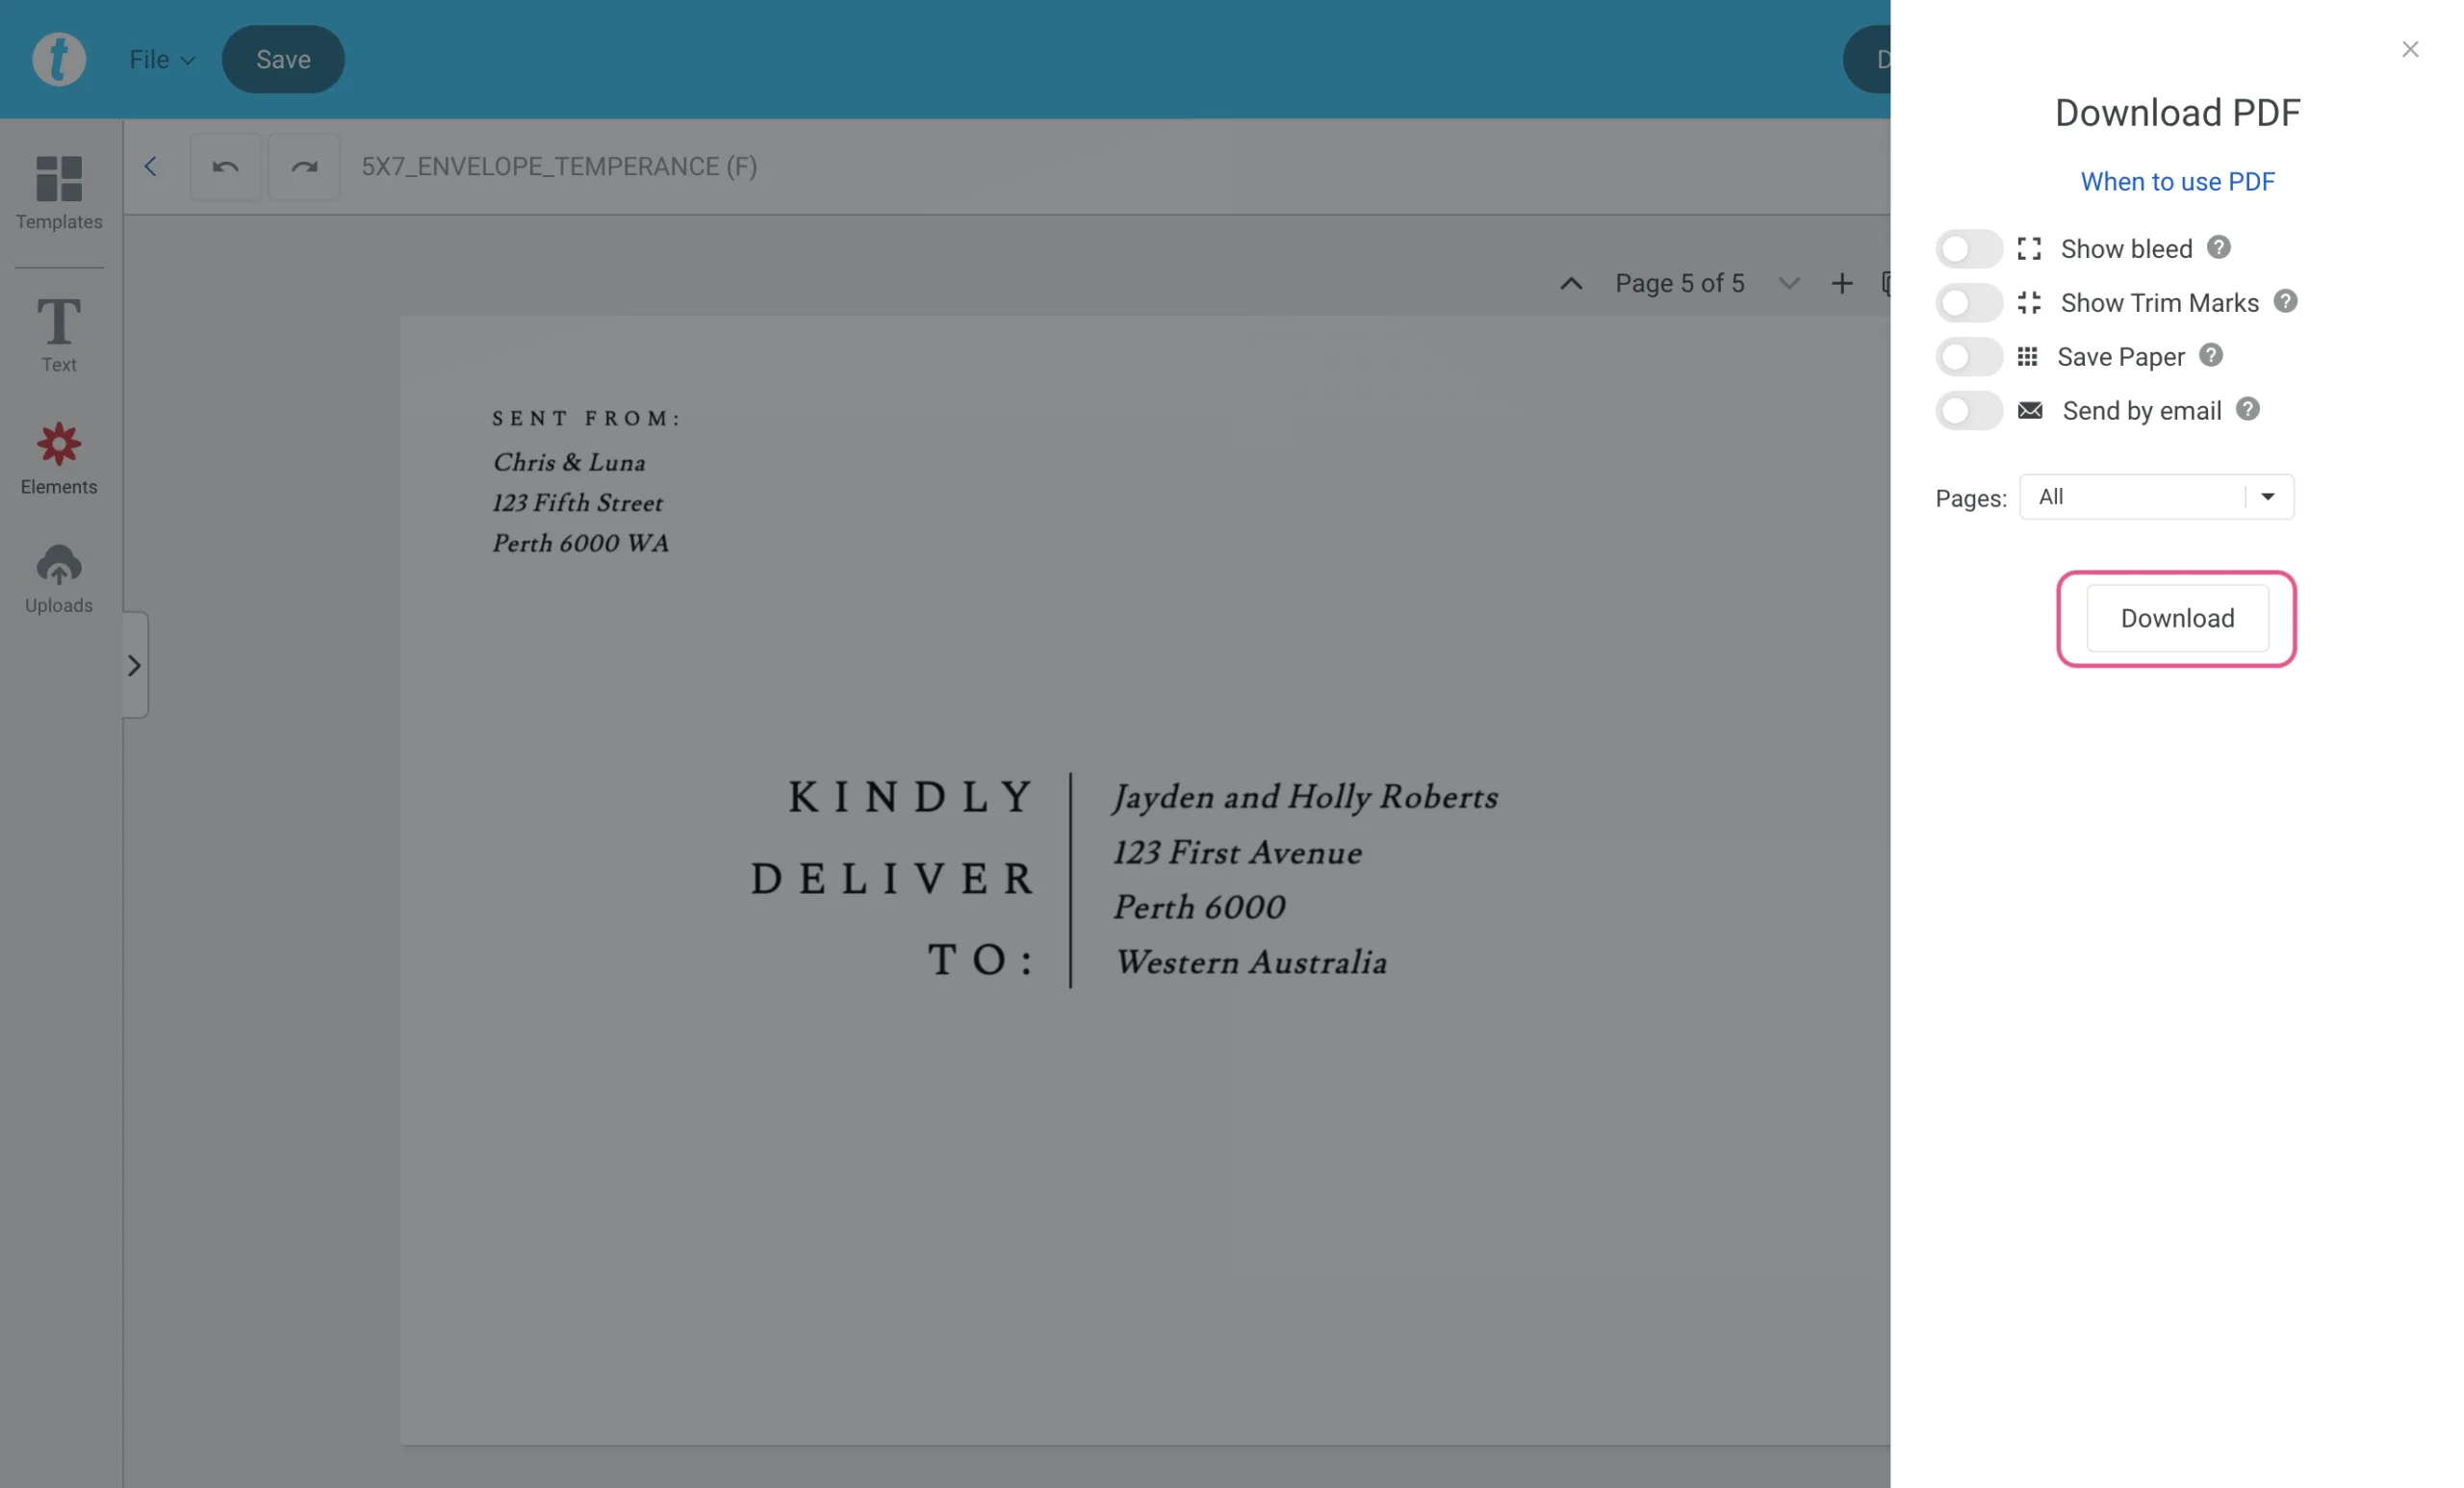
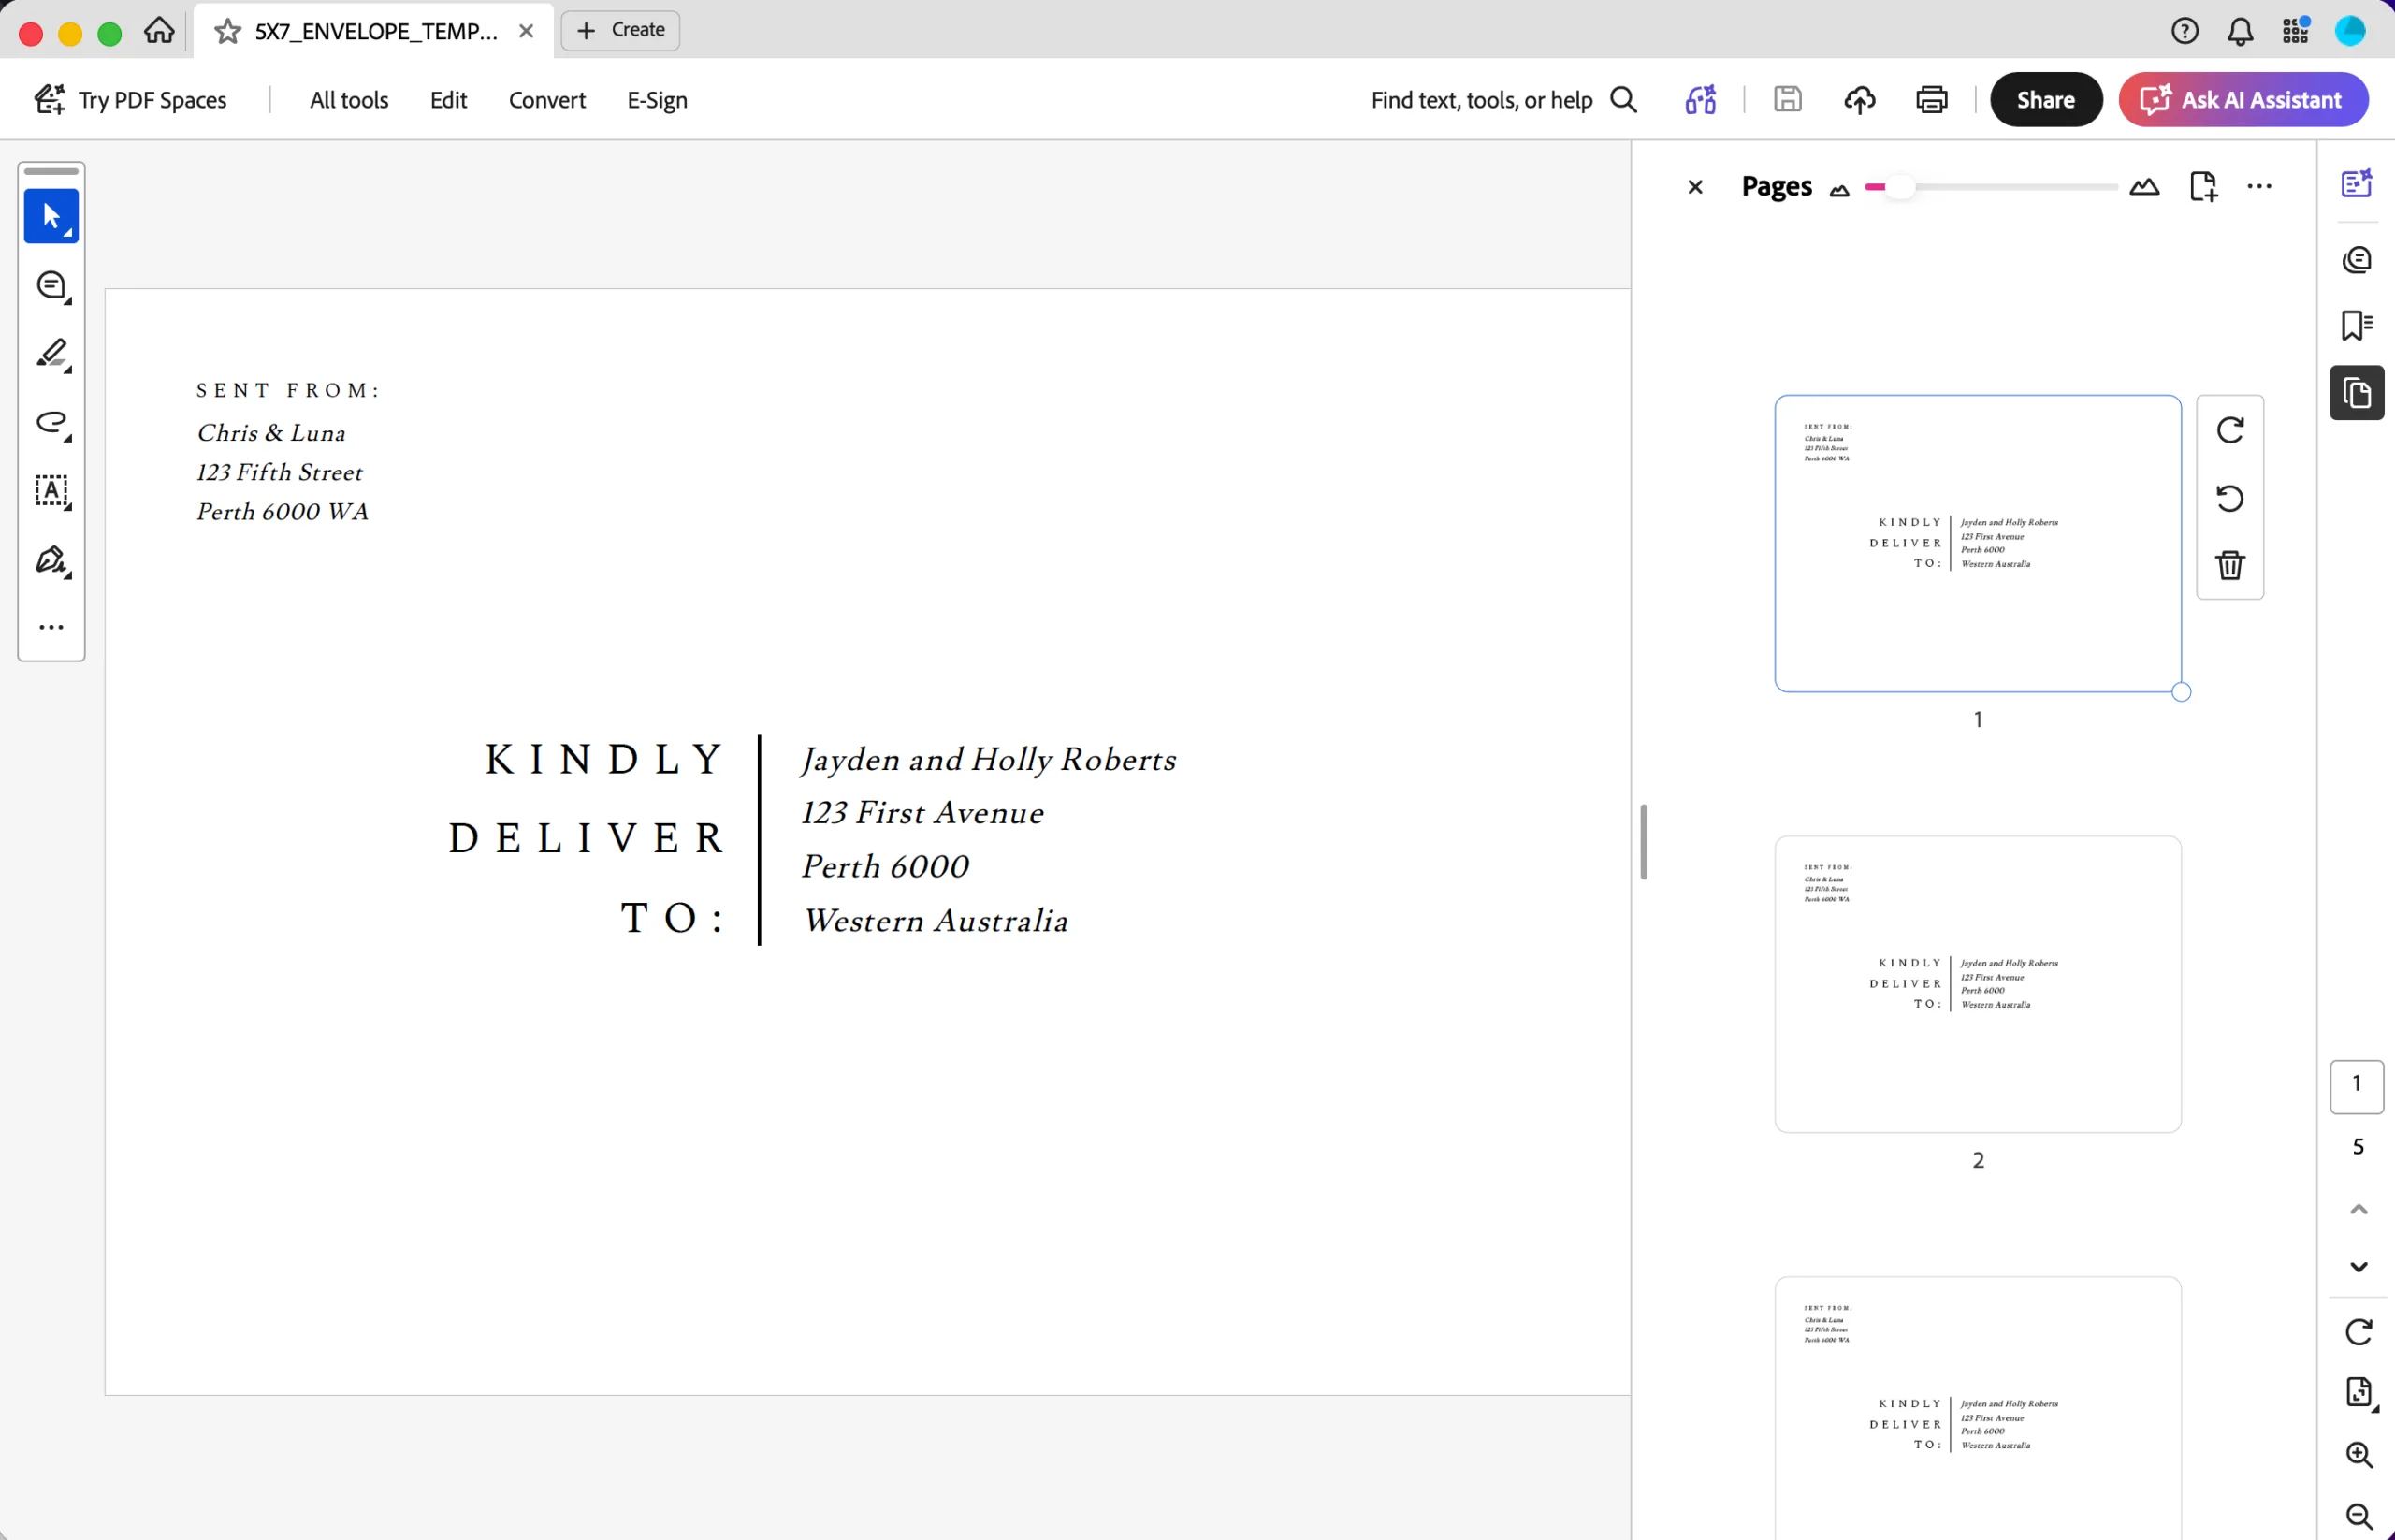
Once you’ve finished entering all your addresses, click the Download button in Templett. Select PDF as your file format, leave all other options off, and choose All Pages before clicking Download. Your file will save as a multi-page PDF in page order, ready to send to your printer.
Final Thoughts
Addressing envelopes in Templett is straightforward once you’ve got your design set up. It’s a simple, satisfying process that saves you a lot of time and effort, especially if you have a long guest list. The main thing to remember is to save regularly — the last thing you want is to lose a batch of addresses halfway through. If you do get stuck with editing, just reach out — we’re happy to work through it with you.