❗️Important: These instructions are for customers who purchased templates from The Hello Bureau. If you bought a template elsewhere, please refer to your original seller for guidance. We are unable to assist with templates that were not created by us.
Templett is a browser-based design tool that works well for most stationery but a 16-page booklet can be slightly overwhelming at first. Text reflows, sections shift, and it can feel like everything falls apart the moment you change one line. Because of this, we’ve built some tools into your template to help you stay in control.
Draft Your Wording First
Before editing your template in Templett, we strongly recommend drafting your ceremony wording in Microsoft Word or Google Docs first. We’ve created a free wording template to get you started which can be downloaded below. Once you’re happy with it, copy and paste directly into the correct sections in Templett. This also ensures you have a backup copy if anything goes wrong.
A reminder: Templett doesn’t autosave. Click the Save button after every change.
Guides
Templett doesn’t have native guide features, so we’ve created our own. Every page includes up to four types of guides, all hidden by default. To turn them on, open the Layers panel on the right-hand side and click the eye icon next to the guide you want to show. Remember to hide them all again before exporting — any visible guides will appear in your PDF.
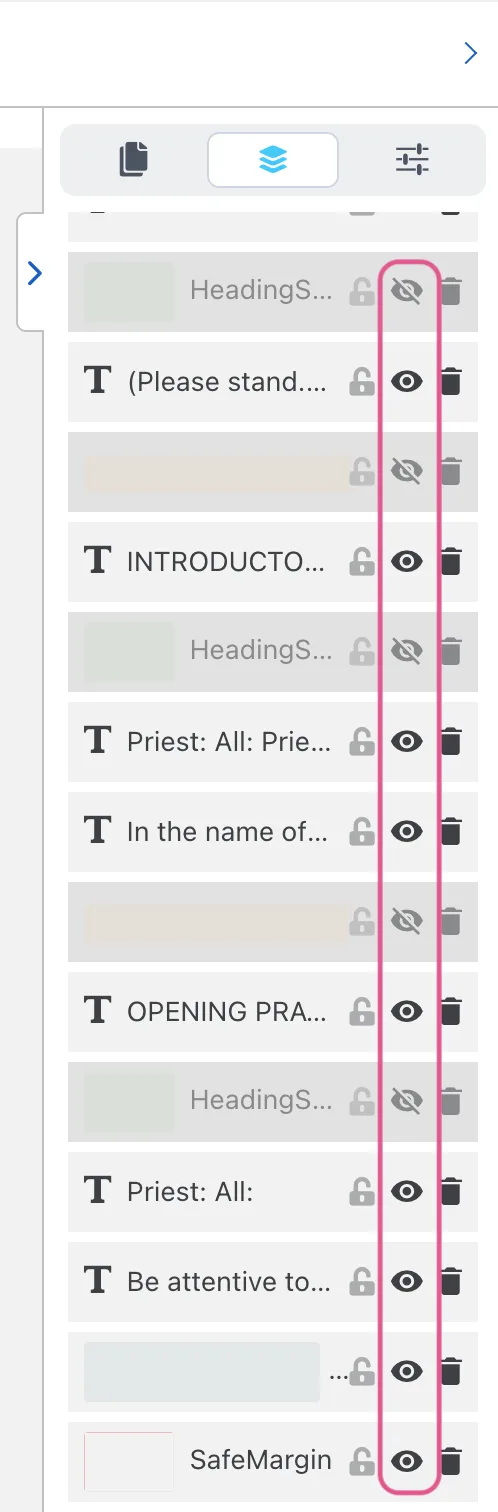
The spacing guides look like coloured bars in between the text layers of the template.
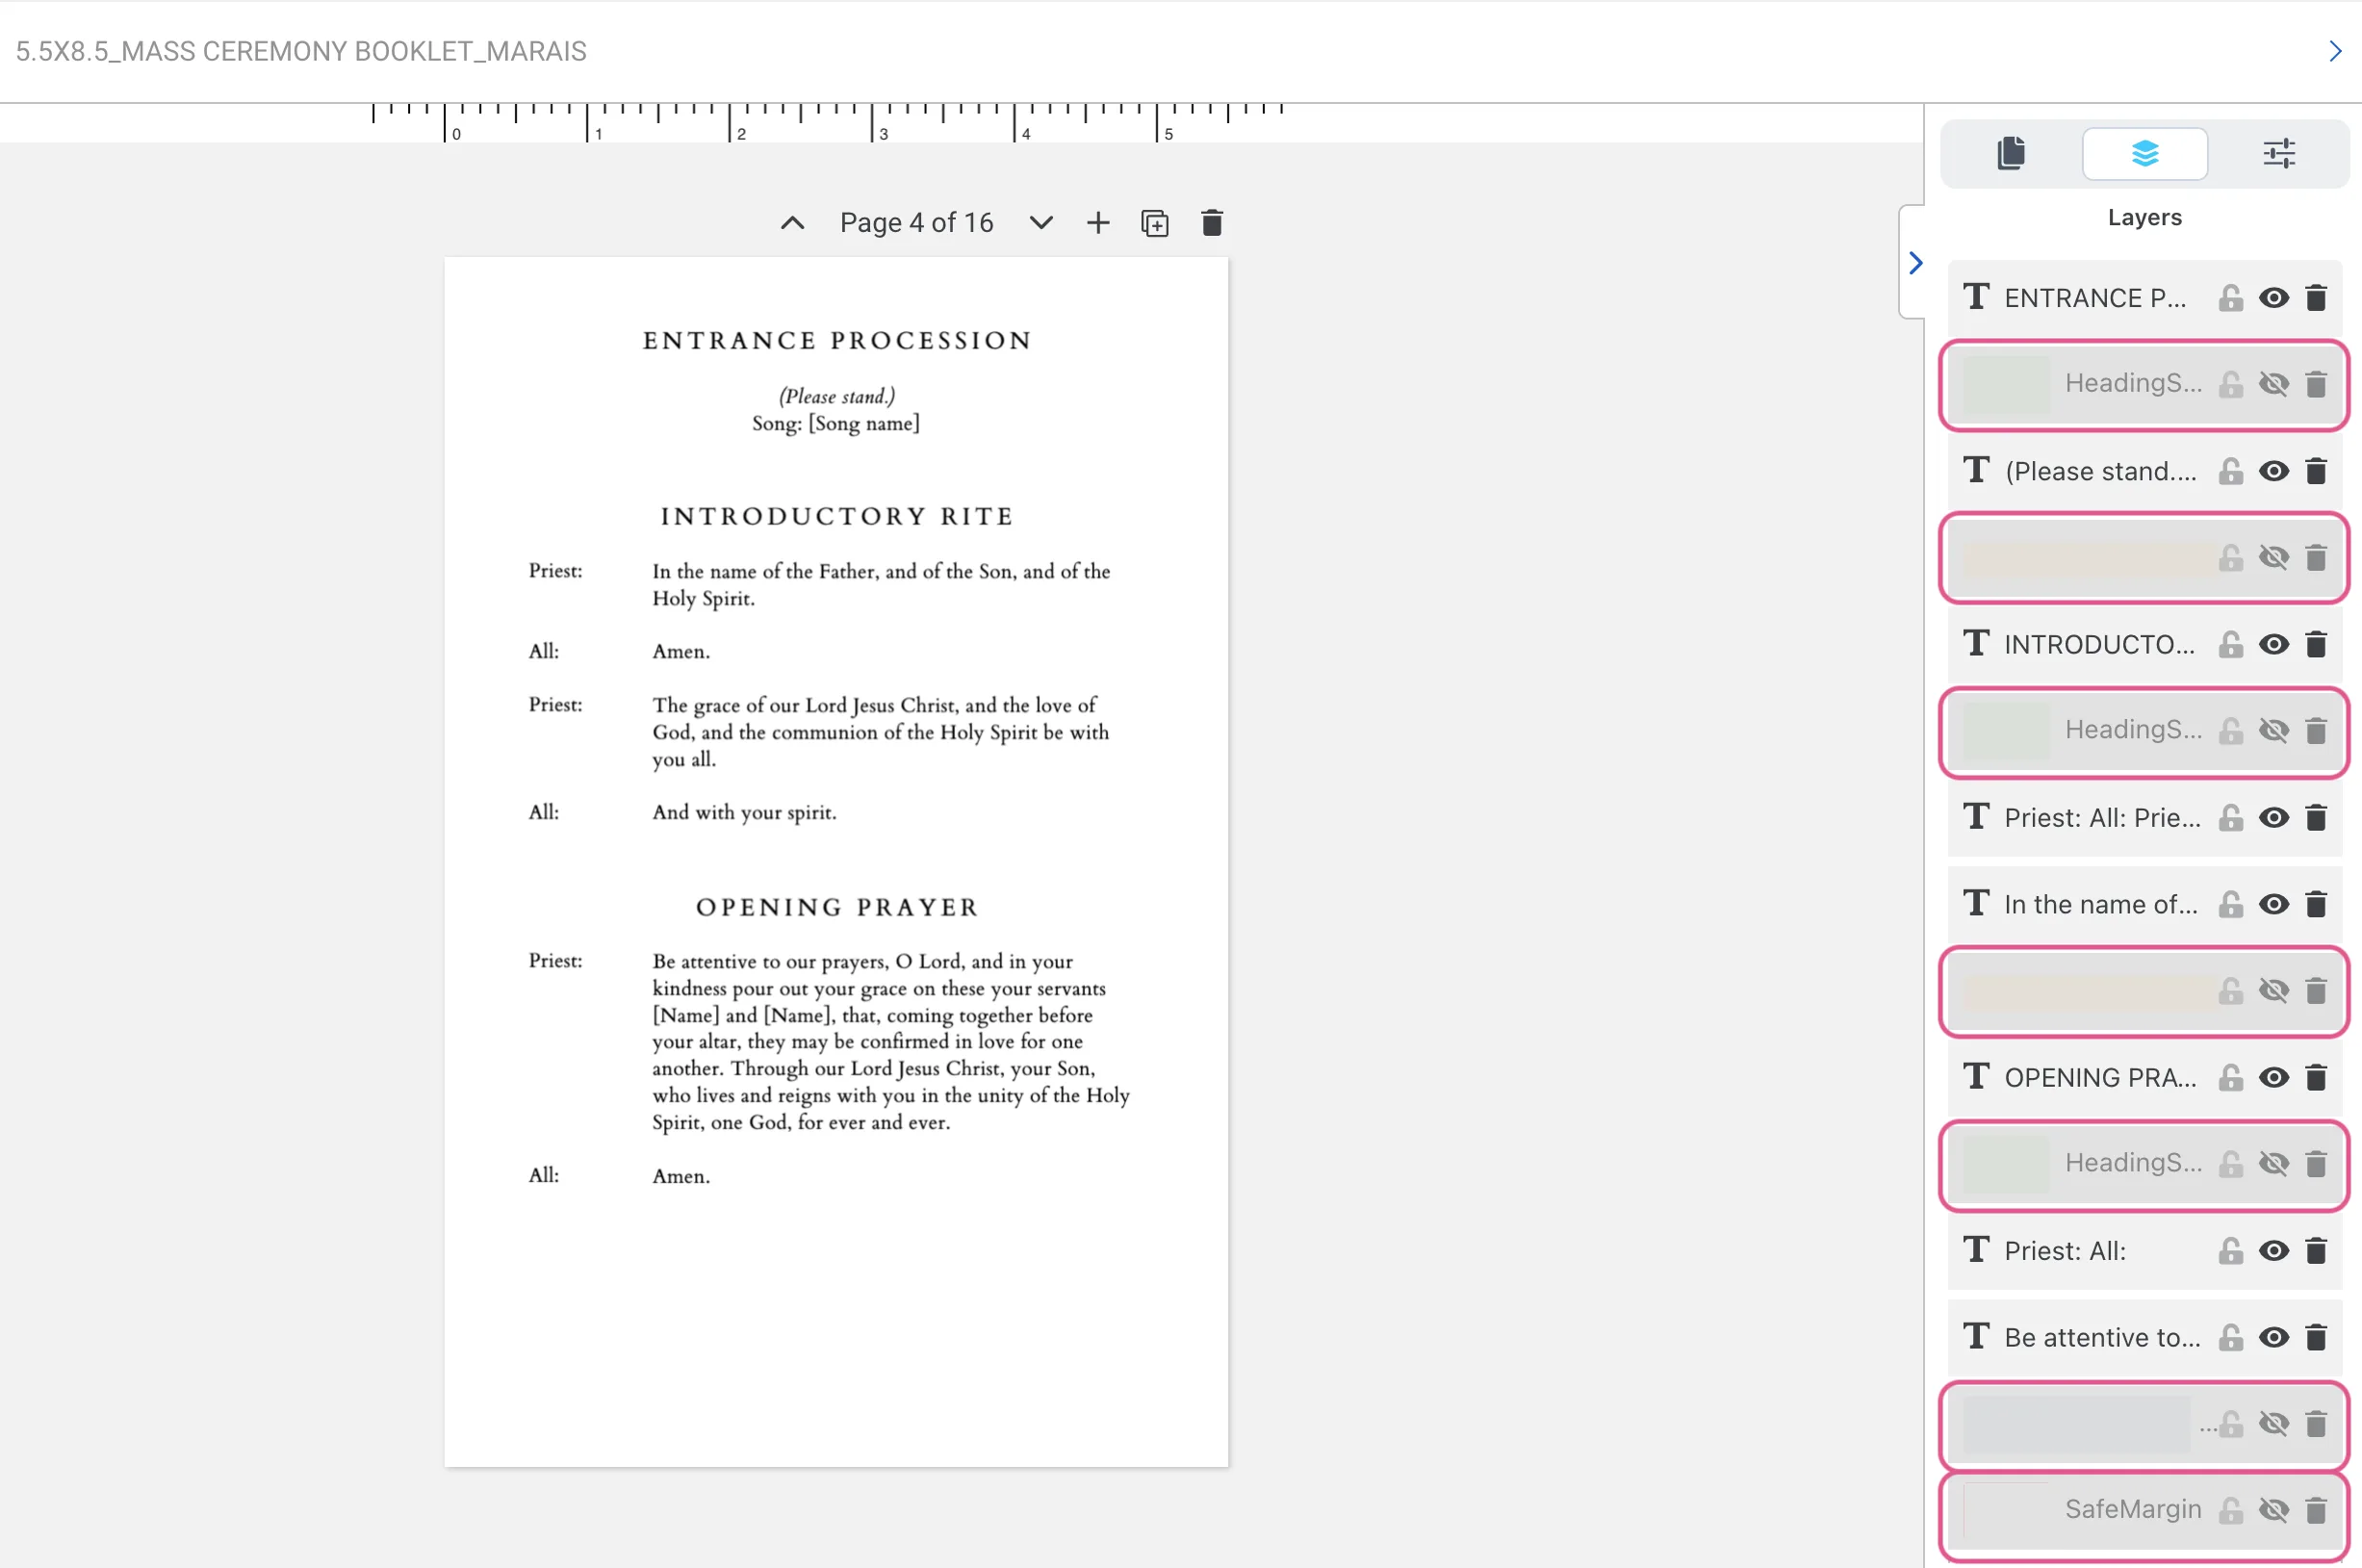
Safe Margin (red)
A border showing the safe print area. Keep all your text within this box to ensure nothing gets cut off when your booklet is printed and trimmed.
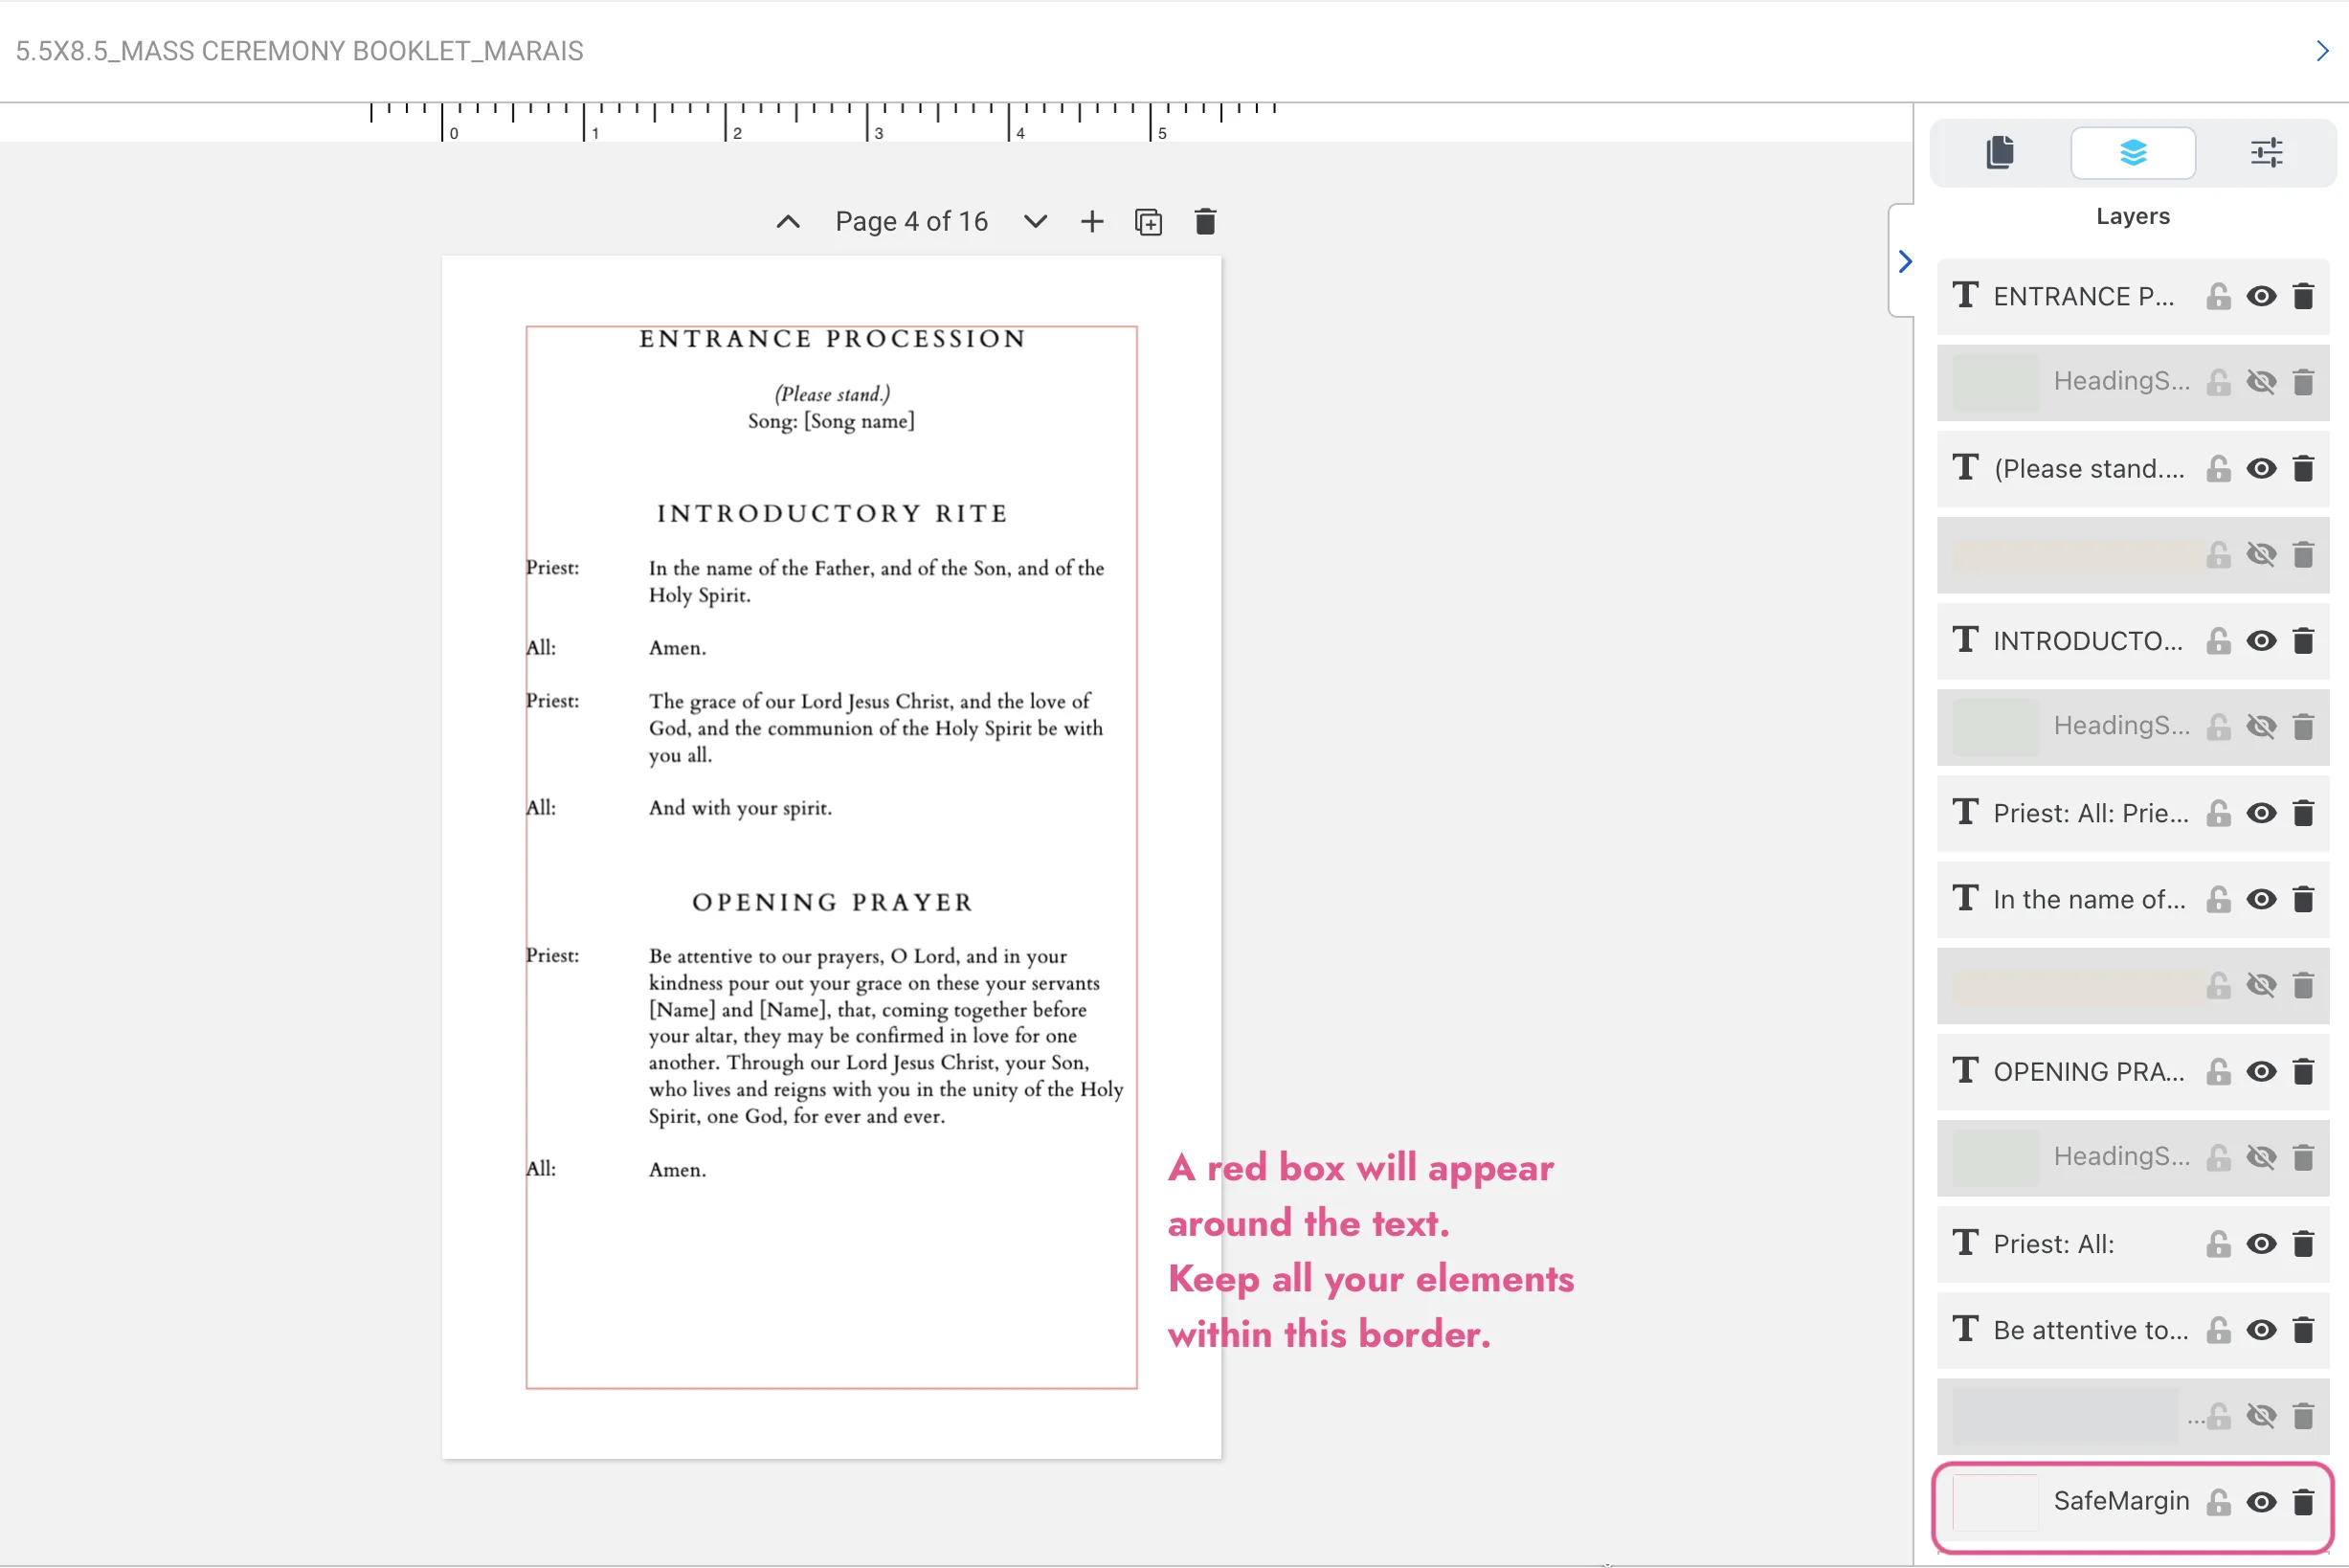
Heading Spacer (green)
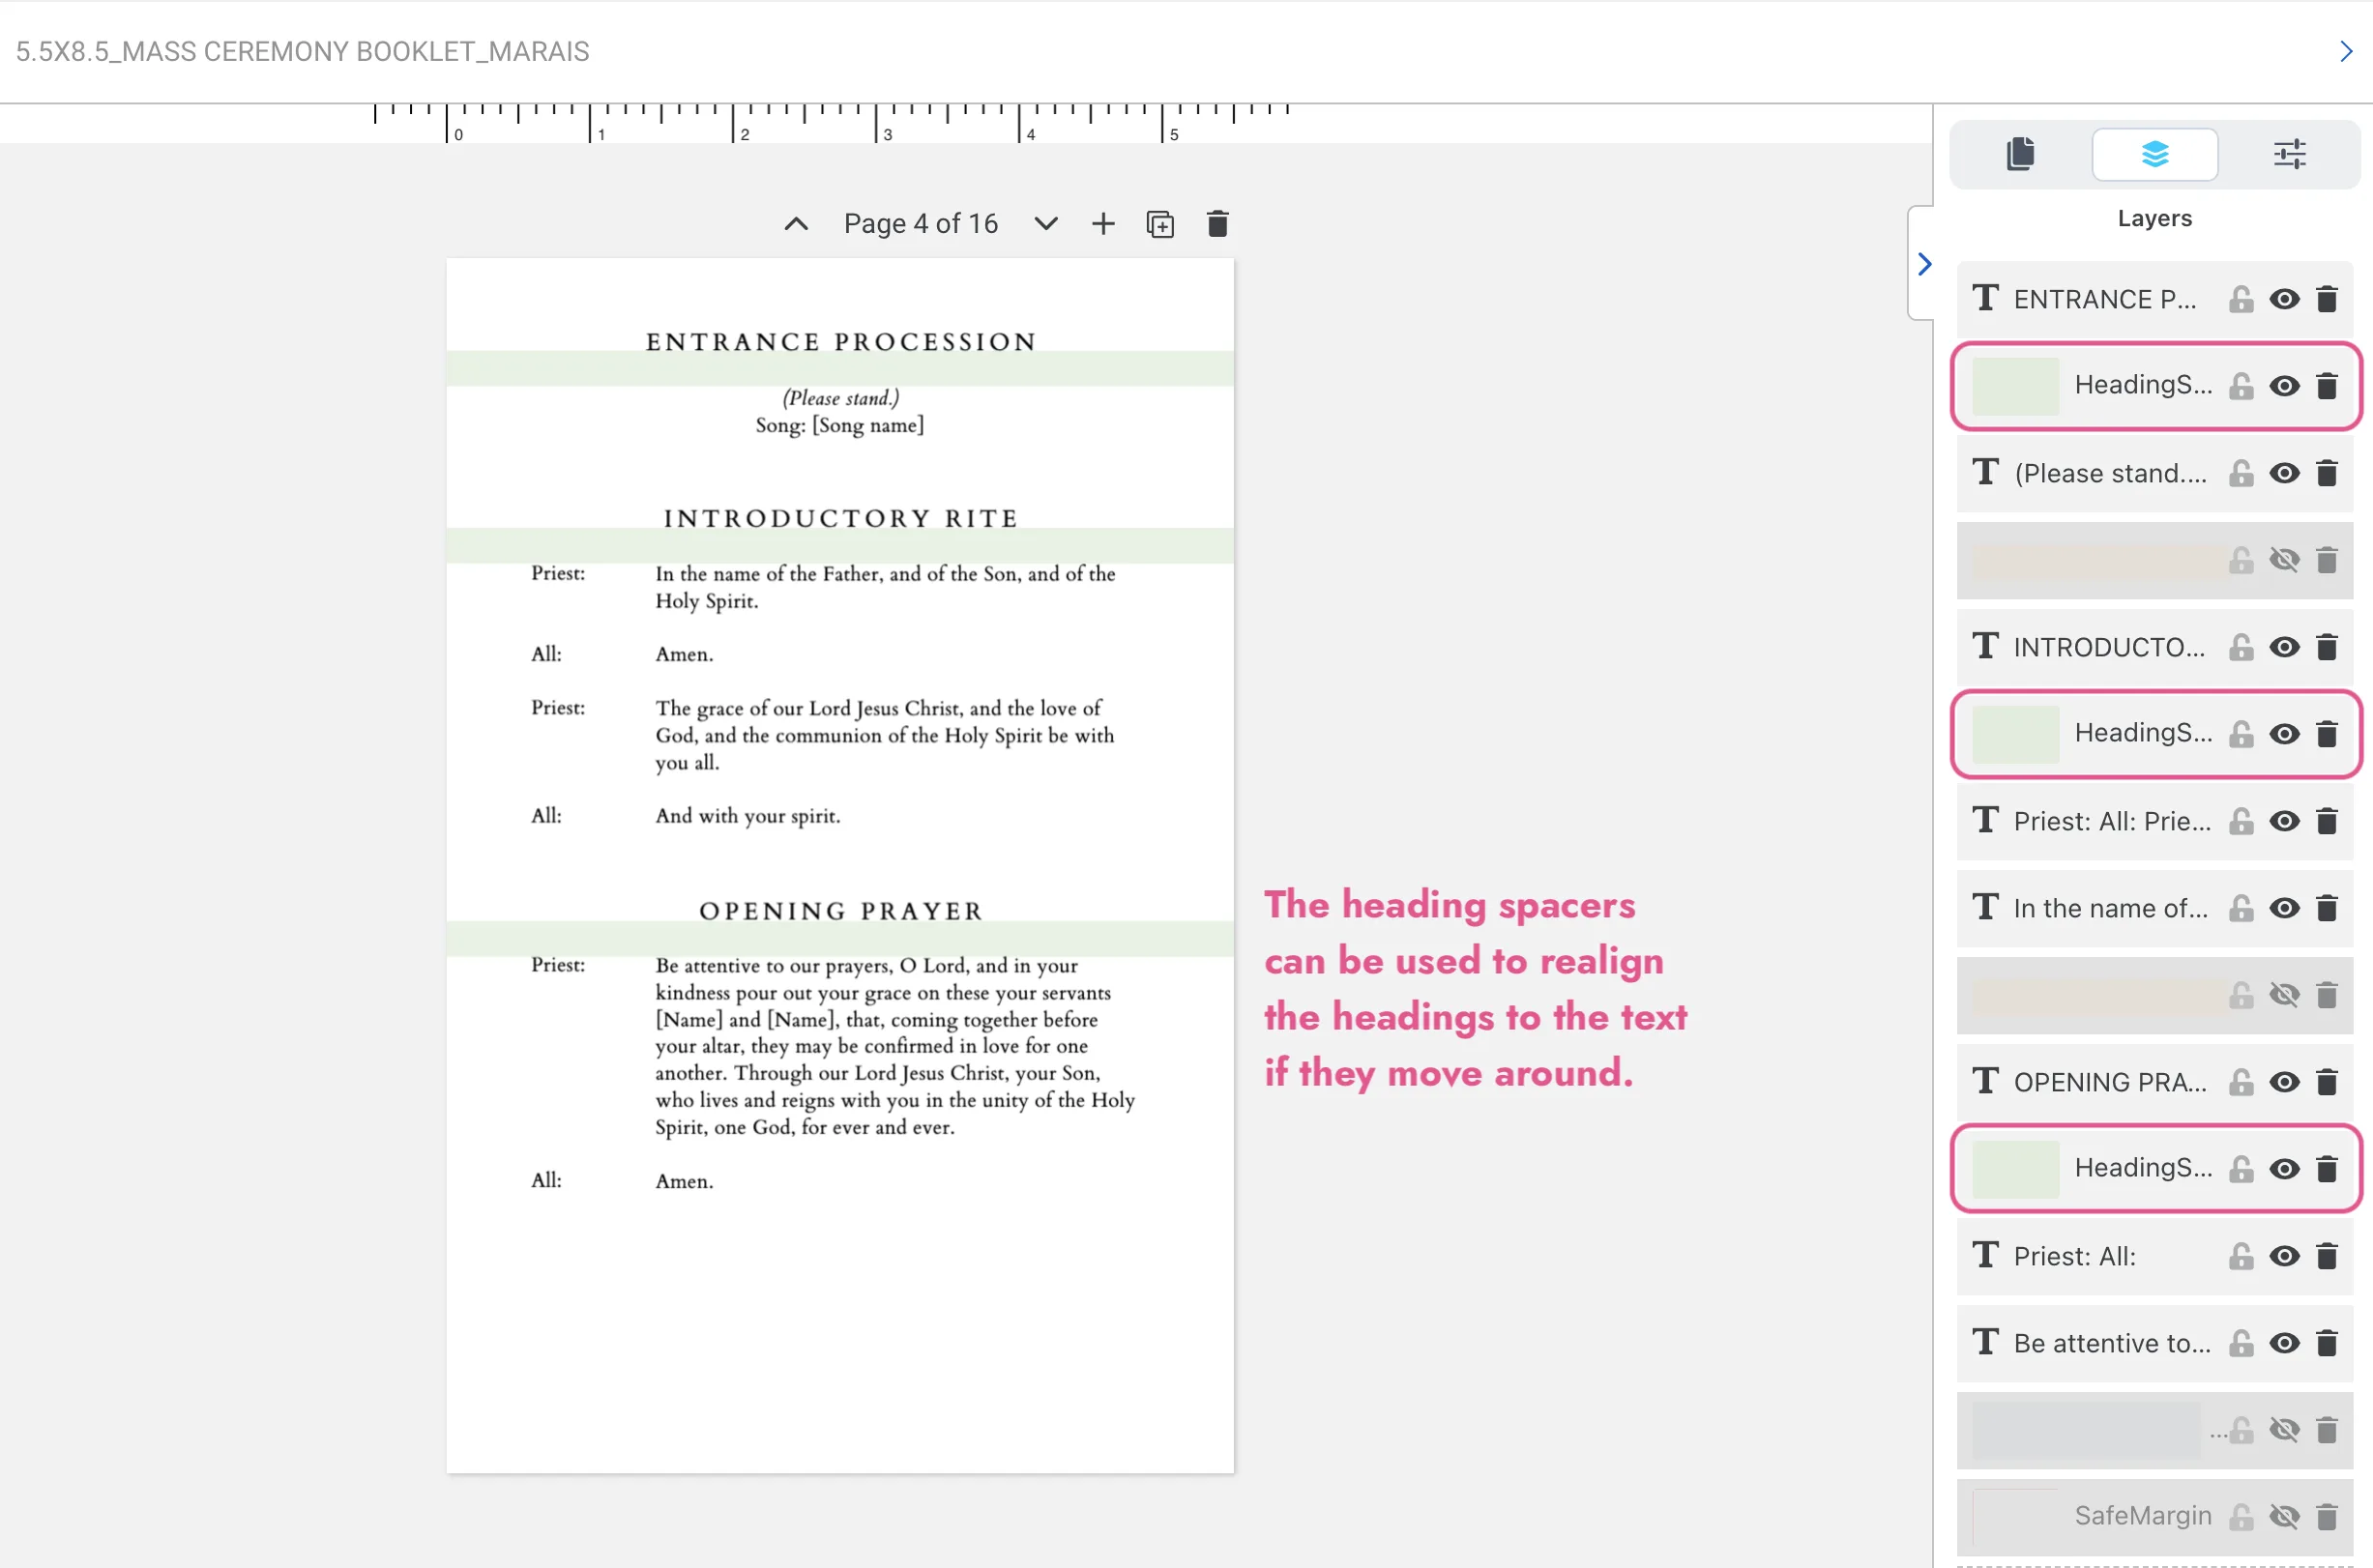
A small spacer bar used to maintain consistent spacing between headings and the text that follows them. It is about 0.64 cm (0.25 in) in height.
Section Spacer (orange)
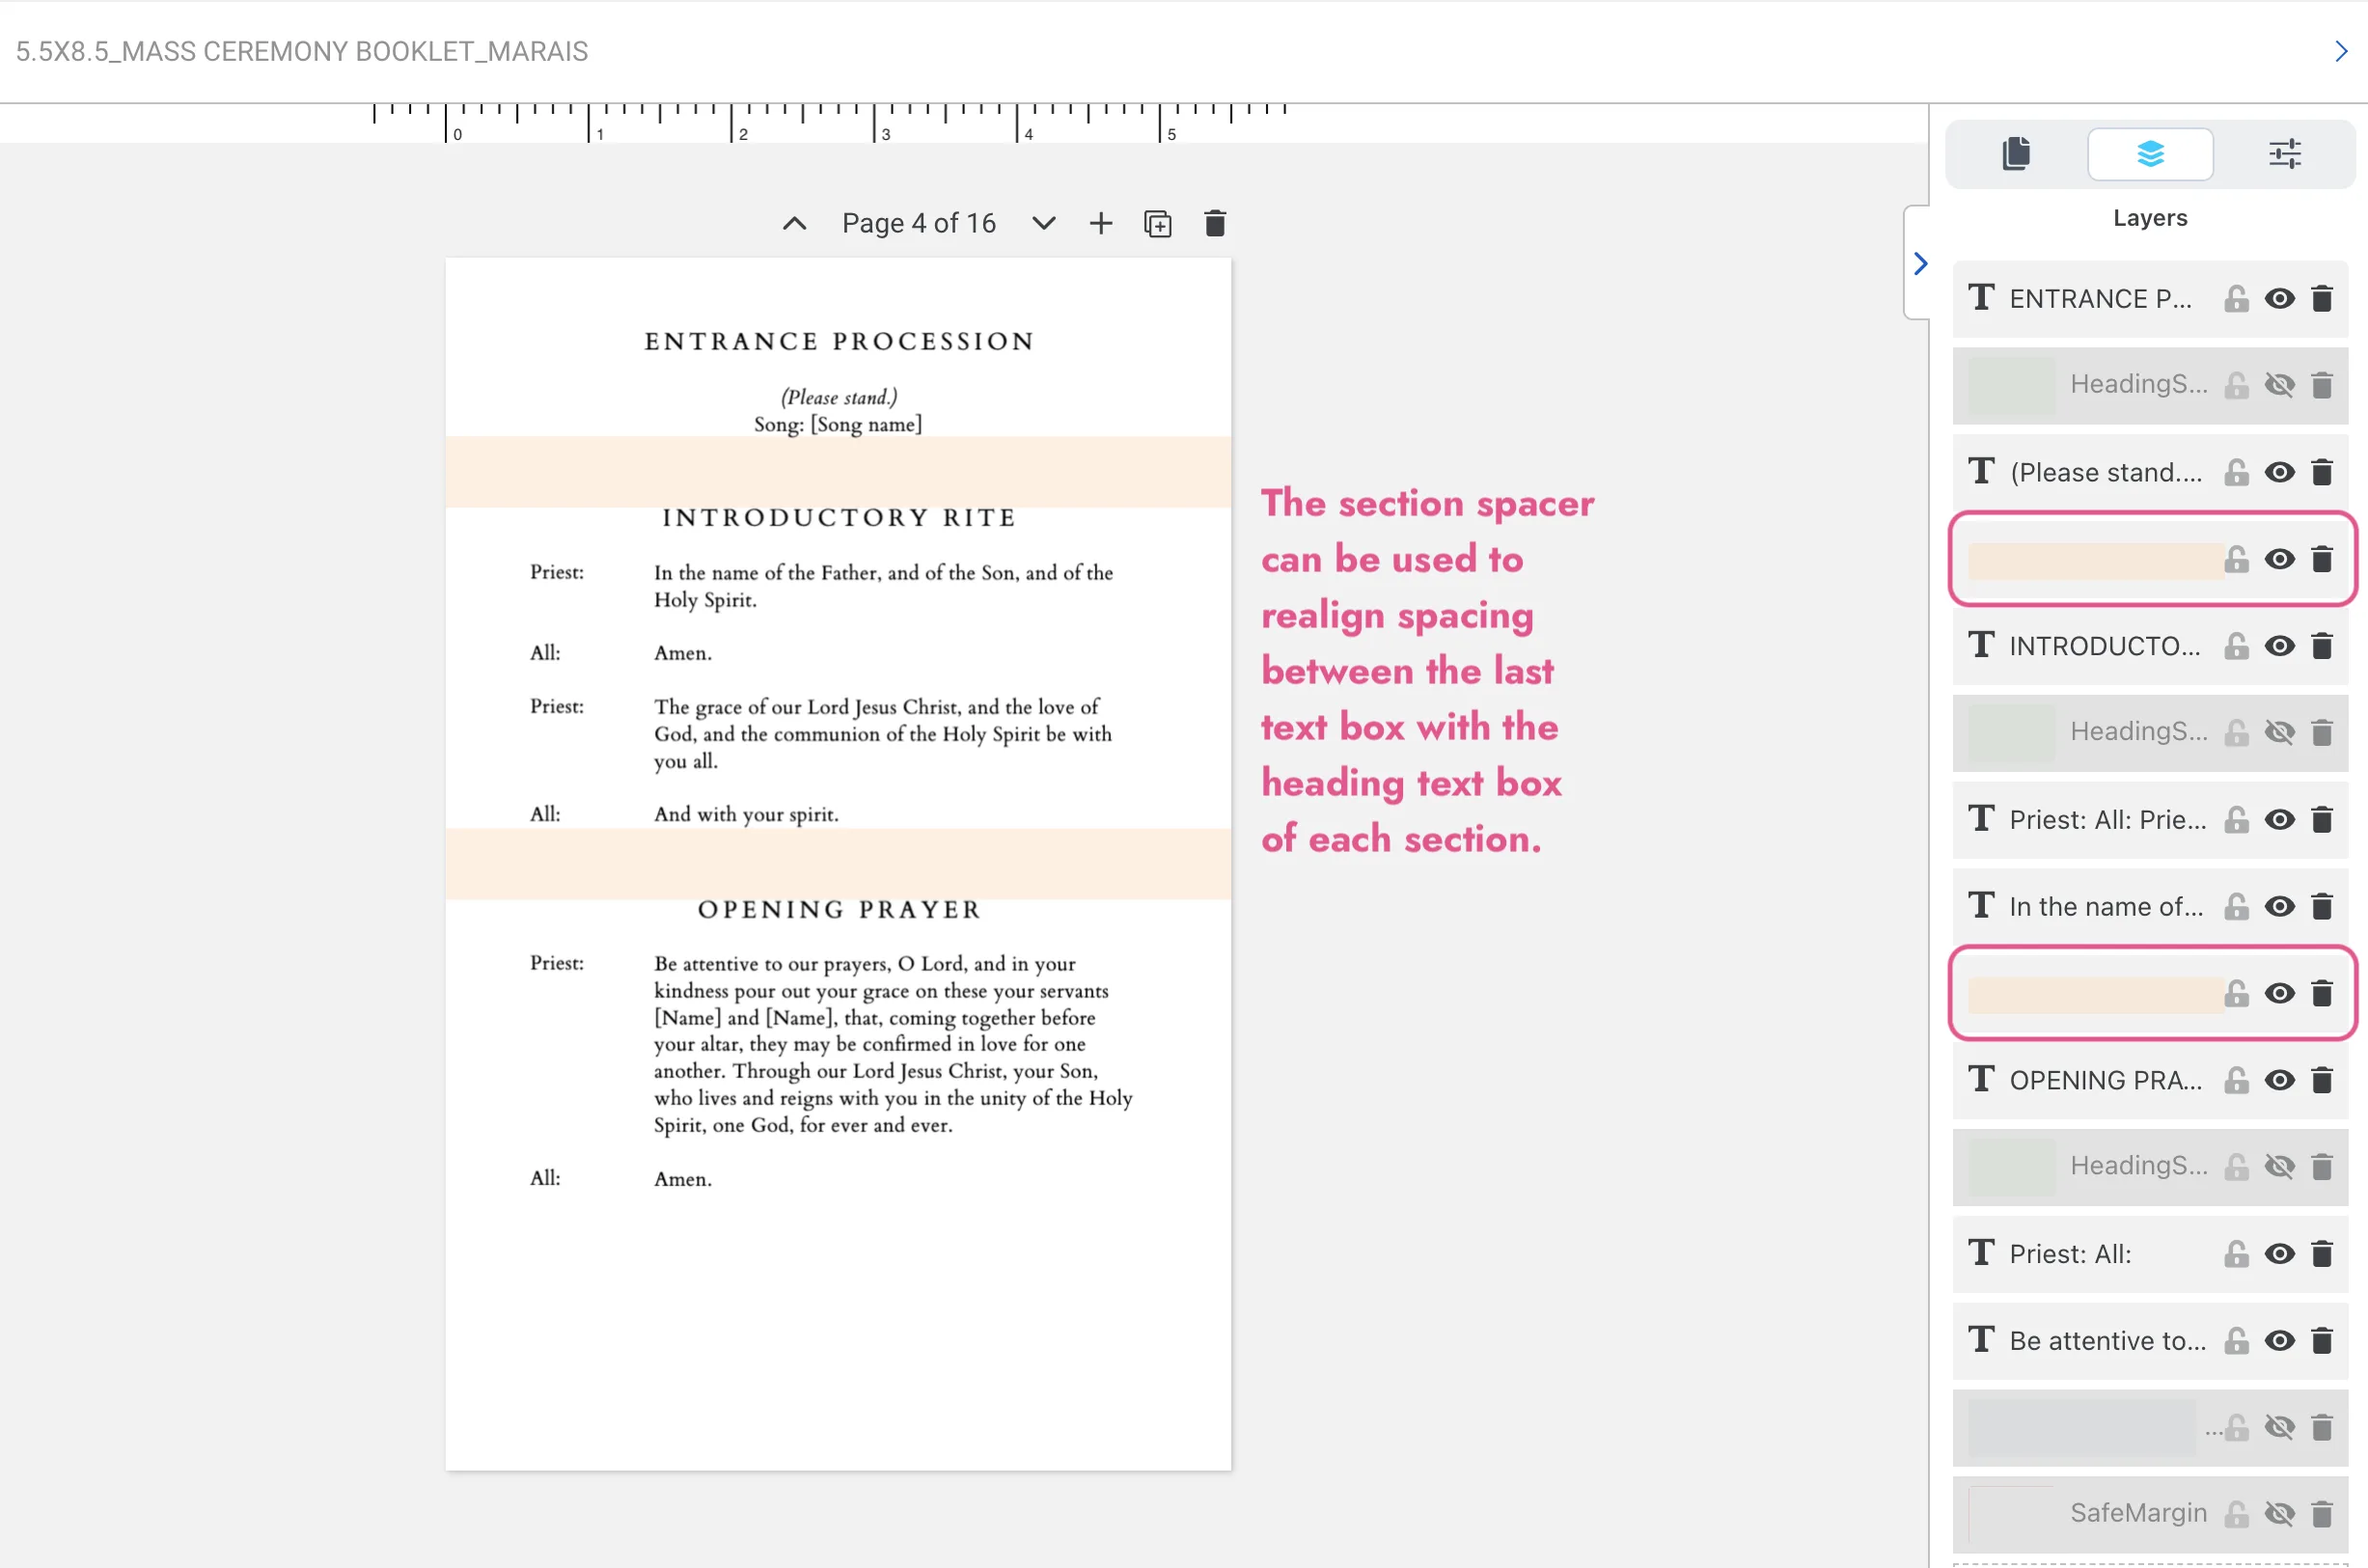
A larger spacer bar that keeps the spacing between sections consistent throughout the booklet. The section spacer is between 0.89–1.27 cm (0.35–0.5 in) in height.
Side Spacer (blue)
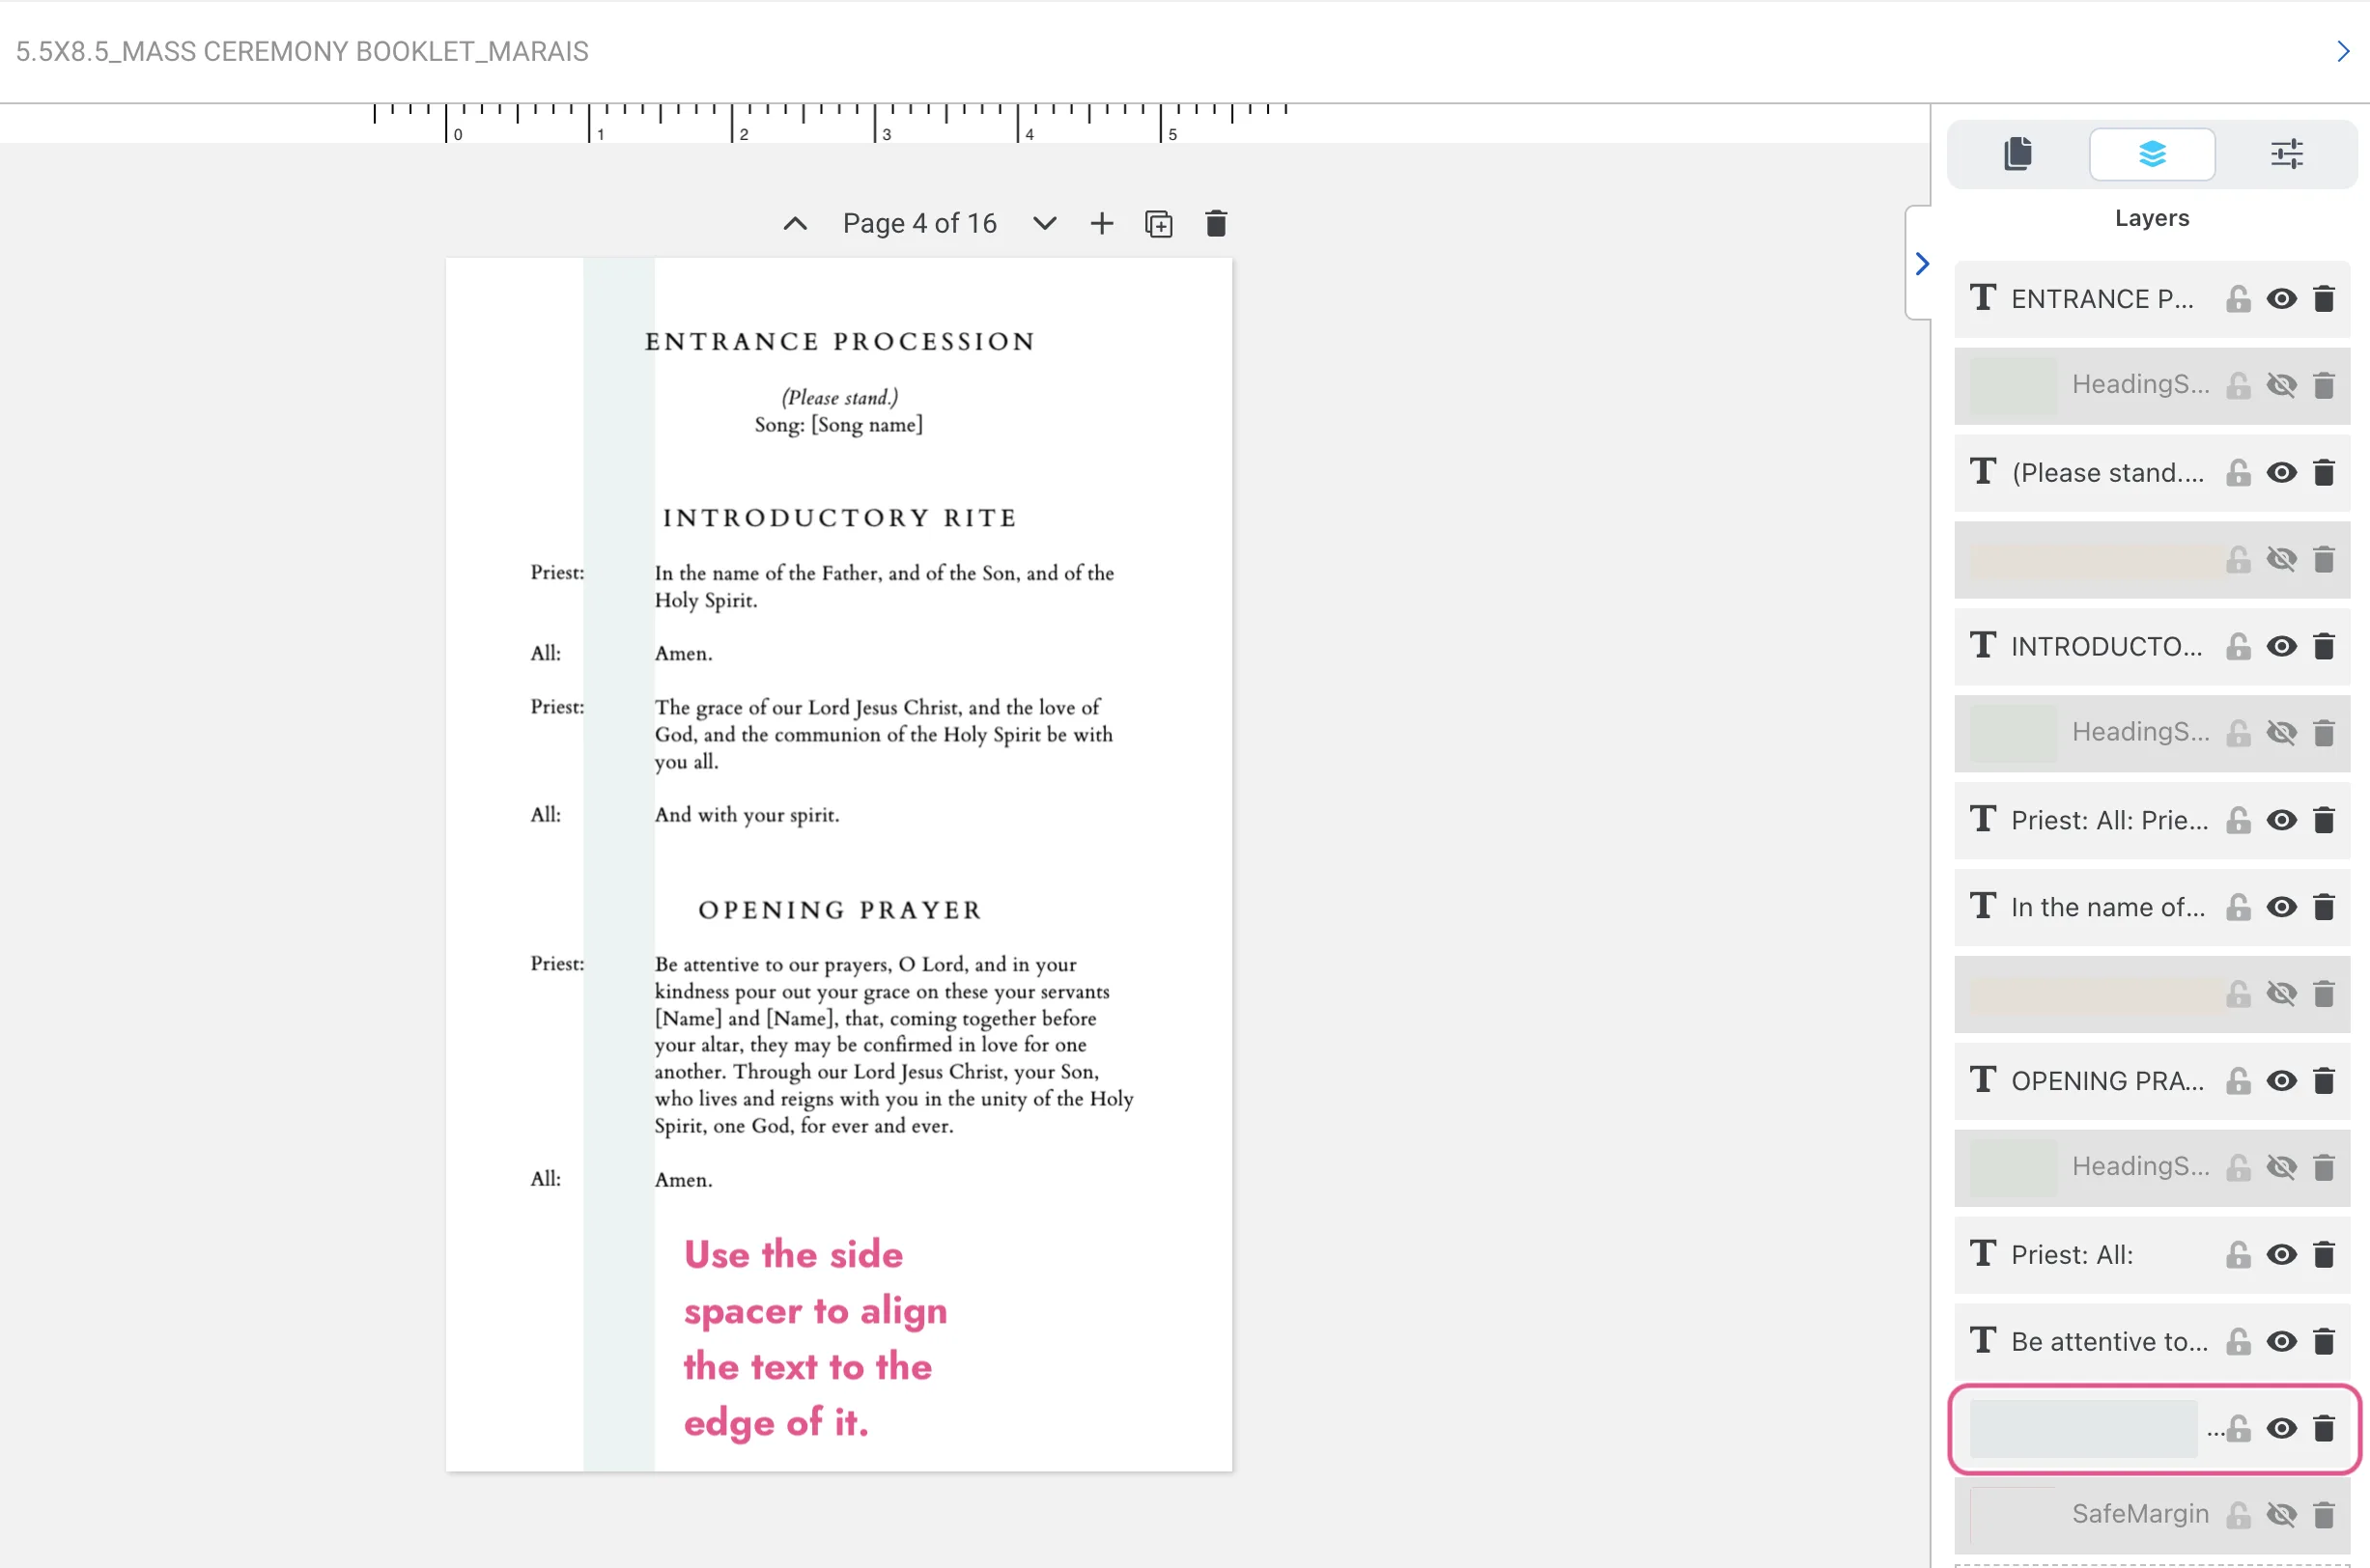
A vertical spacer for keeping the dialogue and response columns consistently aligned across pages.
Typography
Text boxes in Templett expand downward as you type. This means that if you add or remove lines, the text box will grow or shrink and may push into the section below. This is normal — use your spacers as a reference to check that your spacing still looks consistent after editing.
If you need to fit more text onto a page, try adjusting the following settings:
- Font size — All booklet font sizes are set to 10pt by default. Go bigger to fill space or smaller to fit more in.
- Line height — The default is 1.2. Decrease it to tighten the gap between lines, or increase it to spread them out.
- Letter spacing — The default is 0.2. Decrease it to bring characters closer together, or increase it to spread them apart.

Changing Fonts
You’re welcome to change the fonts in your template to suit your style. Just keep in mind that every font has a different weight, size, and spacing, which means switching to something quite different can shift your layout unexpectedly — especially across 16 pages. We recommend previewing each page before exporting to check everything still looks as it should.
If you’d like to personalise the typography, changing the heading font is the safest place to start as it has less impact on the overall layout than changing the body text.
To learn more about text formatting, check out our post on Templett Text Formatting Basics.
Align Objects Tool
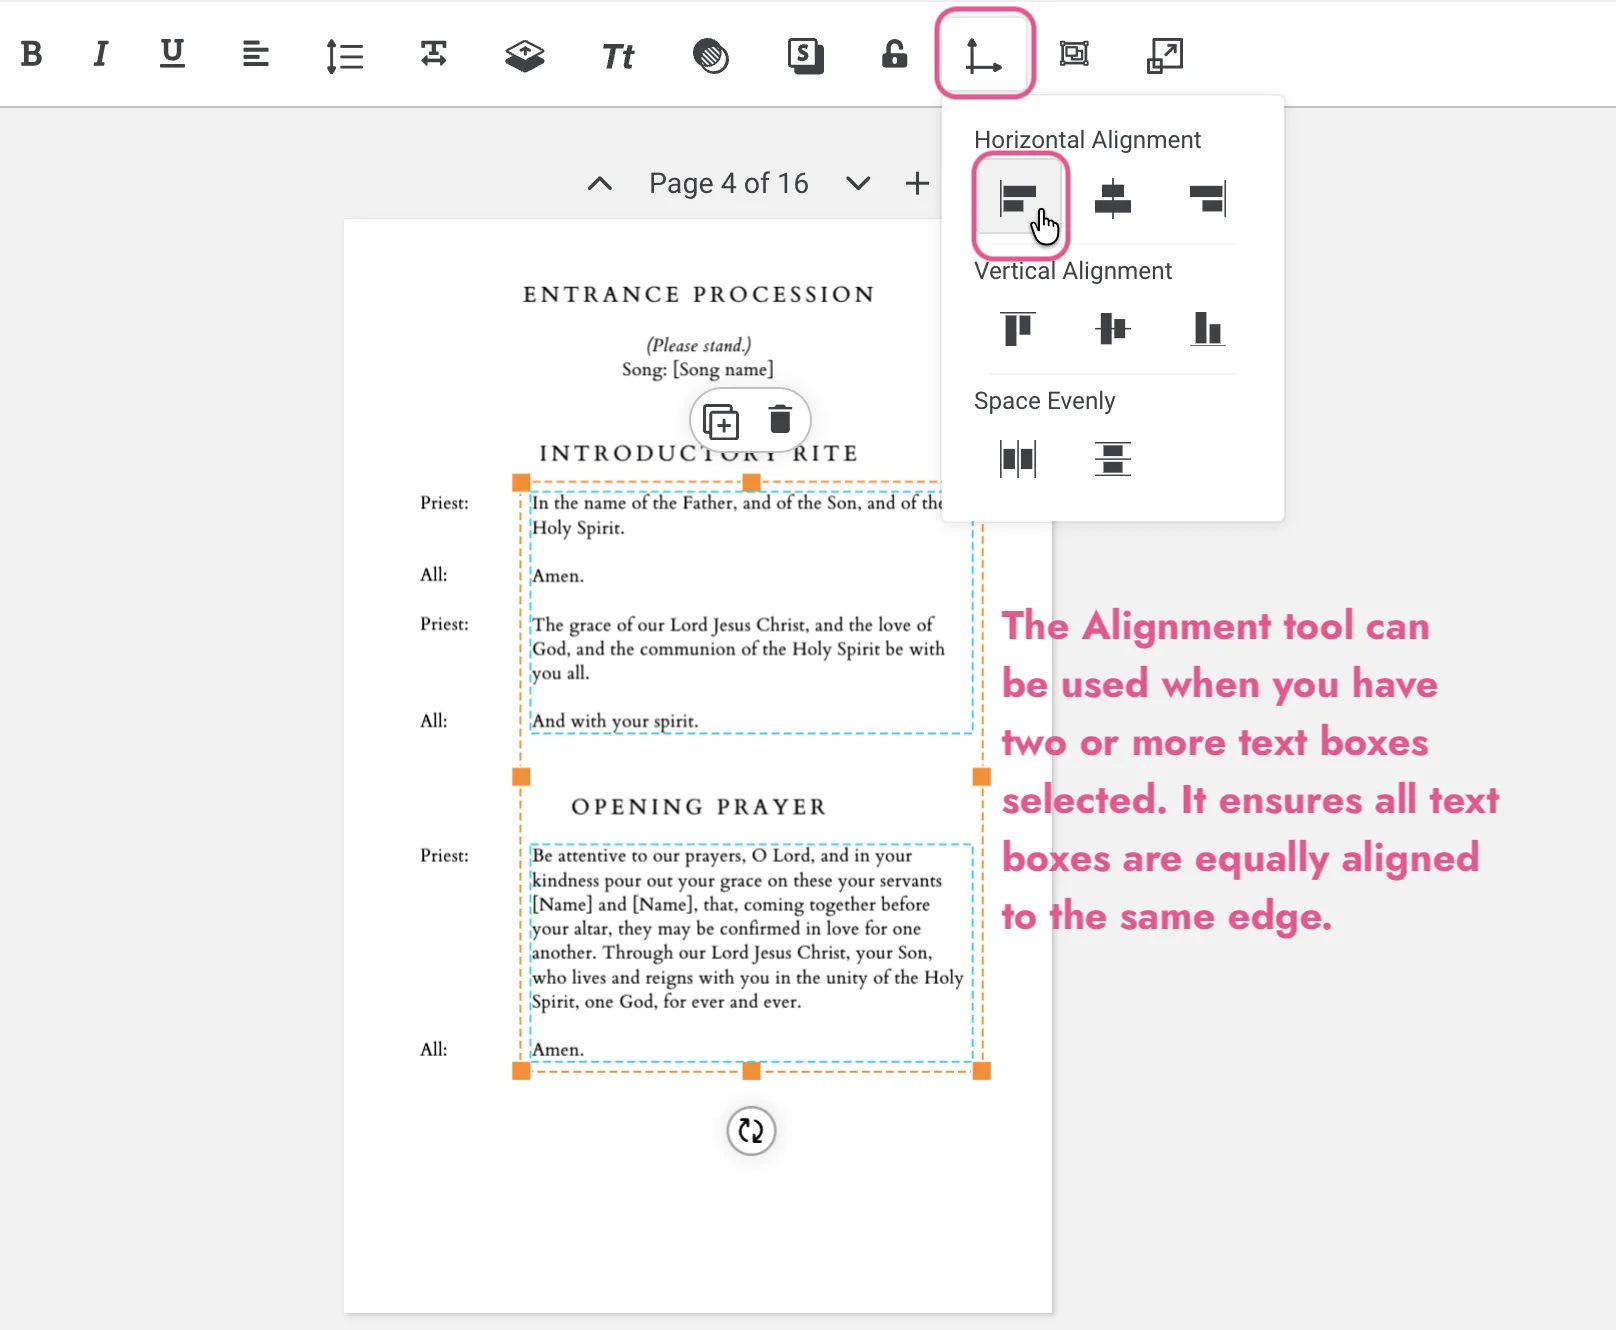
If you’ve moved text boxes around and need to get them back in line, Templett’s Align Objects tool makes it easy to realign multiple elements at once.
To select multiple text boxes, hold Shift and click each one until the orange border appears around your selection. Then click the Align Objects icon in the toolbar and select Align Left to line them back up to the same edge. This is particularly useful for keeping the dialogue response columns consistently aligned after editing.
Adding and Rearranging Pages
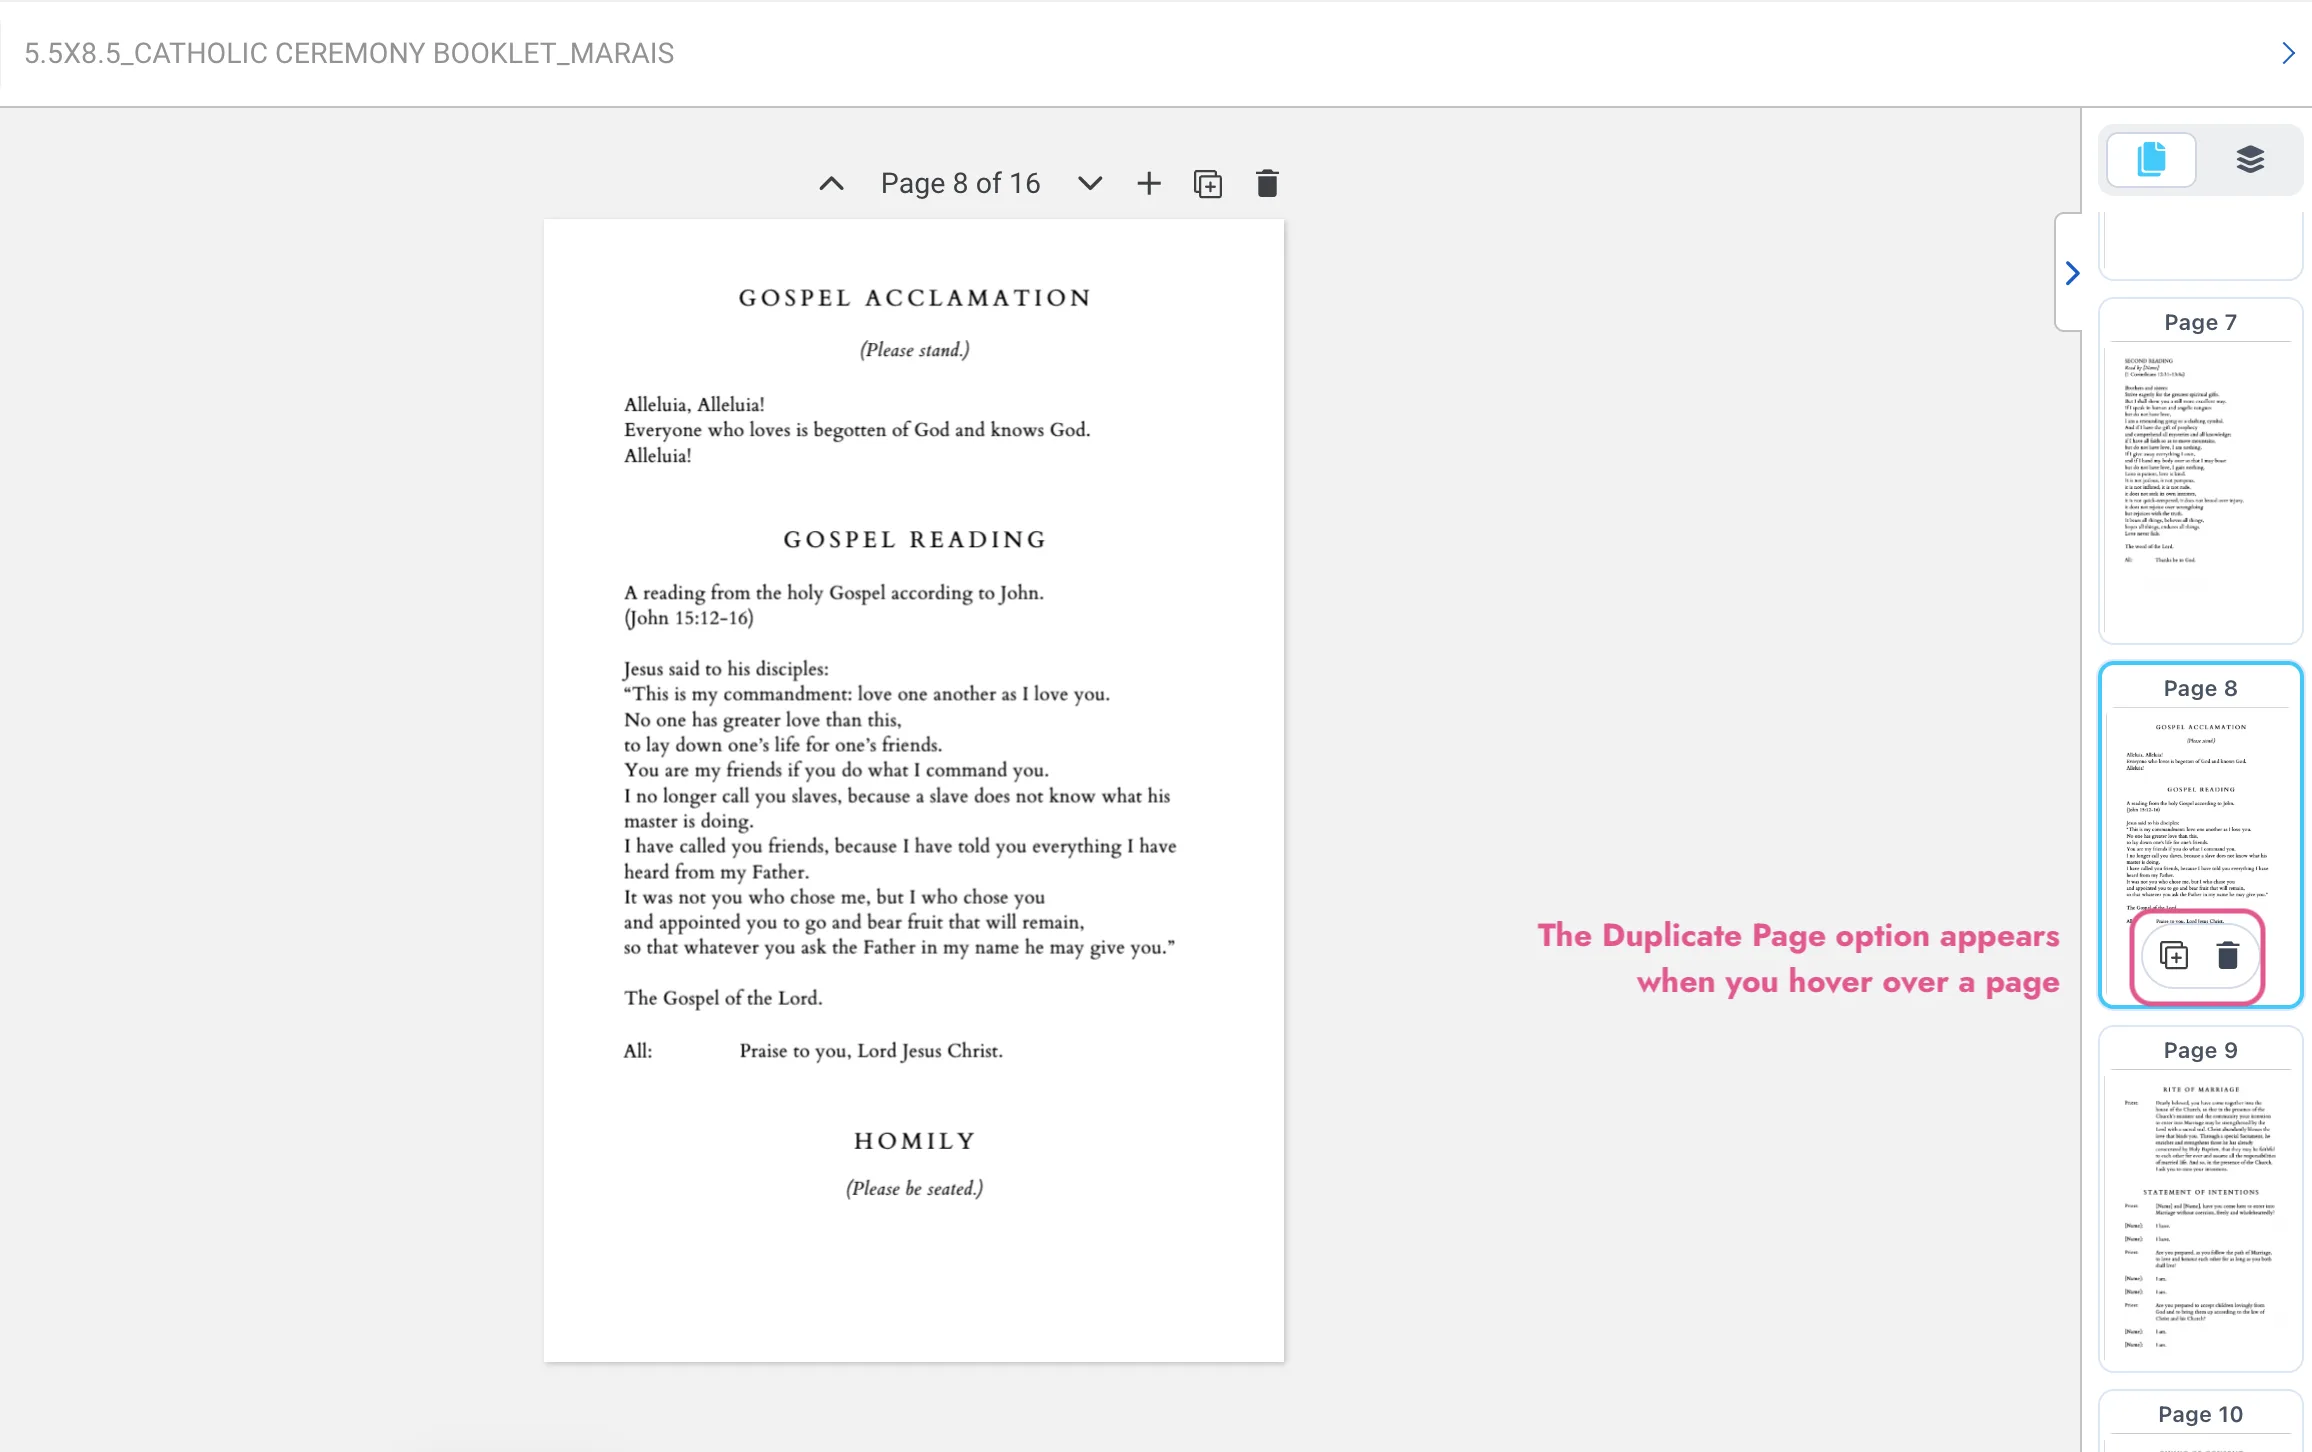
If you need to add pages, the easiest method is to duplicate an existing page rather than adding a blank one. This keeps all the built-in alignment guides and spacing intact. Simply duplicate the page by hovering over it and clicking the Duplicate Page option then update the wording to suit.
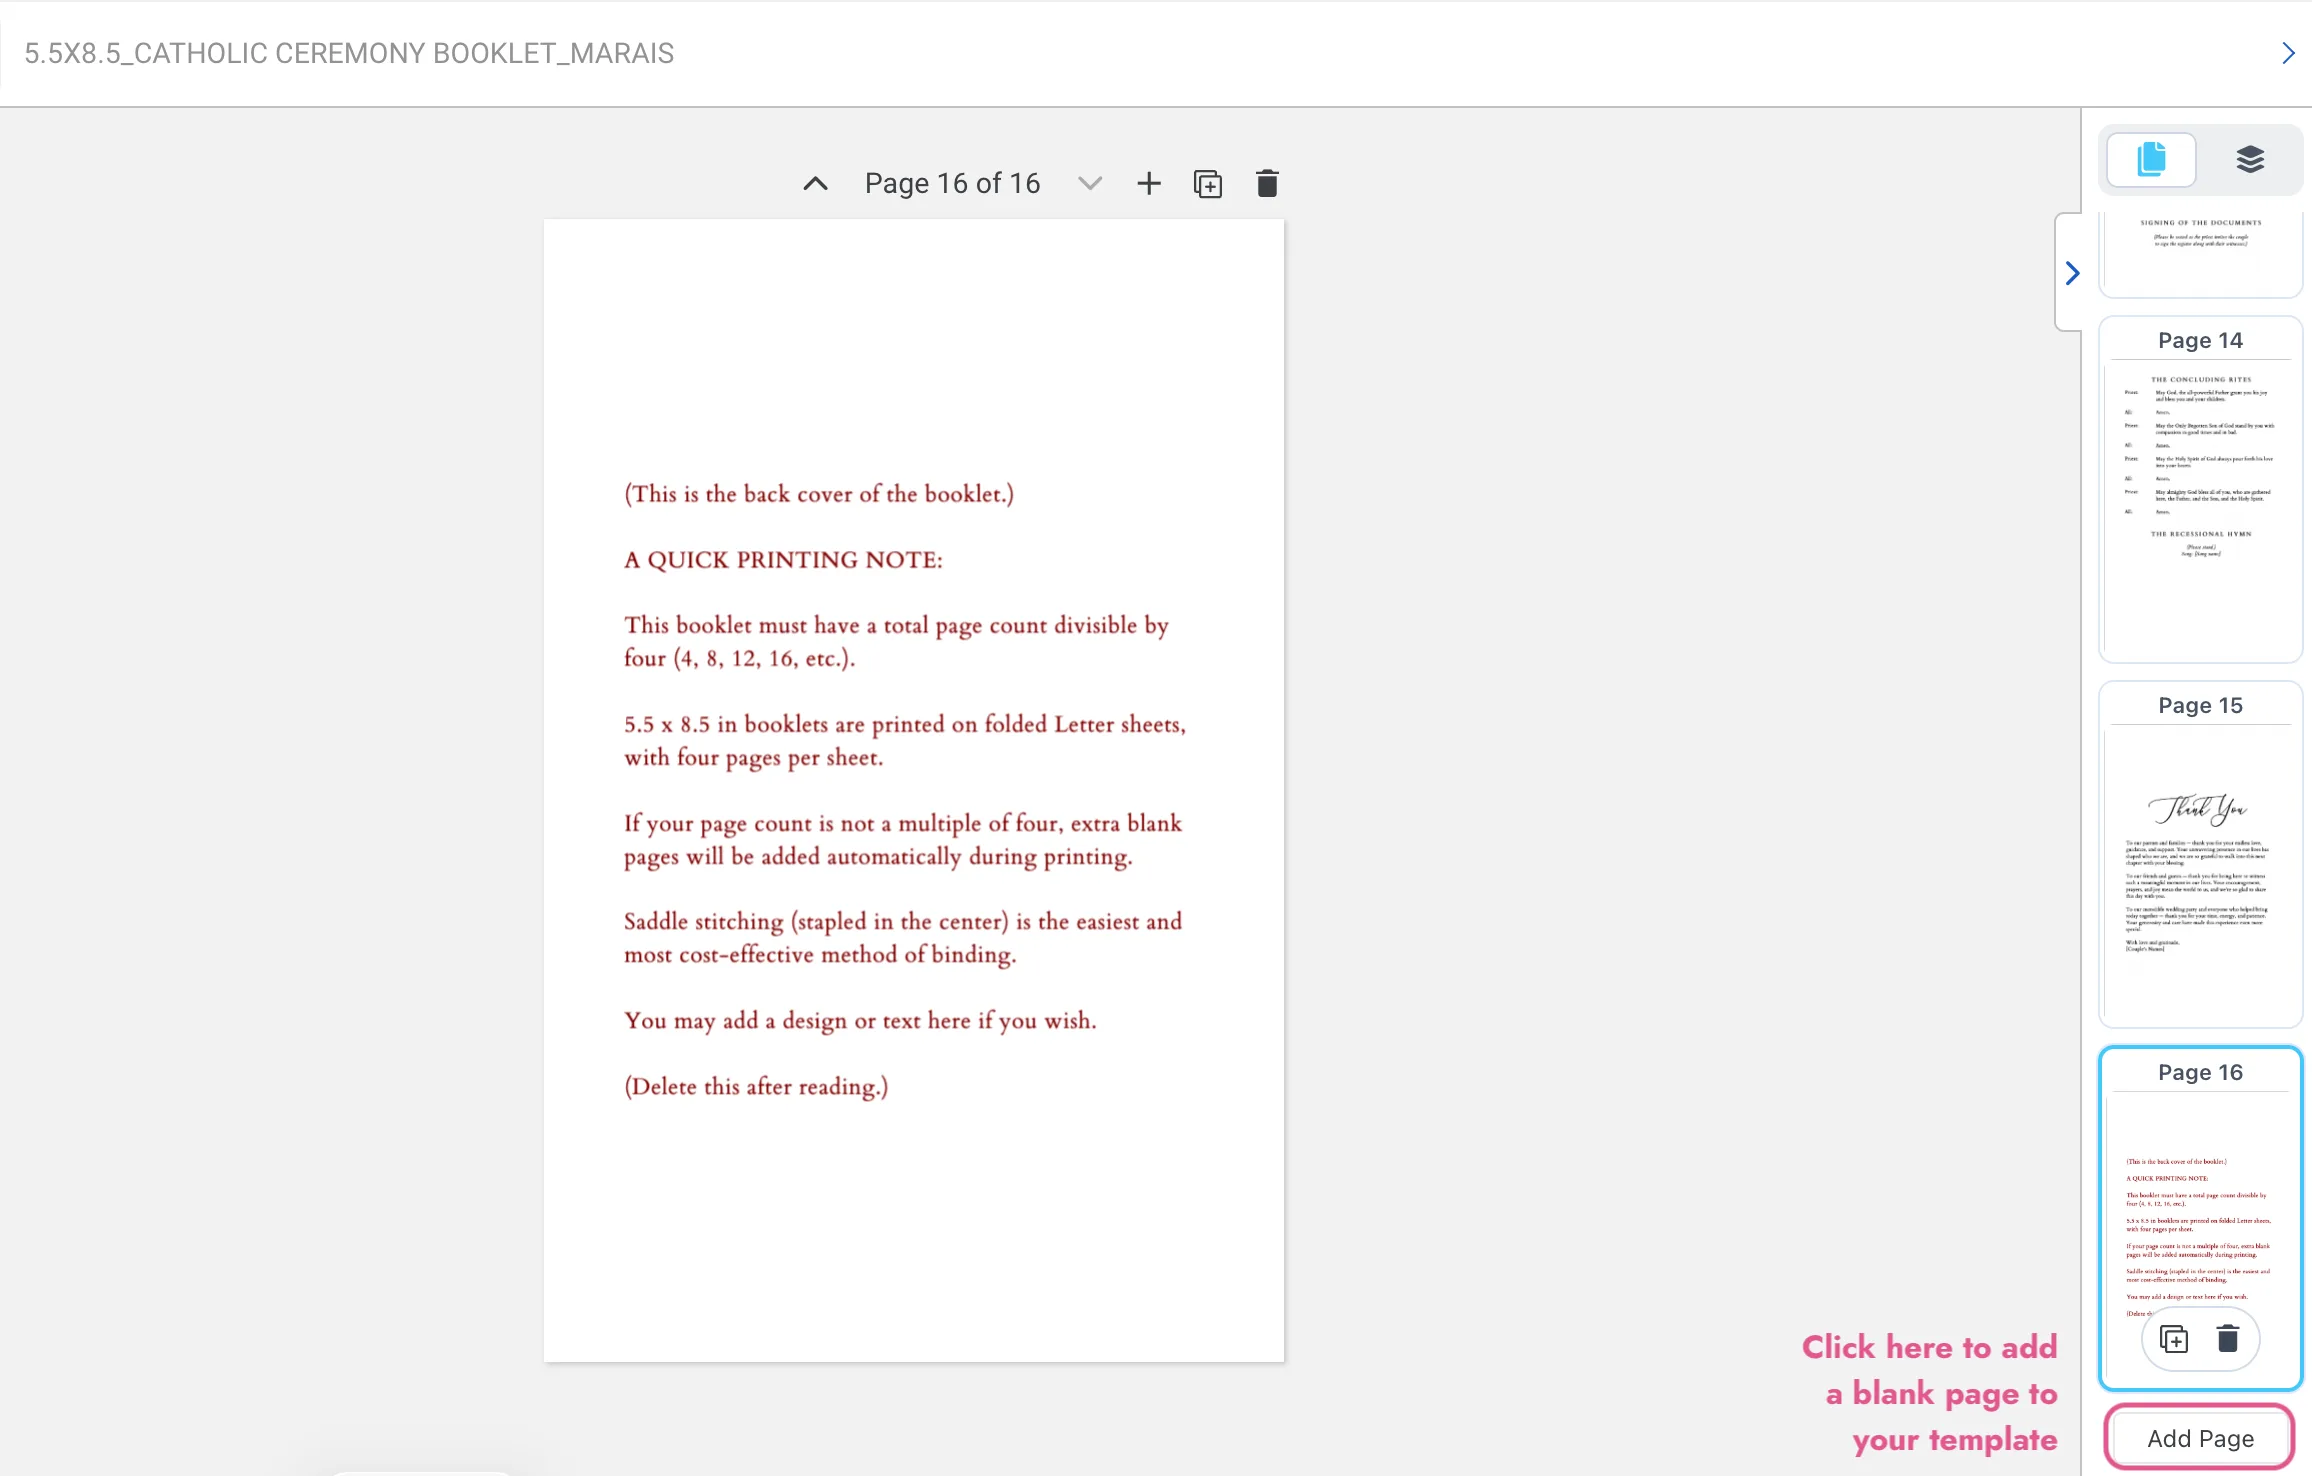
To add a blank page, scroll to the end of the page thumbnails in Templett and click Add Page.
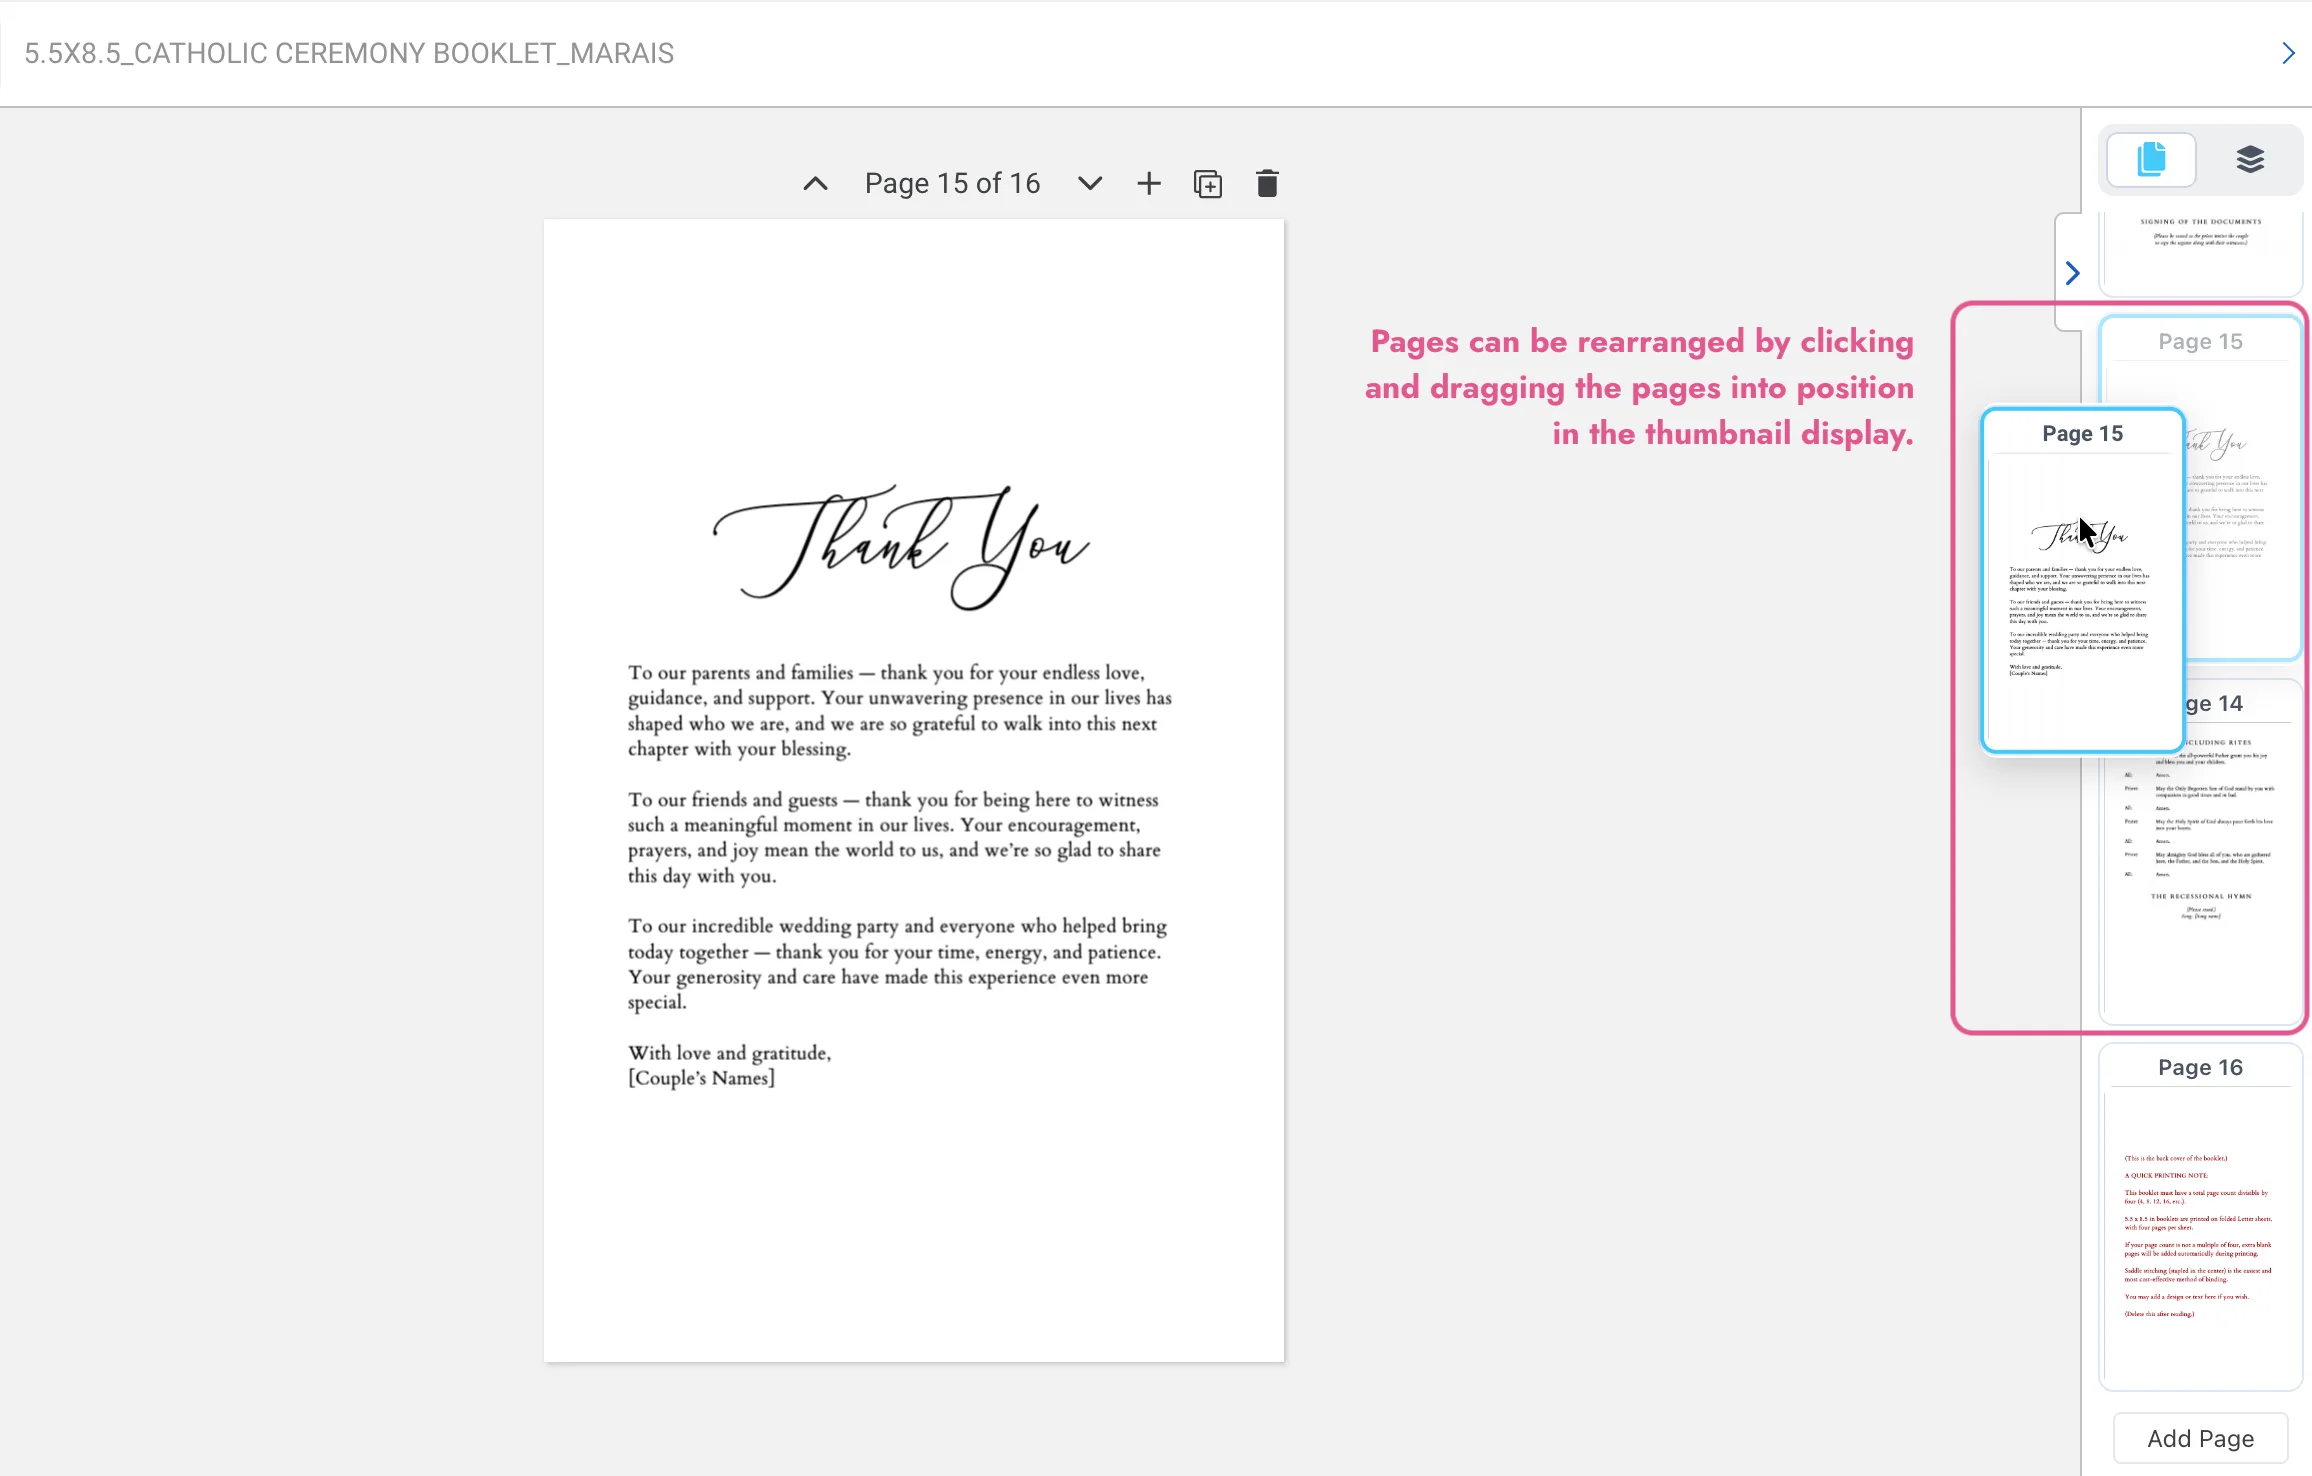
To rearrange pages, click and drag the thumbnails into position.
Placeholder Text on Pages 2 and 16
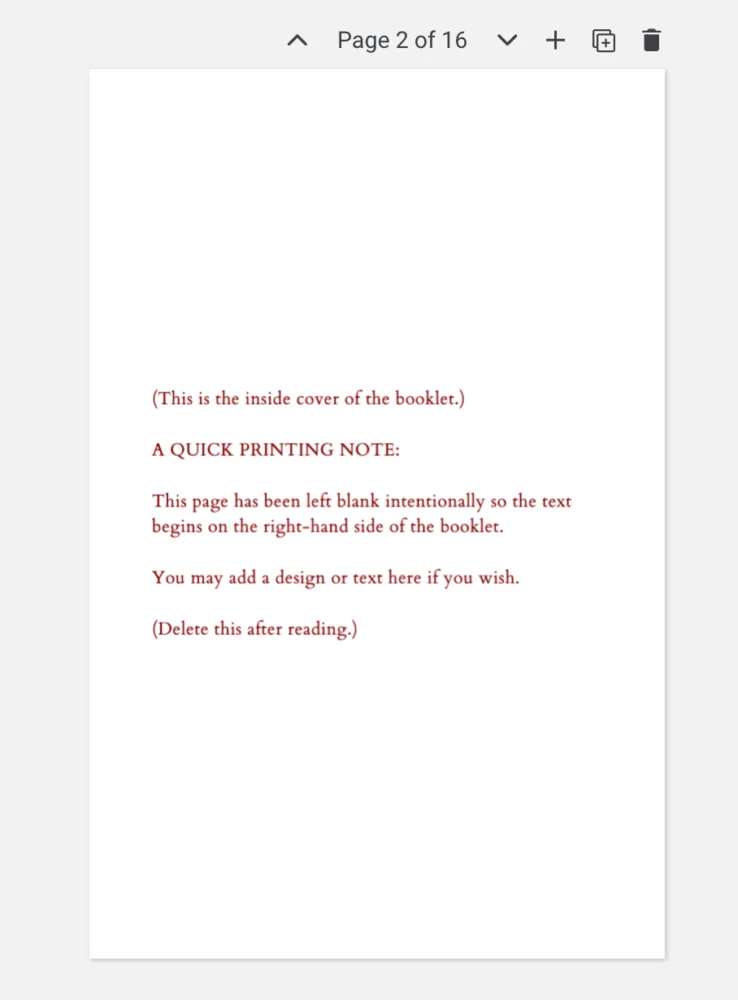
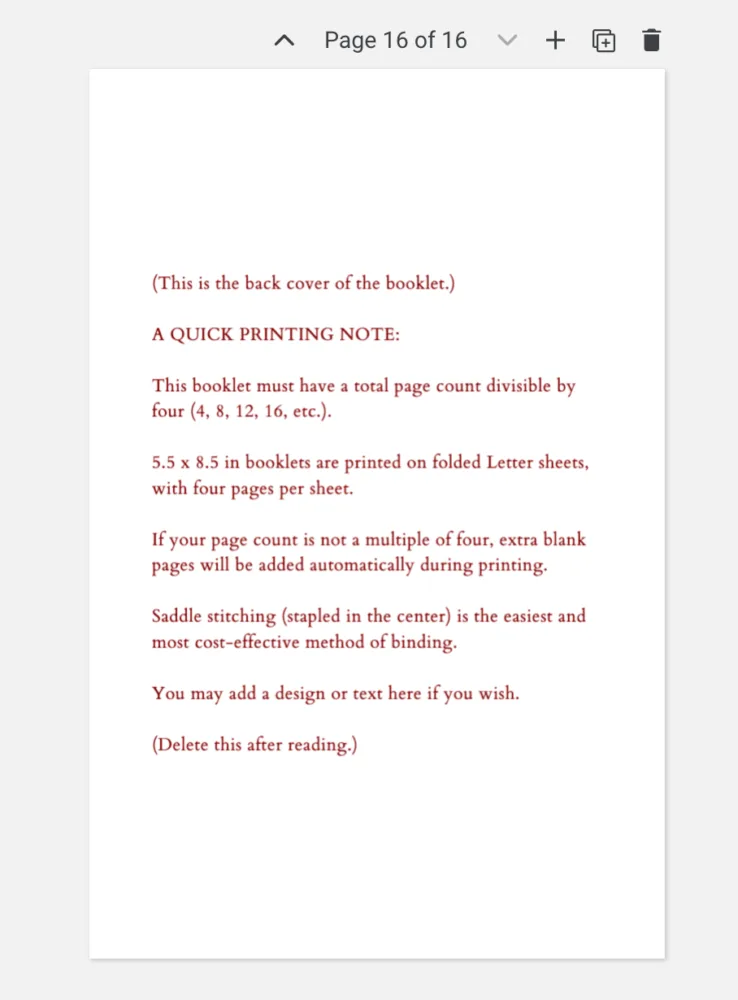
Pages 2 and 16 contain instructional notes that must be deleted or hidden before exporting your booklet.
Page 2 is the inside cover and has been left blank intentionally so your content begins on the right-hand side when the booklet is opened but you’re welcome to add your own text or design here if you’d like to use the space.
Page 16 is the back cover, which depending on your design may be blank — feel free to add a message, image, or decorative element here too. Learn how to add images in this tutorial.
The pages are there because your booklet must have a total page count divisible by four (4, 8, 12, 16, 20 and so on). This is because booklets are printed on folded sheets with four pages per sheet, and a print shop will not be able to produce your booklet correctly if the page count doesn’t meet this requirement.
Printing Your Booklet
Once you’re happy with your design and ready to print, find our full download and printing instructions at How to Print Your Catholic Wedding Ceremony Booklet Template Professionally.
Final Thoughts
Text formatting and layout in browser-based editors has its limitations, but we want you to have a great experience with your template. Everything in this guide was put in place after careful consideration of what makes a booklet template easier to use and less stressful to edit. If you do get stuck, just reach out — we’re happy to work through it with you.