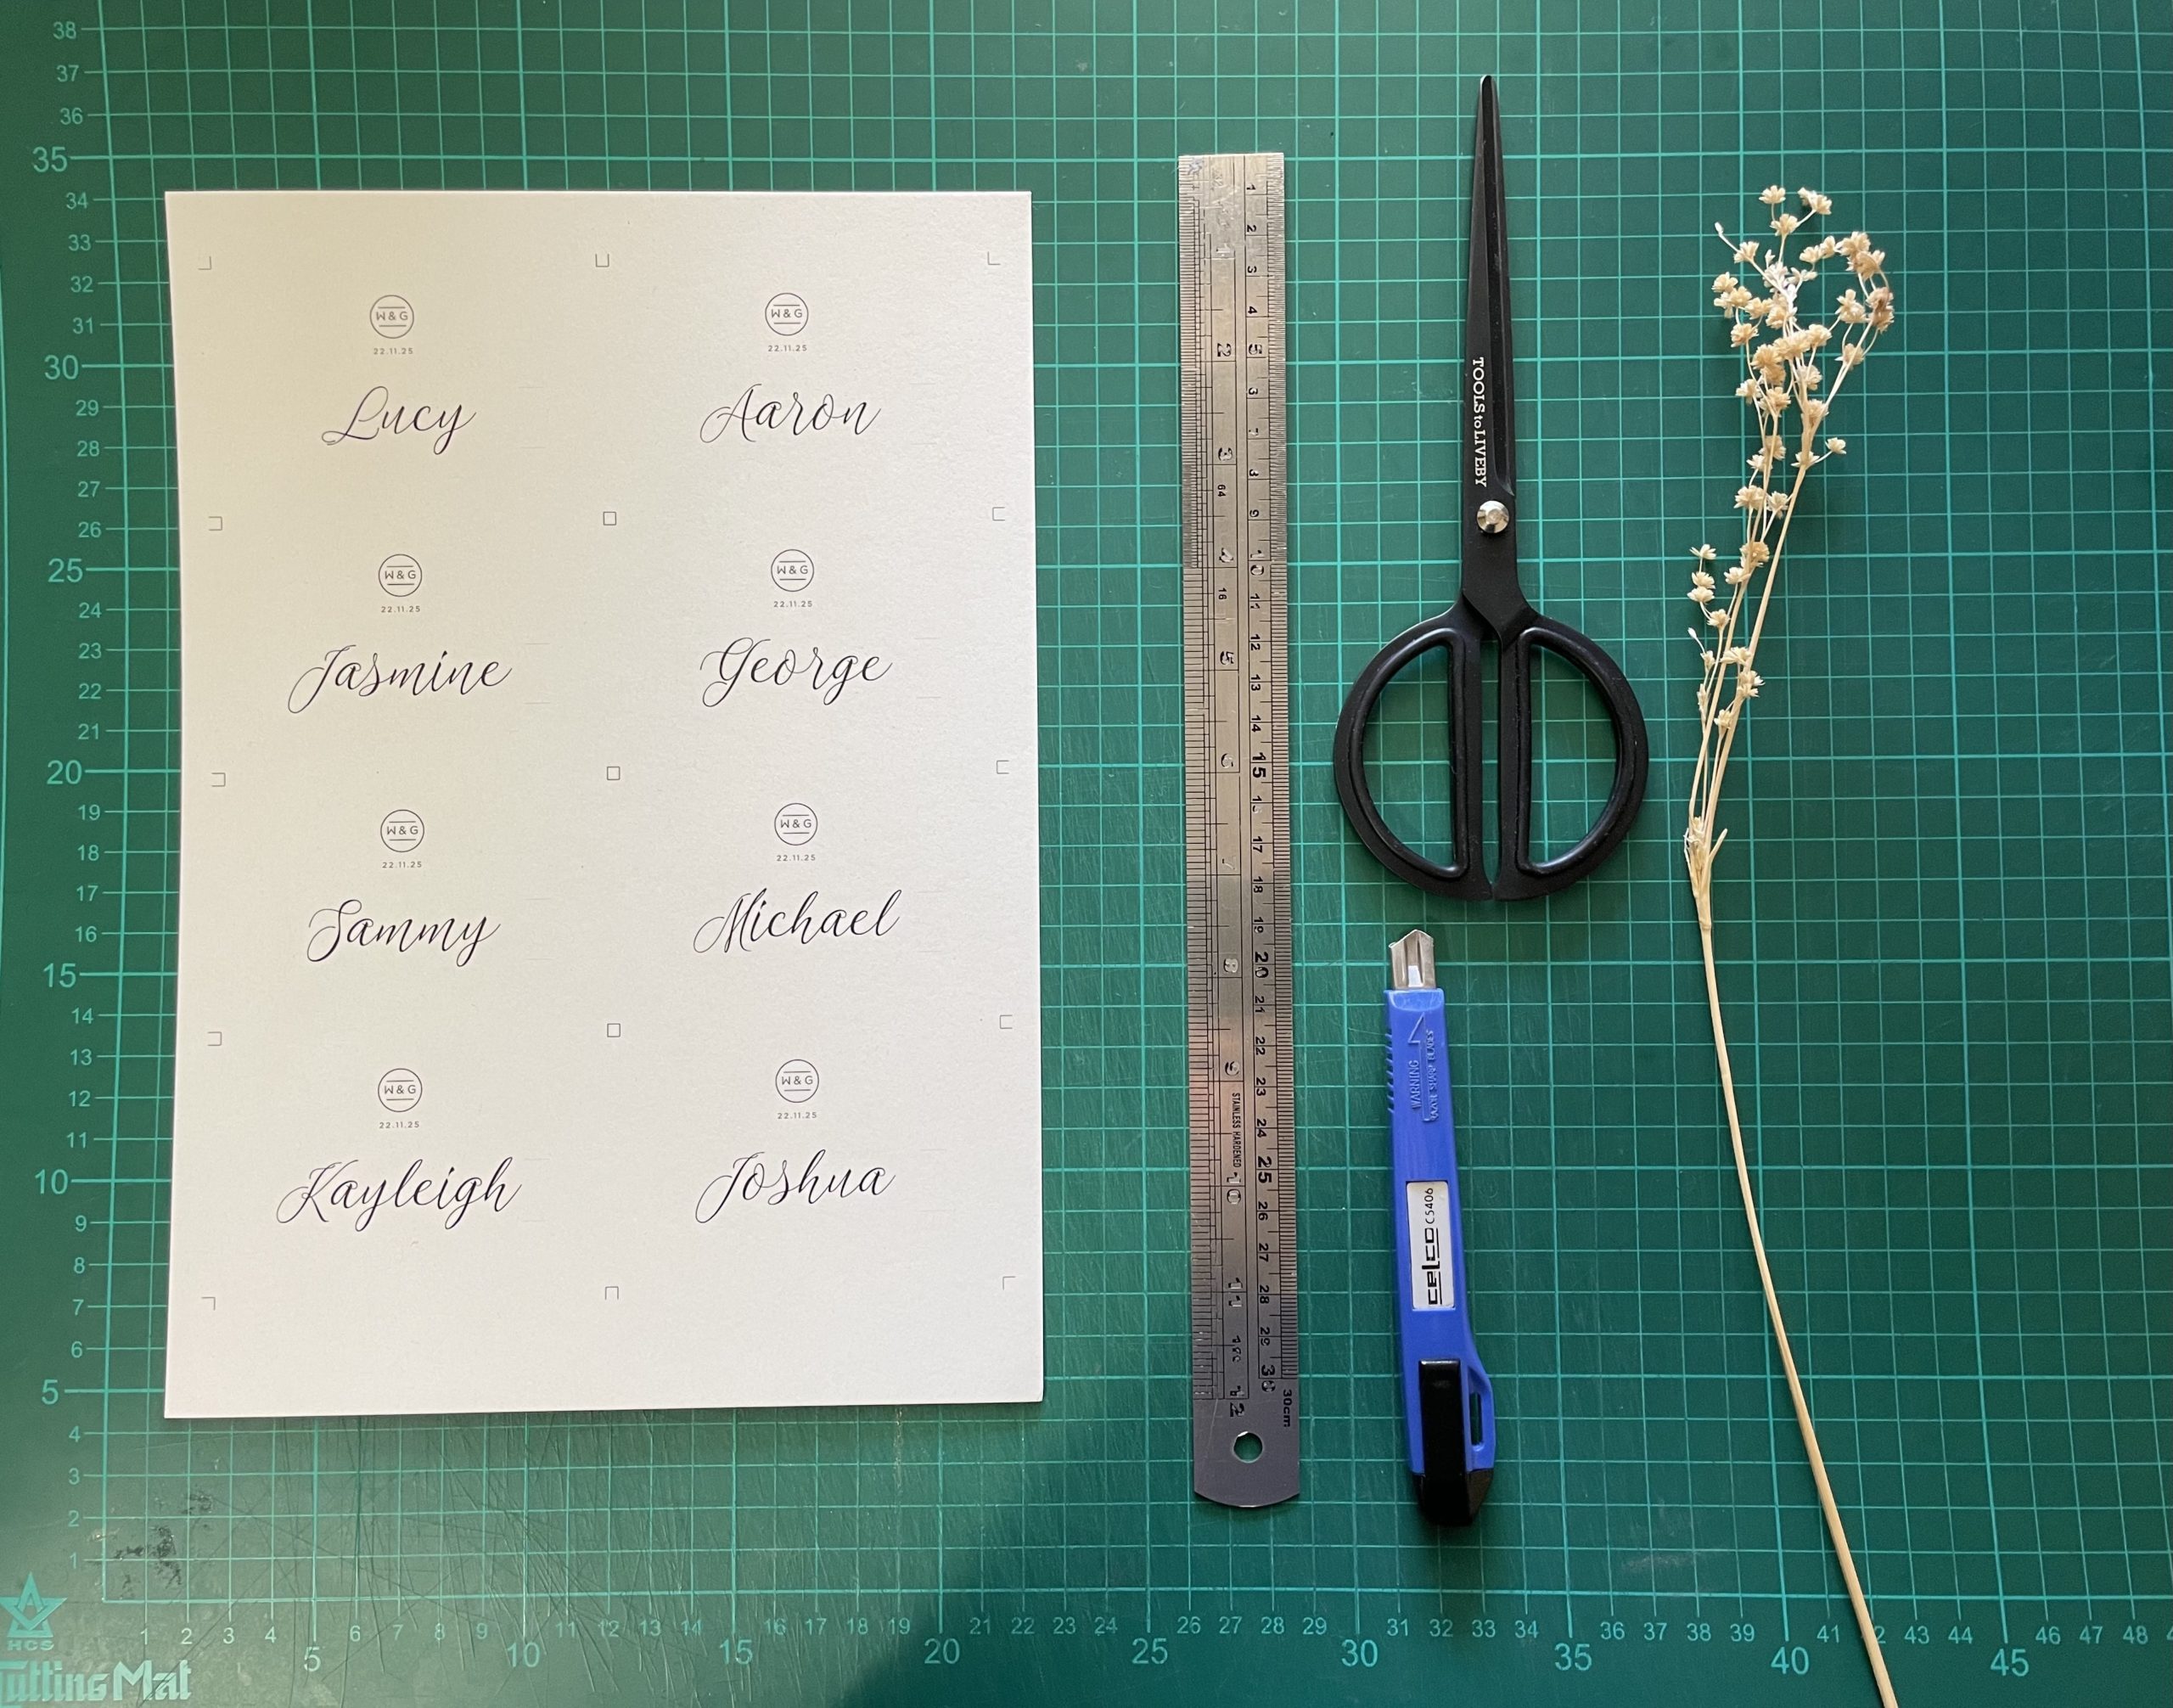
Materials Required
- Flower Place Card Template from The Hello Bureau
- 200-300gsm cardboard (to print the place cards on)
- Desktop Printer (if you’re printing the cards at home)
- Scissors or craft/utility knife
- Metal ruler
- Cutting mat
- A few bunches of your favourite foliage or flowers – dried or fresh. I recommend using hardy varieties with long stems such as eucalyptus, rosemary, lavender, Geraldton Wax or Baby’s Breath
Time Required
- Around 30 minutes to type up all your guest names into the template (for 100 people)
- Printing time can vary on the quantity of place cards you require. If you’re printing at home, this process should only take a few minutes
- Cutting time can be about 5-10 minutes per sheet
- Inserting foliage takes about 30 seconds to 1 minute per place card
Step 1: The template and printing
The first step is to create your place cards digitally with our specially designed wedding place cards template (which can be found here.)
The template is fully editable so you can change all the elements around. There are two cut lines on the template already, please ensure you DO NOT delete these as you will need them as a guide for where to cut the slits for the foliage to sit in. Edit page one to exactly how you would like it, then simply duplicate the page and edit the names on the rest. Once completed, download the template as a PDF.
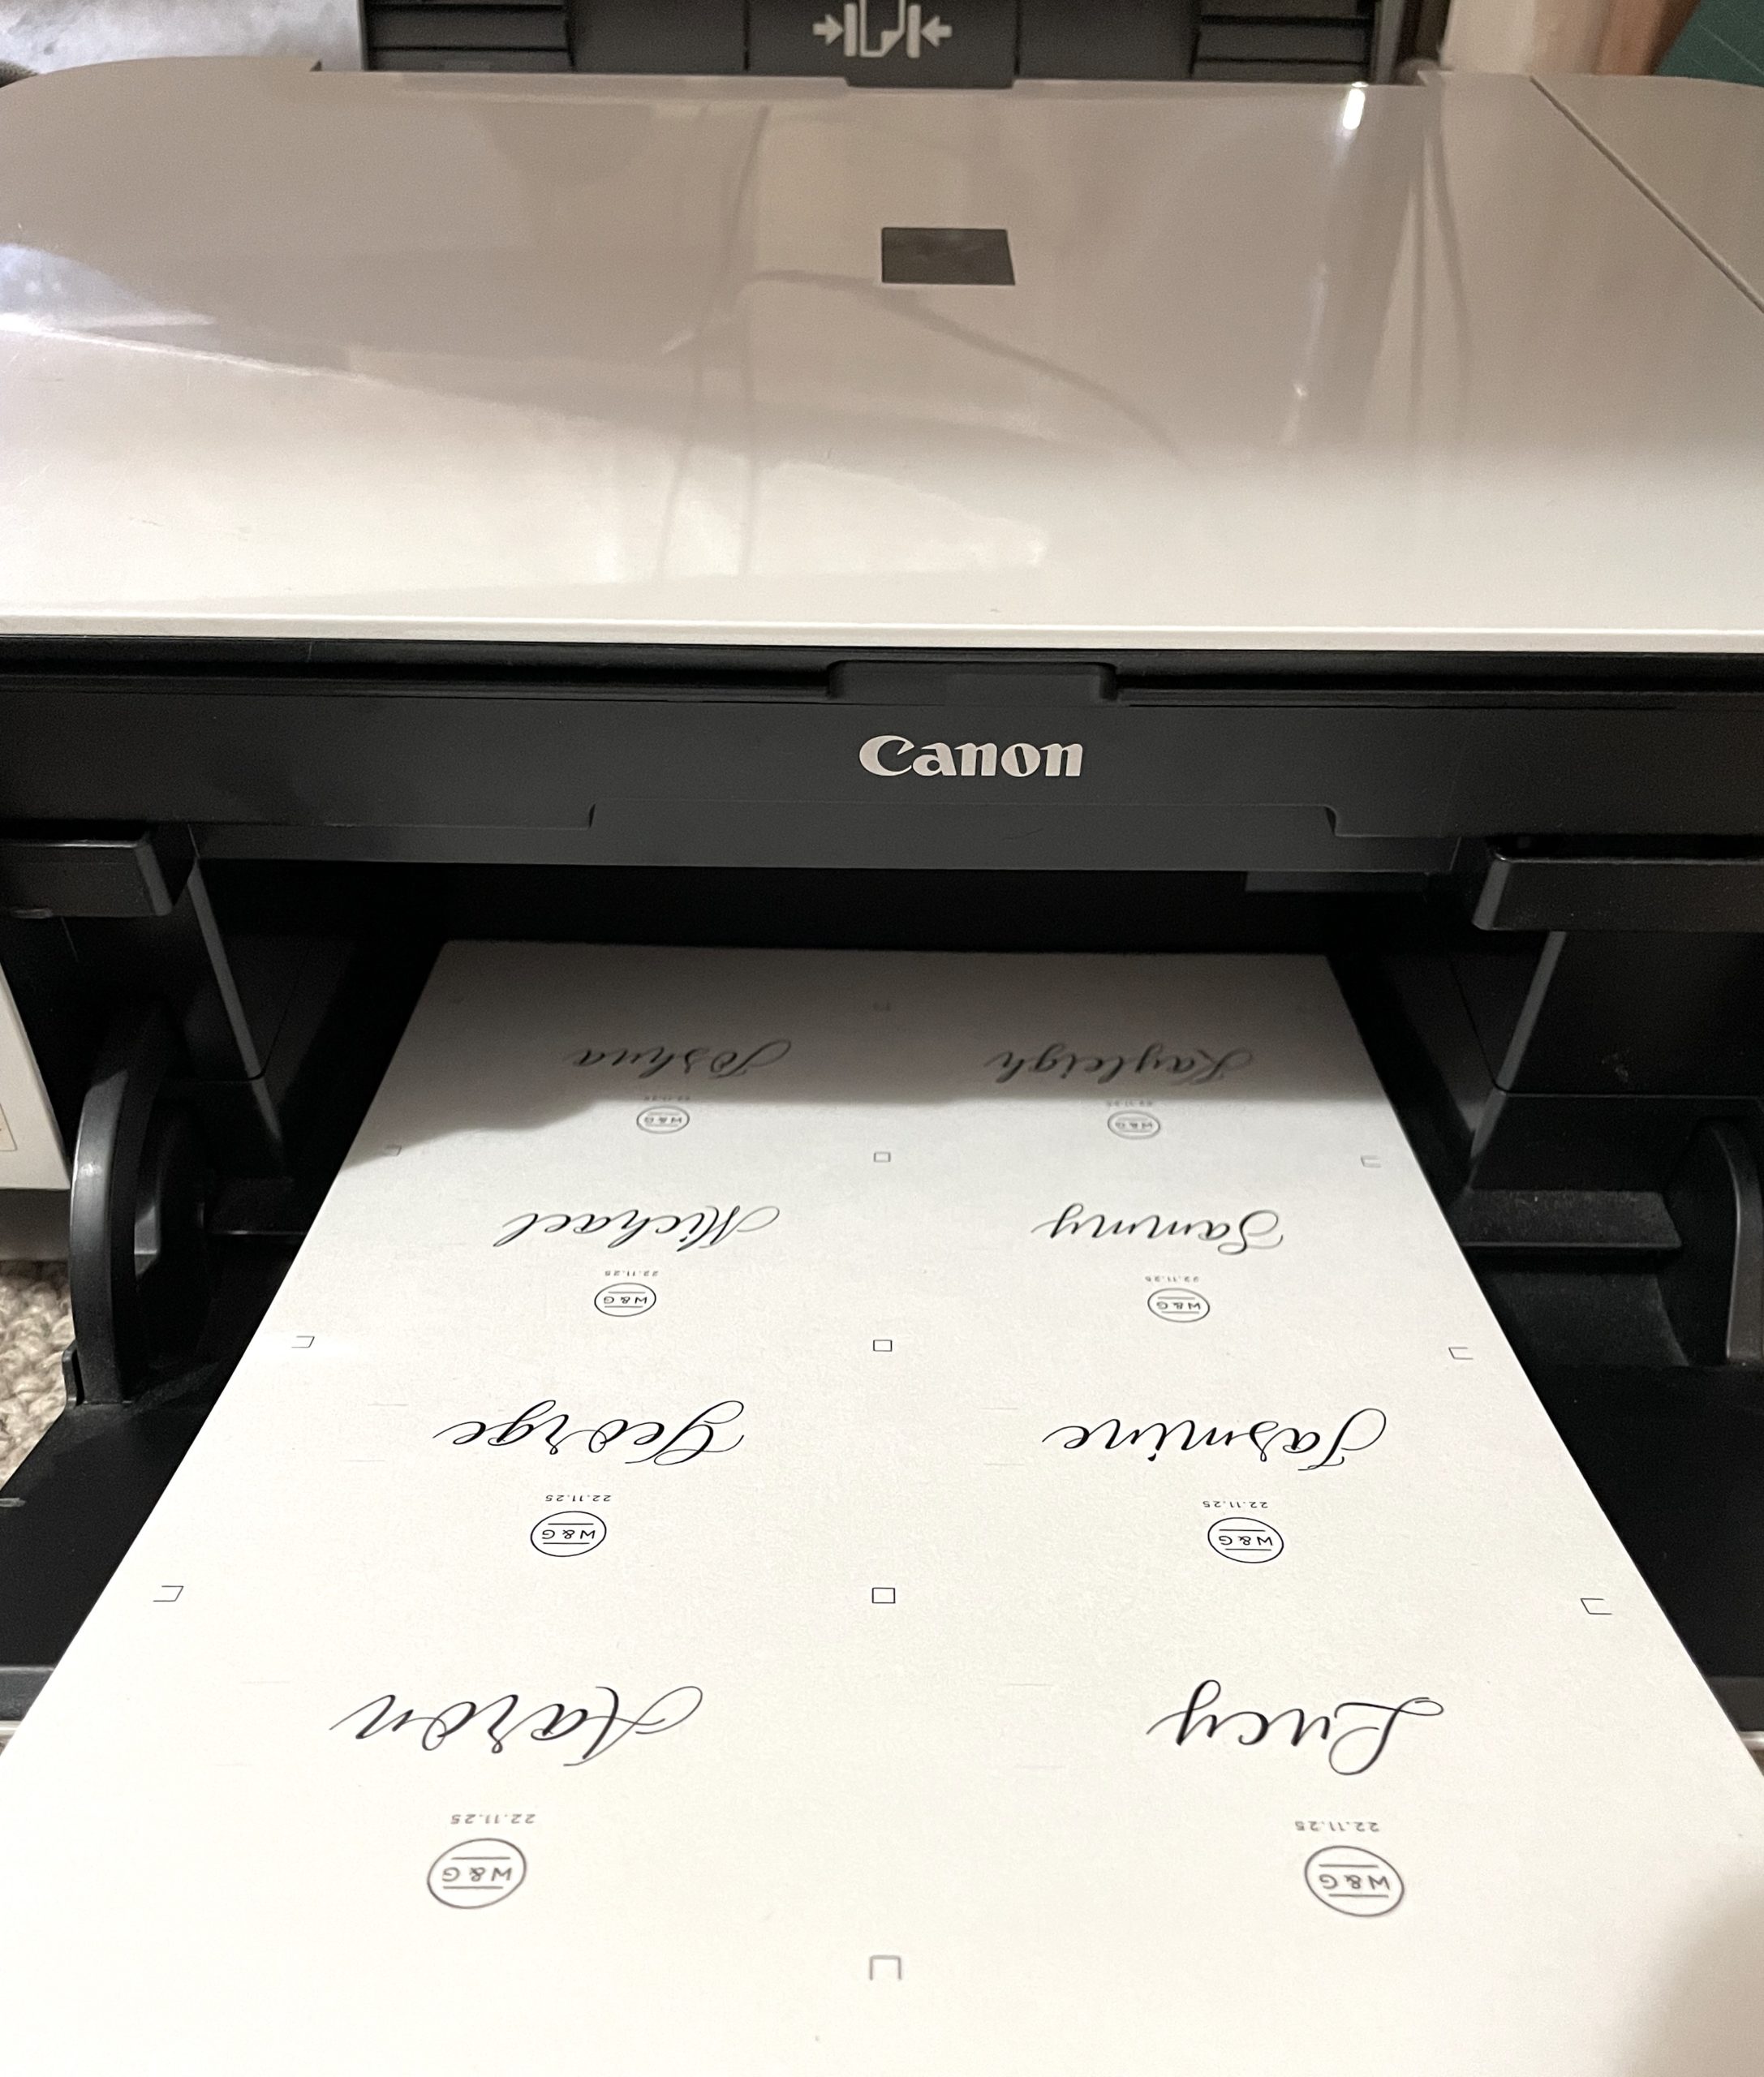
Printing the place cards at home
If you plan to print and cut these at home, use the following settings when downloading the template (choose the paper size that is applicable to you):

When printing the PDF at home, you may need to change your printer settings to ‘Scale to fit’ so that the trim marks appear on the page. It is best to do a sample print on scrap paper first before using your desired cardstock.
I successfully printed my place cards on 300gsm cardstock using a desktop Canon MP240 inkjet printer. However, it’s important to note that not all printers are capable of handling heavy cardstock. Therefore, kindly ensure that your printer is compatible before attempting to print (and please avoid forcing it through if it’s not).
Printing the place cards professionally
If you intend to send the place cards to be printed and cut professionally, use the following settings when downloading your template. You should end up with a multiple page PDF with one place card per page.

In our opinion, the best place to print individual wedding place cards professionally is at your local print shop. Most of them take walk-in orders and have a wide range of paper available to suit your needs. It’s also easier to speak to someone in person about your requirements instead of going back and forth via email.
However, if you are not in close proximity to a local print shop, I recommend the following places to order your individual place cards online. I highly advise contacting the printing team via email first and asking them to assist with printing individually-named place cards.
Australia: Officeworks (You can get in touch with their design team here.)
UK: Printed.com (Highly experienced printer for wedding stationery. You can contact them about your place cards here.)
USA: Prints of Love (Every order is reviewed by their design team before it is sent to print and you can add order notes before submitting.)
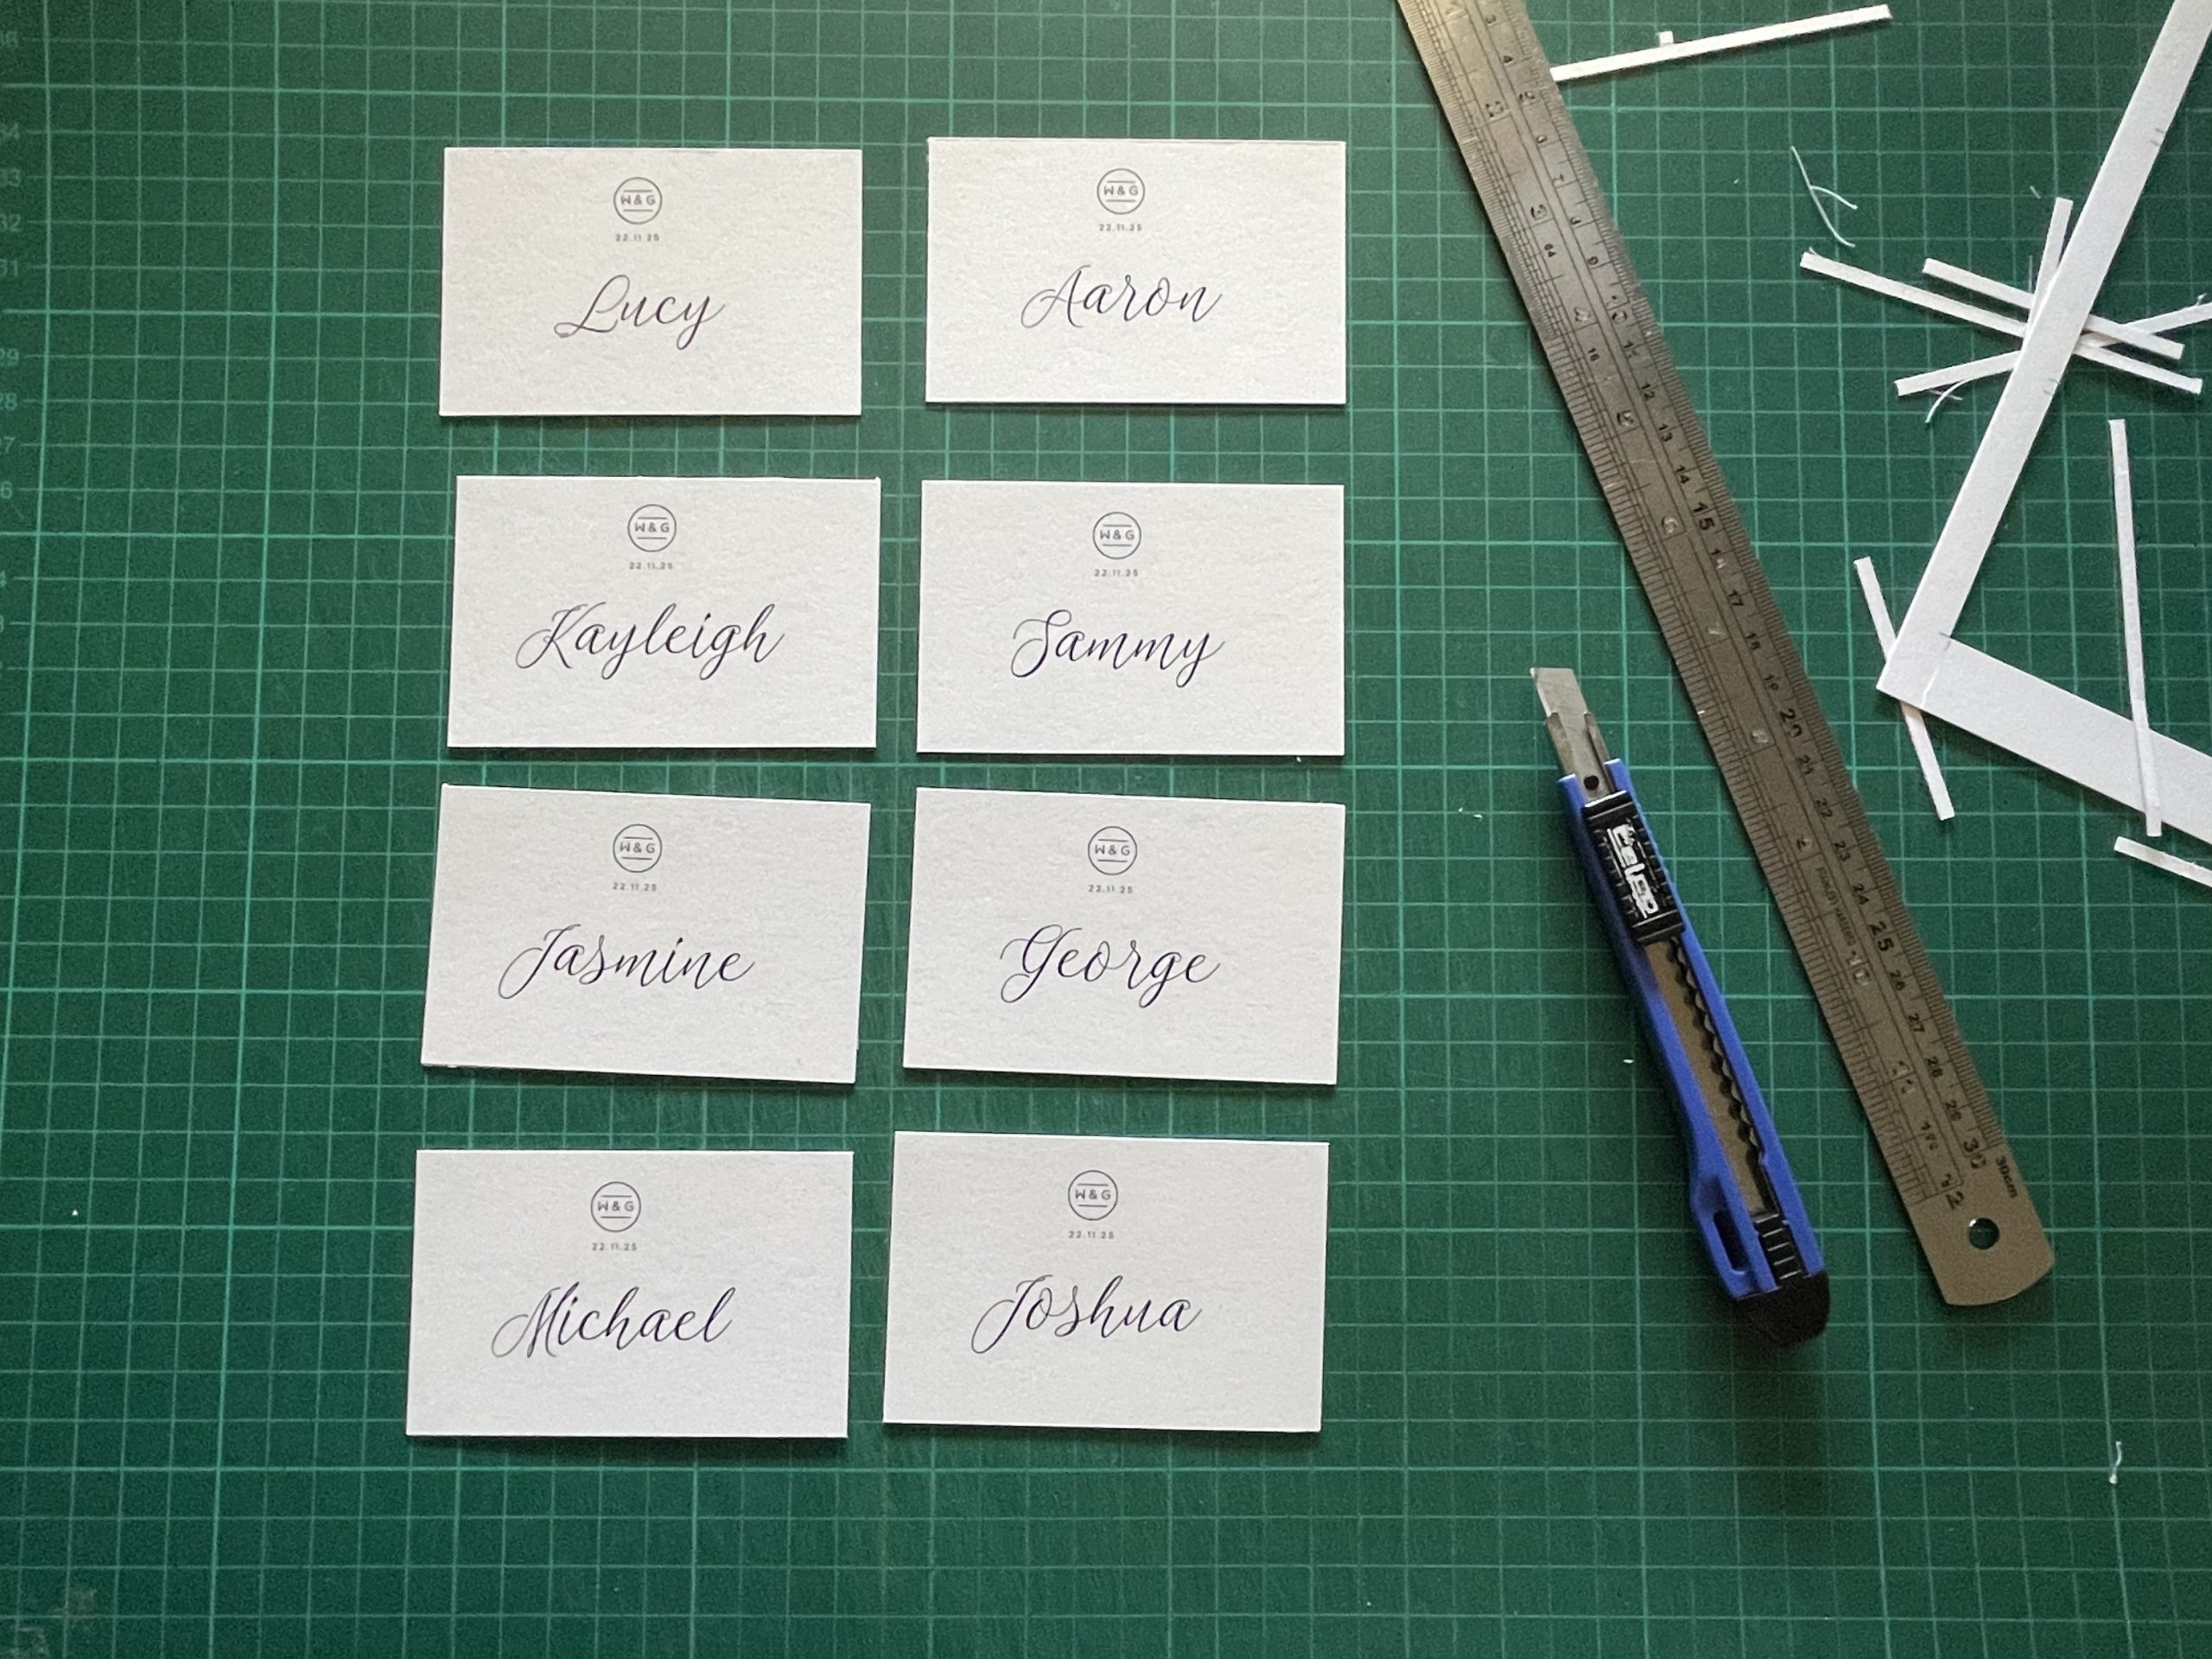
Step 2: The Trimming
Skip this step if your place cards are already professionally printed and cut to size. You will still need to cut out the two slits in each place card though.
Your template will have the trim marks already, so it’s simply cutting along them to create each individual card. I prefer to cut my place cards using a sharp utility knife and a metal ruler. My preferred method of trimming is to lightly score all the guidelines first and then go back over the lines to cut the cards out. The reason for this is so the printed guideline markers on the edges don’t get trimmed off after the first few cuts.
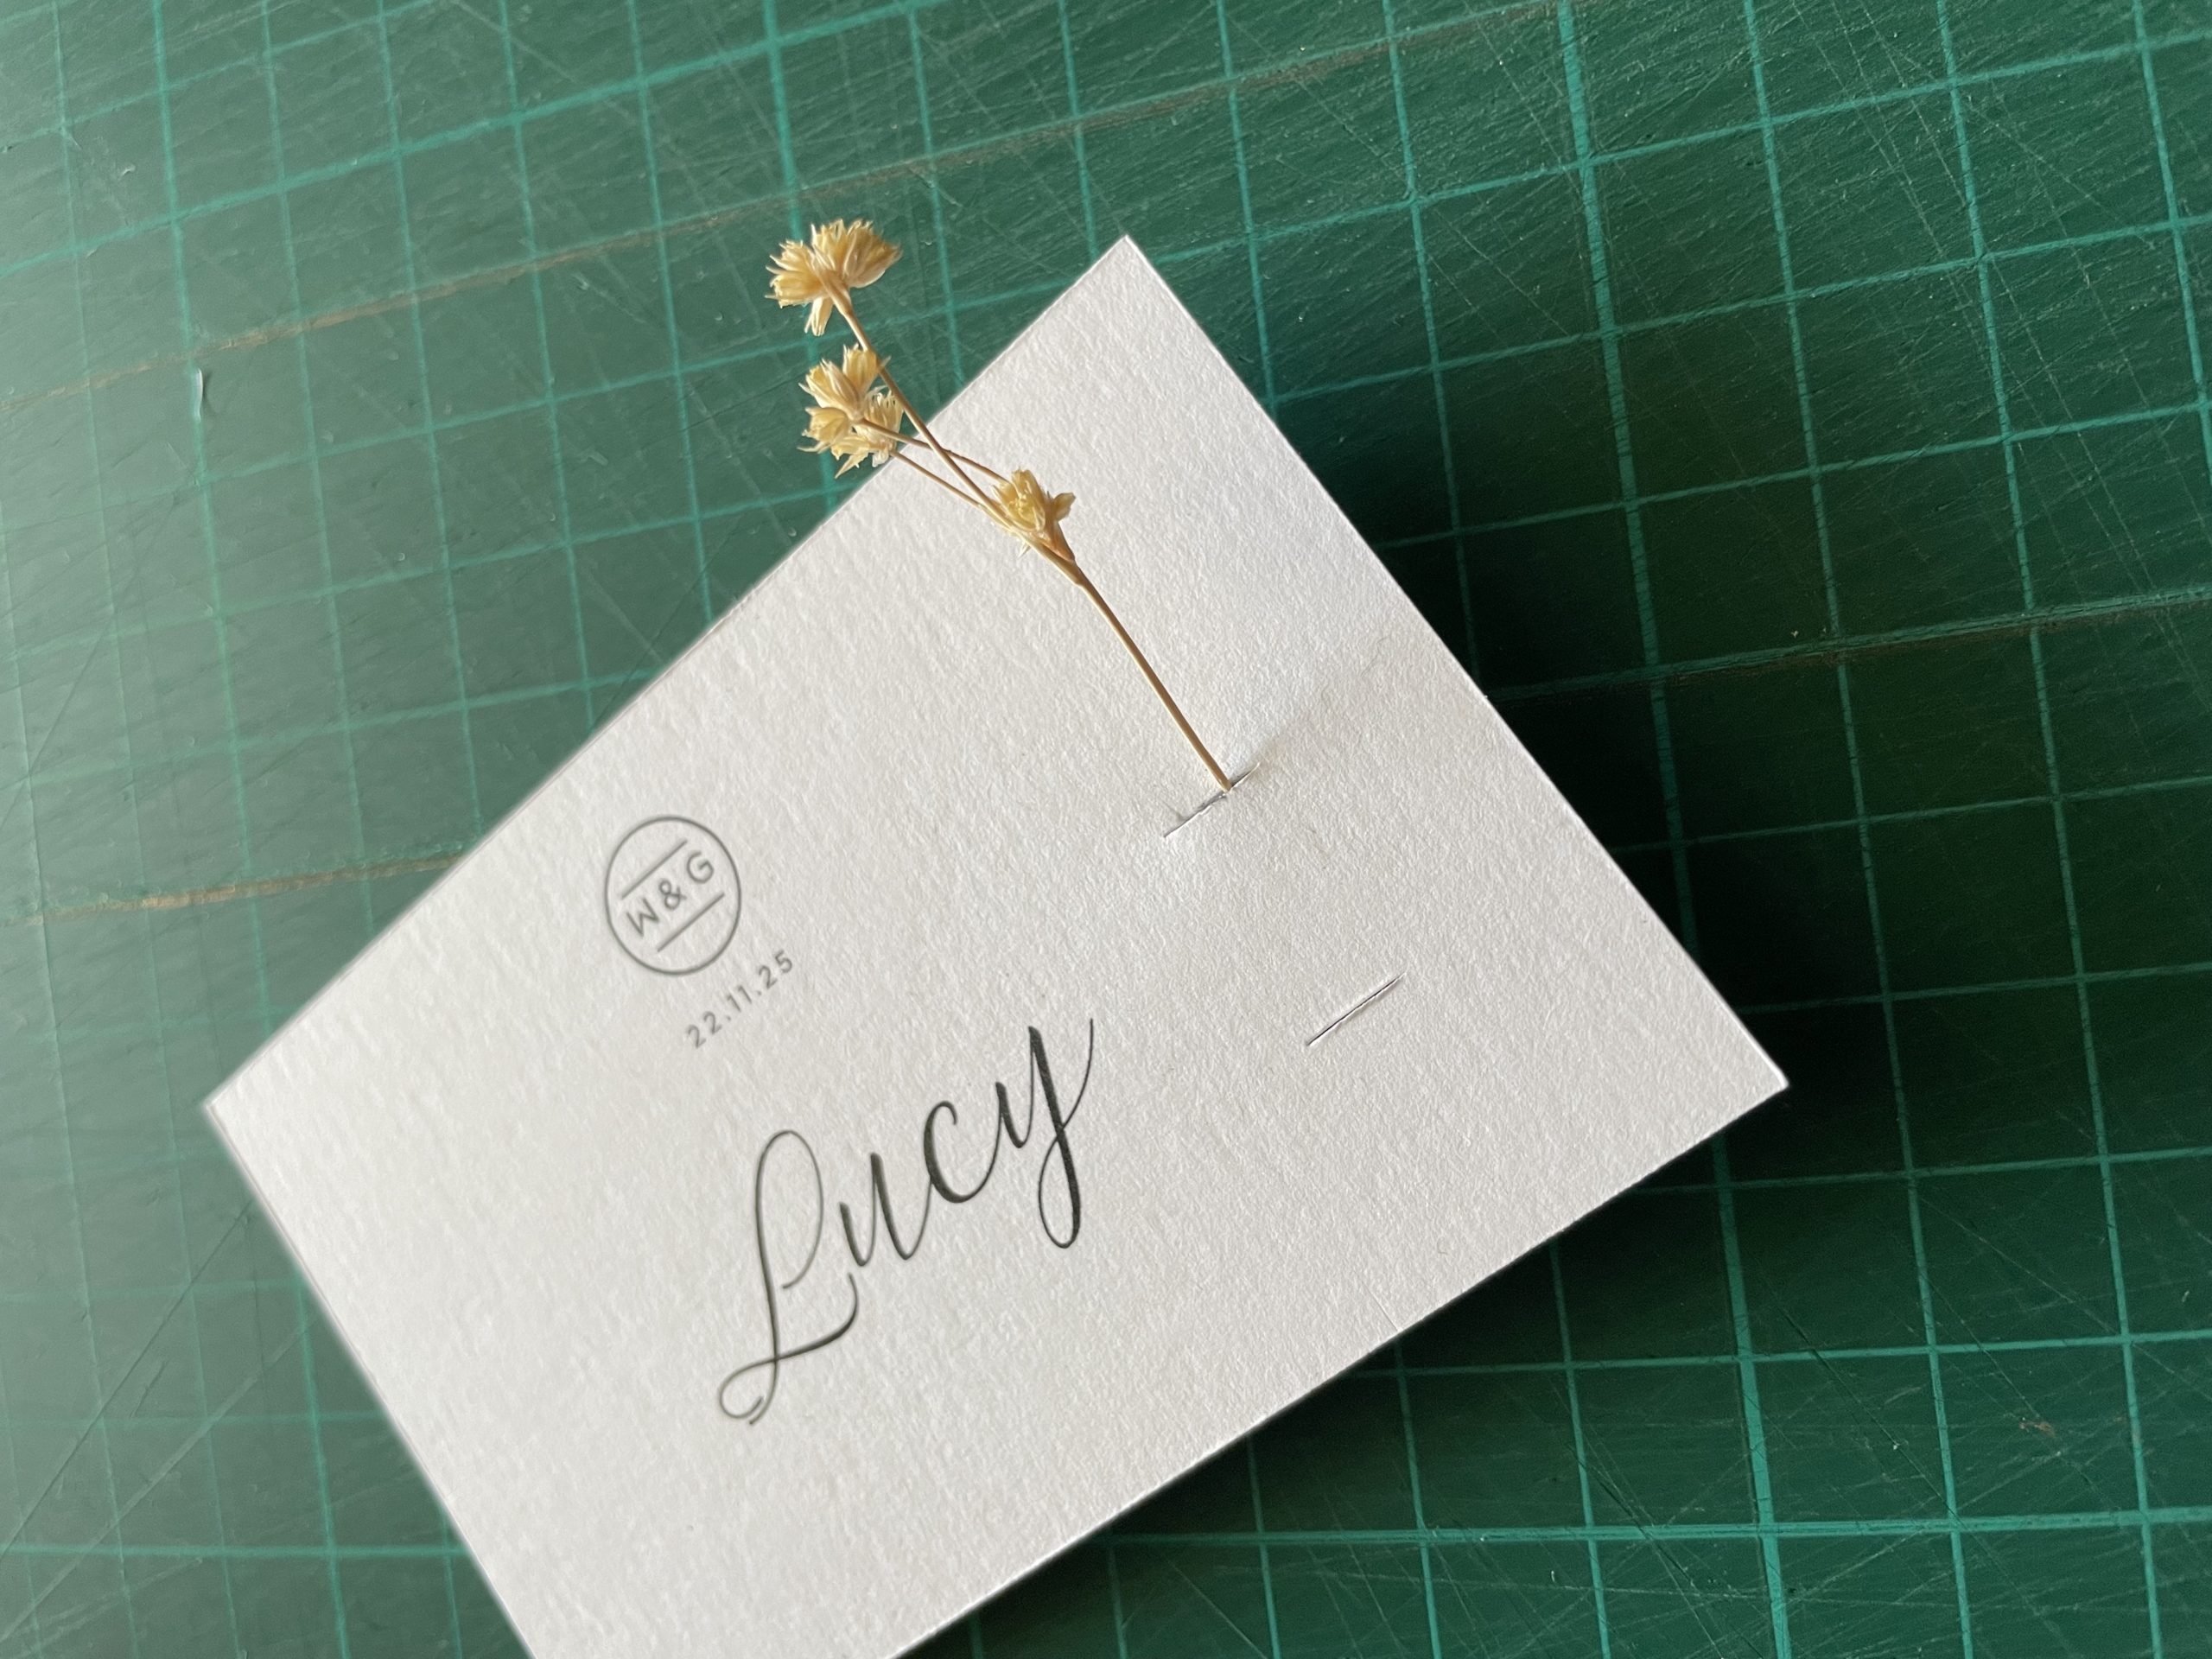
Don’t forget to also cut the slits in each card at this stage.


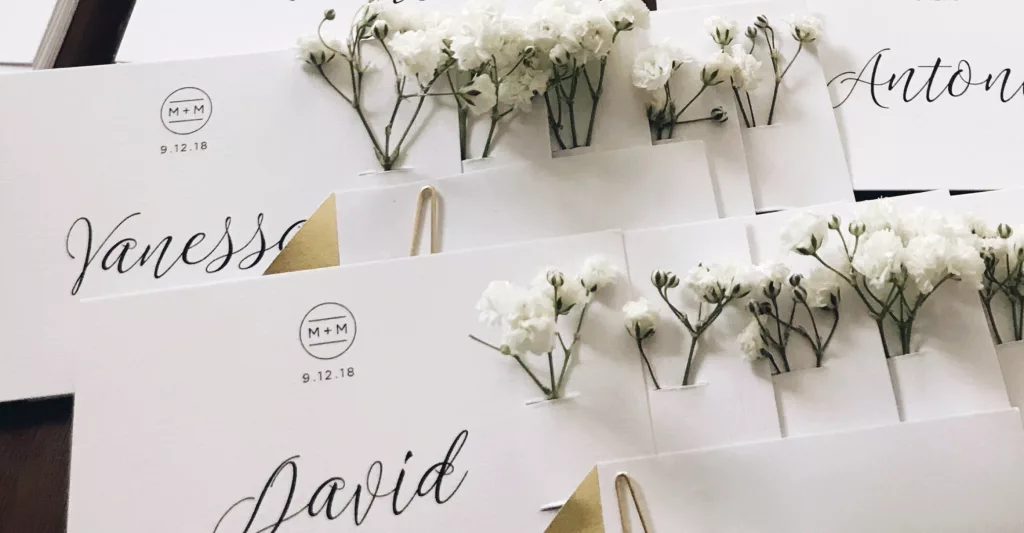
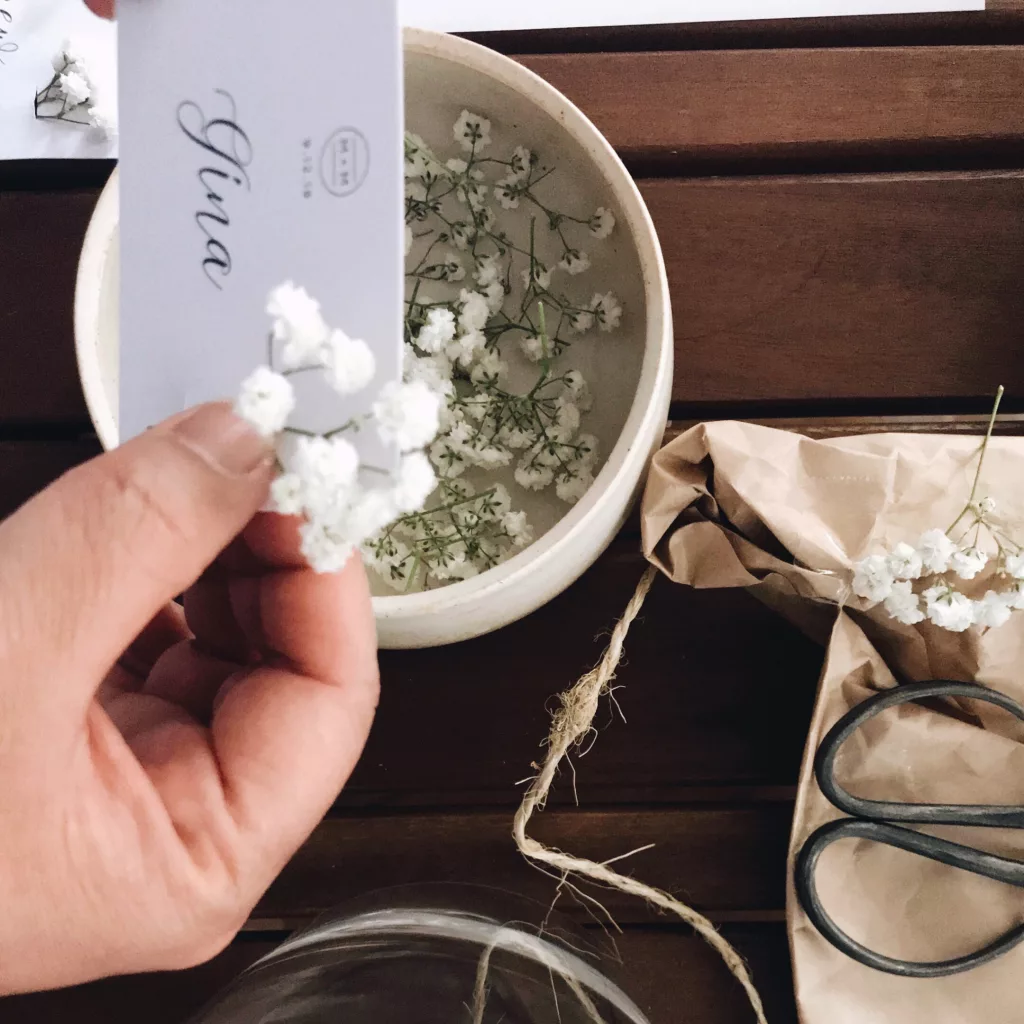
Step 3: The Foliage
This is the fun part (for those who love playing with flowers!)
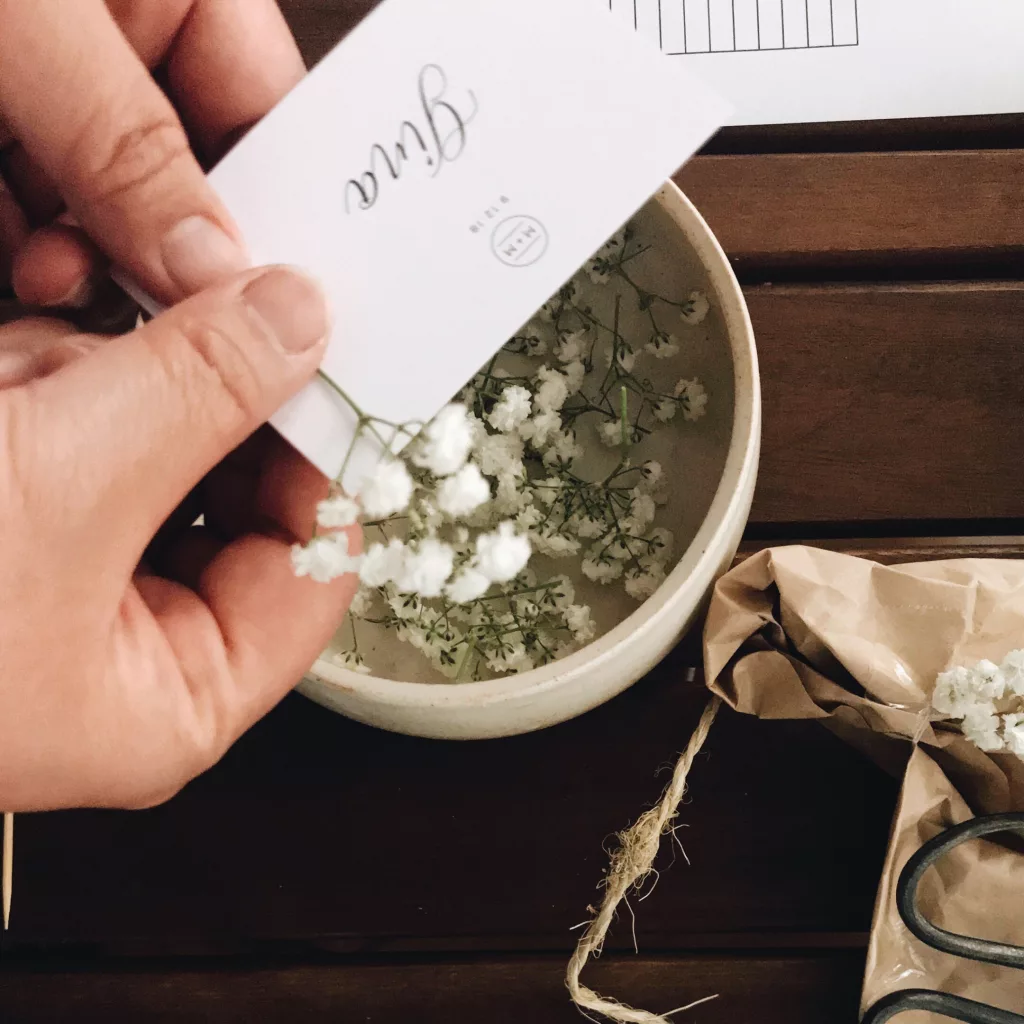
Cut small stems of foliage long enough to sit comfortably into the two slits on the place cards.
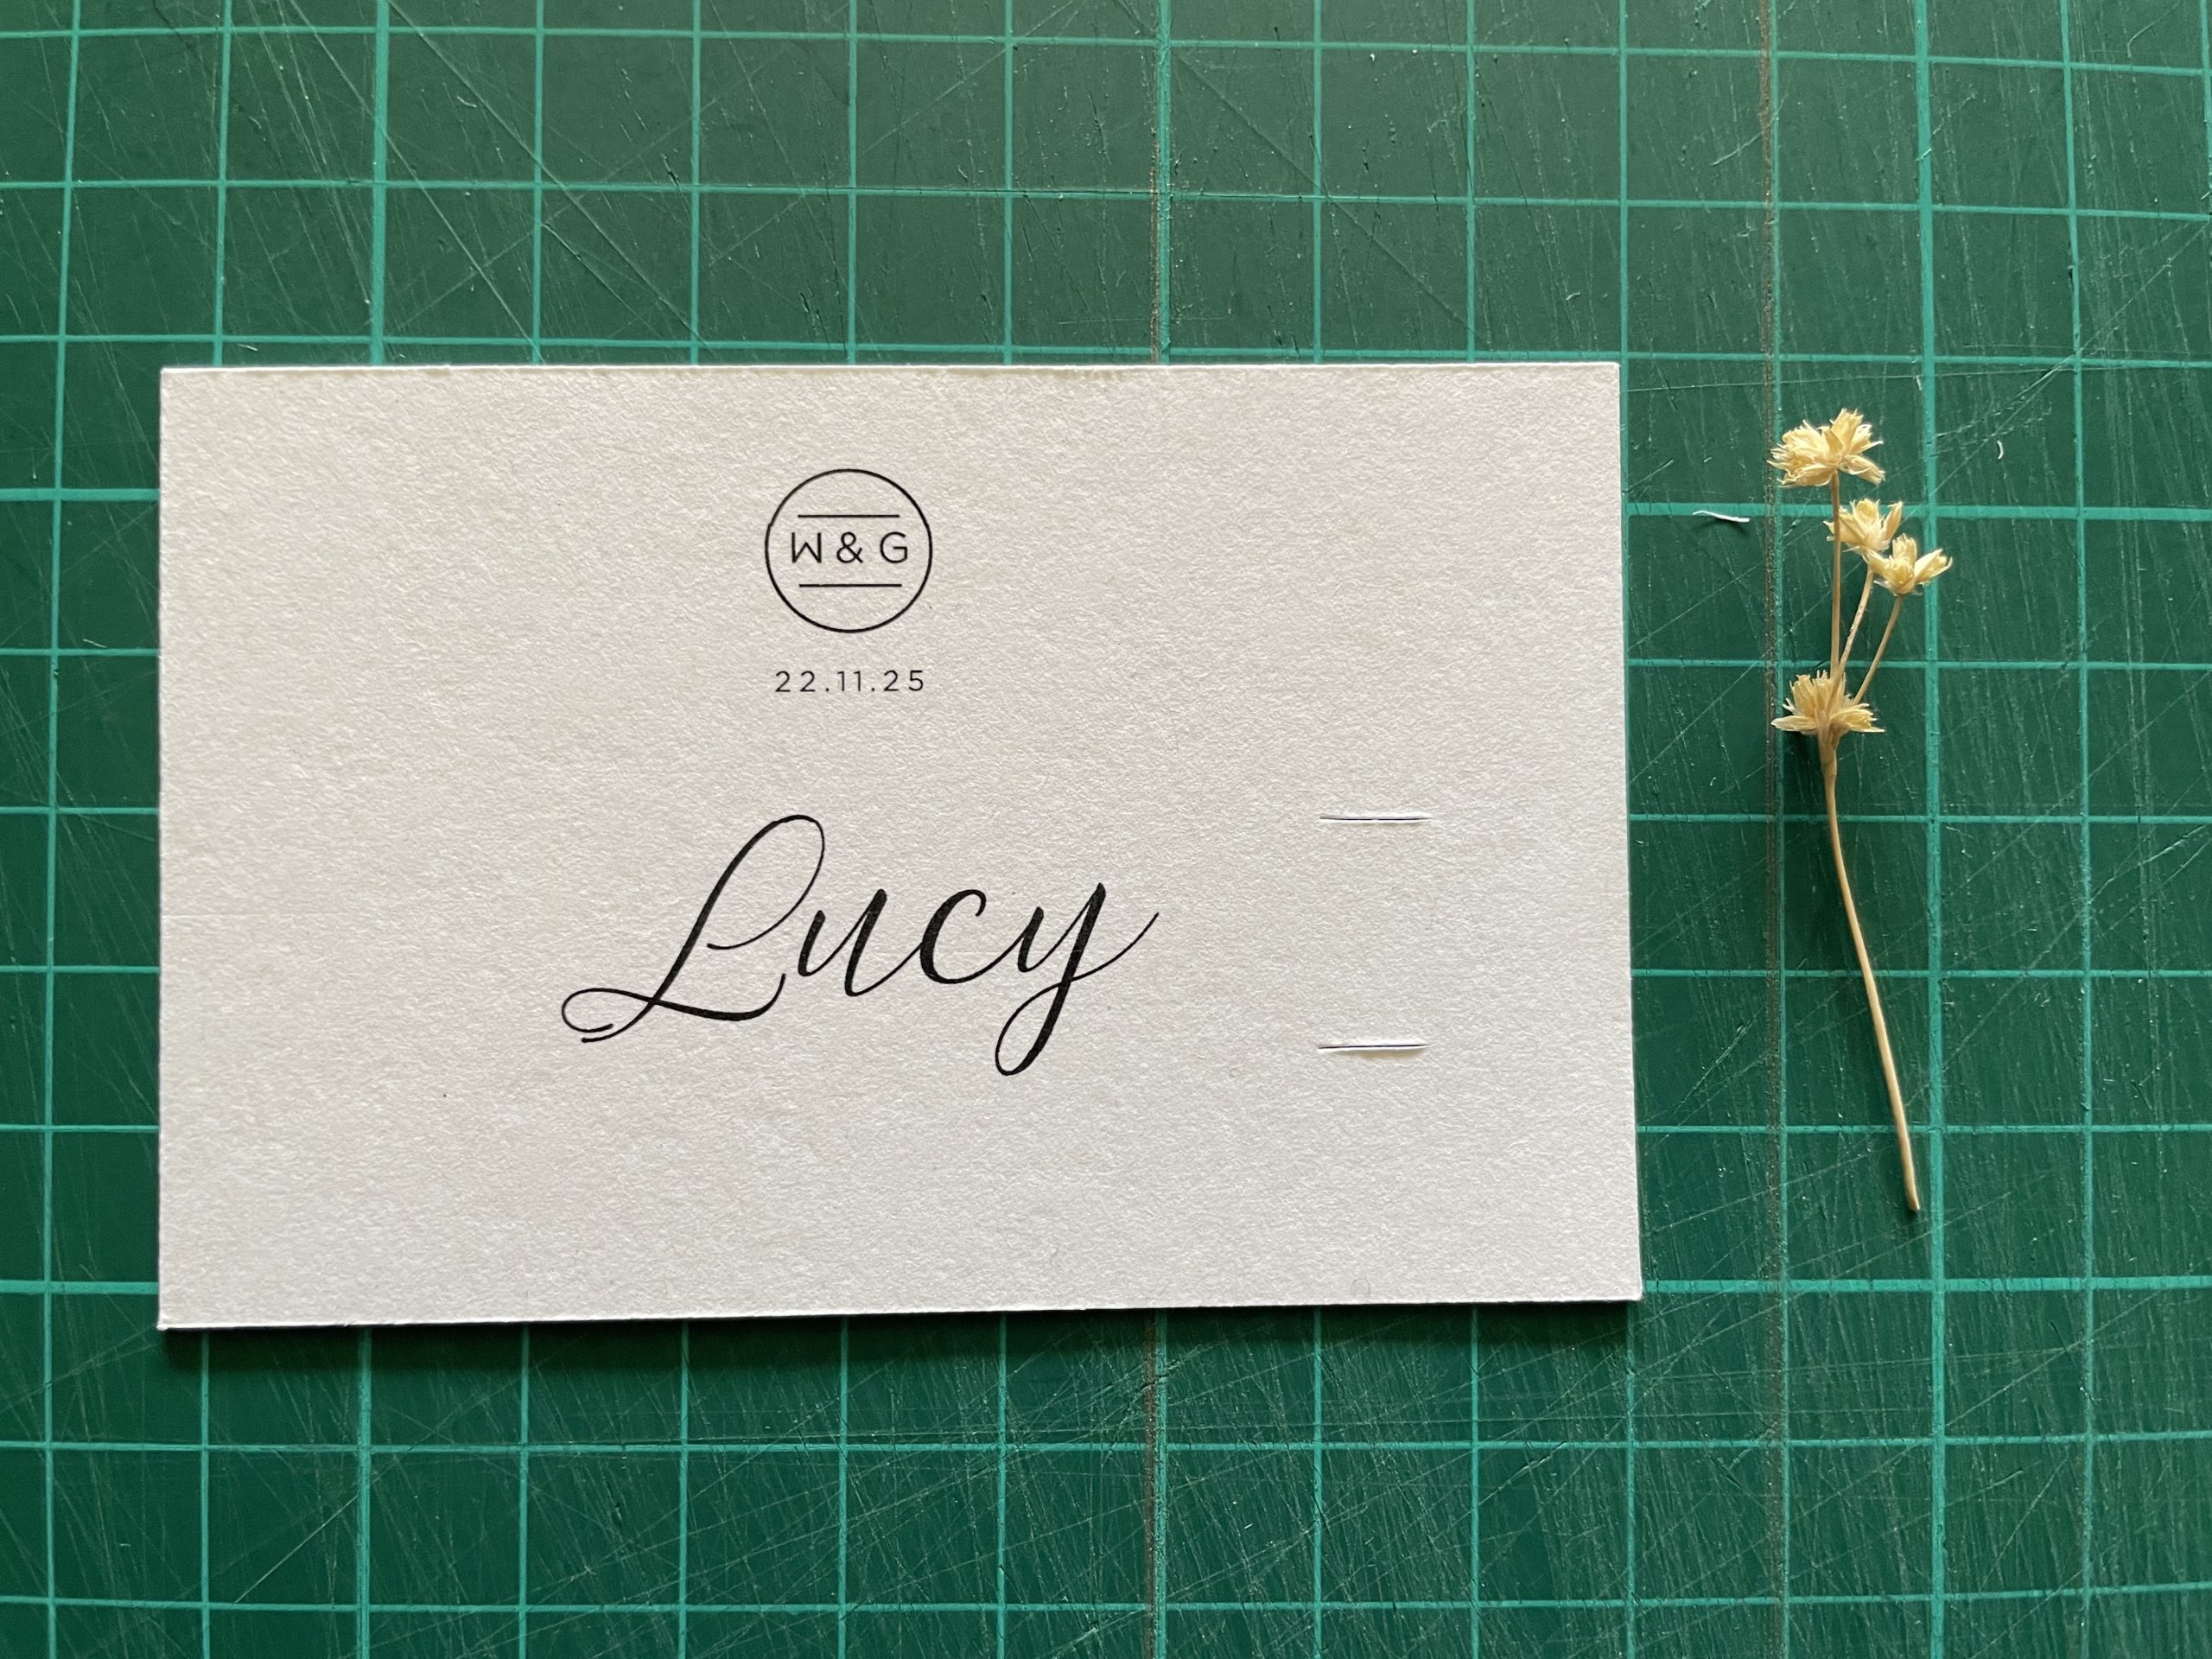
Insert the foliage stem from the top slit first and then tuck it into the bottom slit.

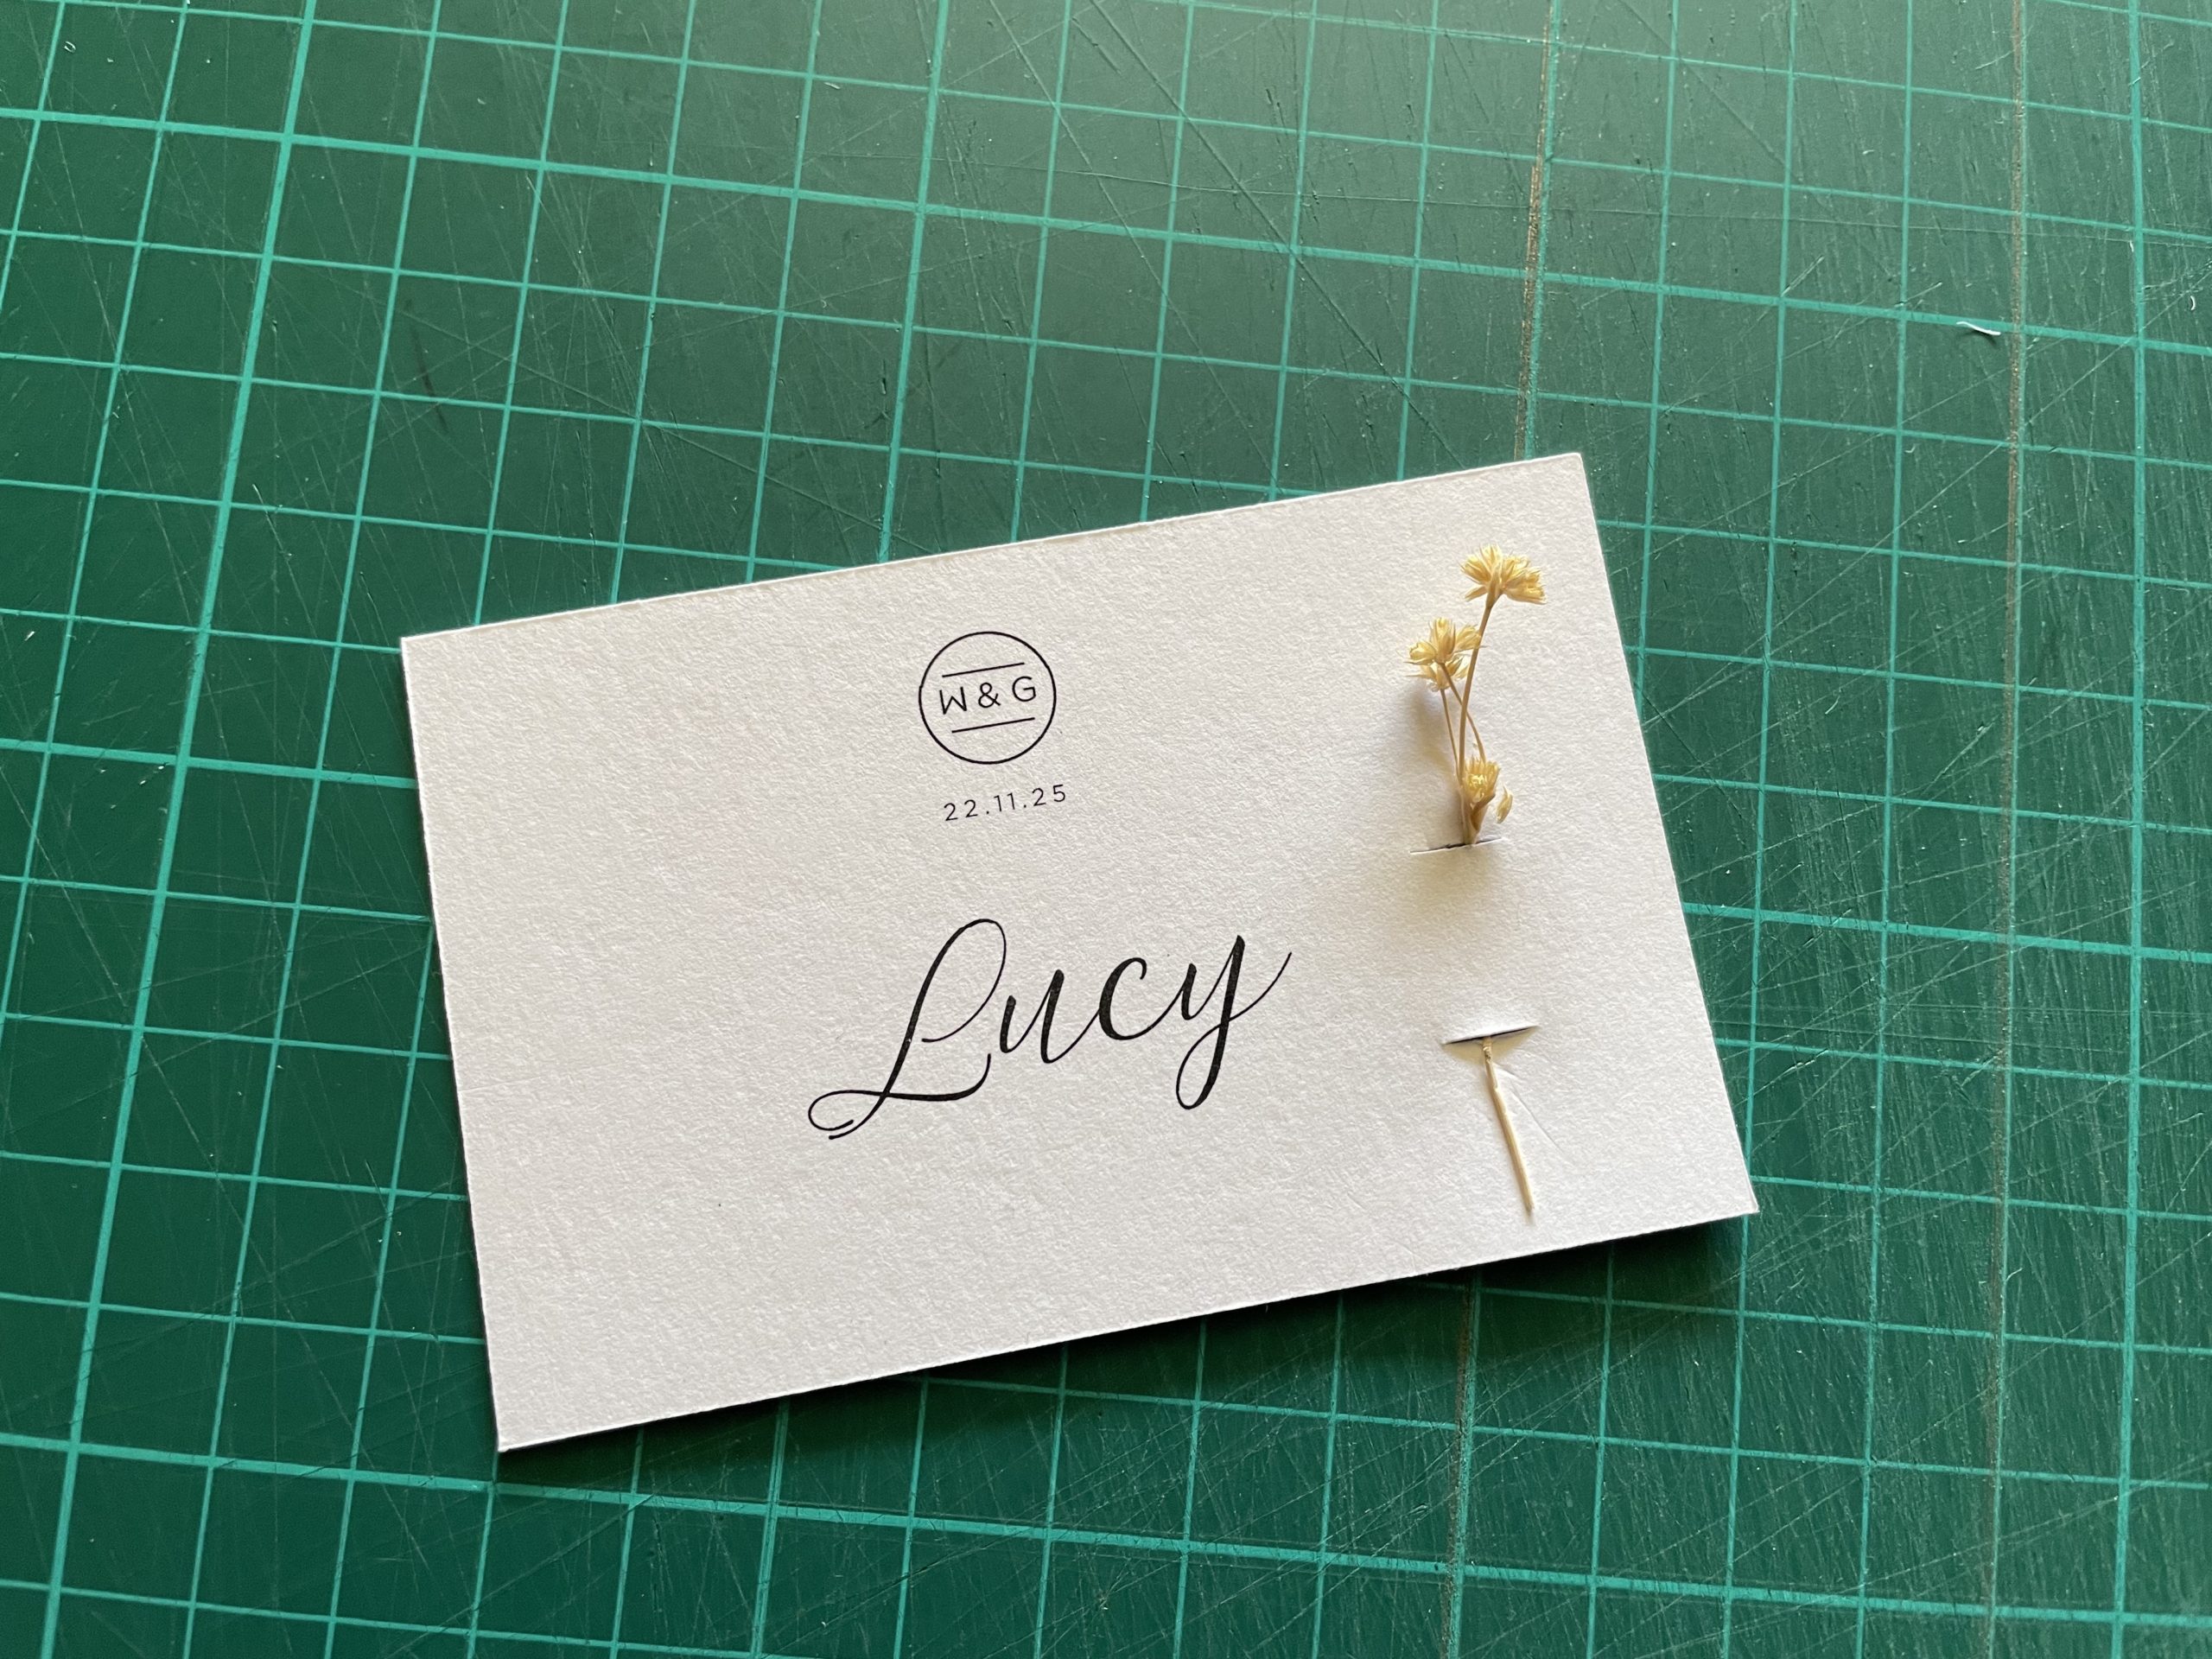
That’s pretty much it! I’ve found that dried flowers work best but you can experiment with all sorts of different types of foliage.
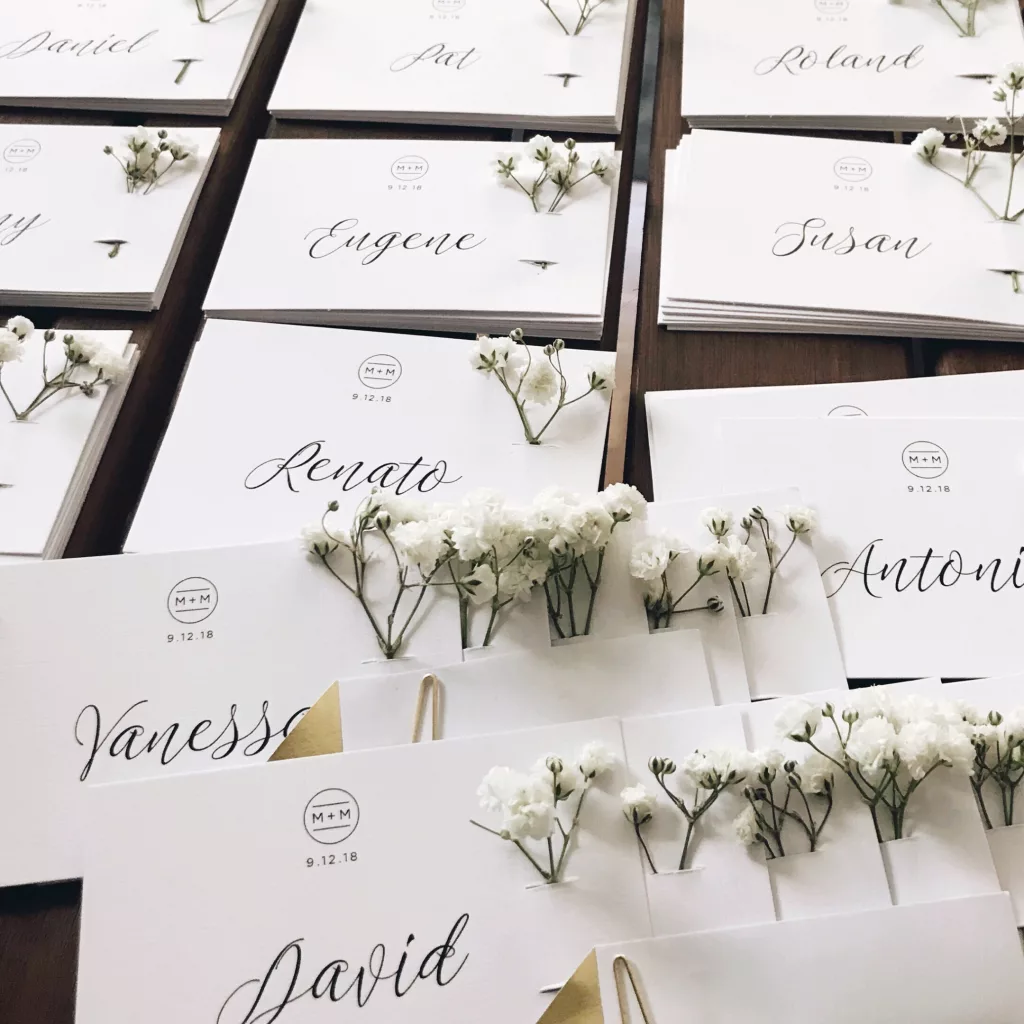
Gallery


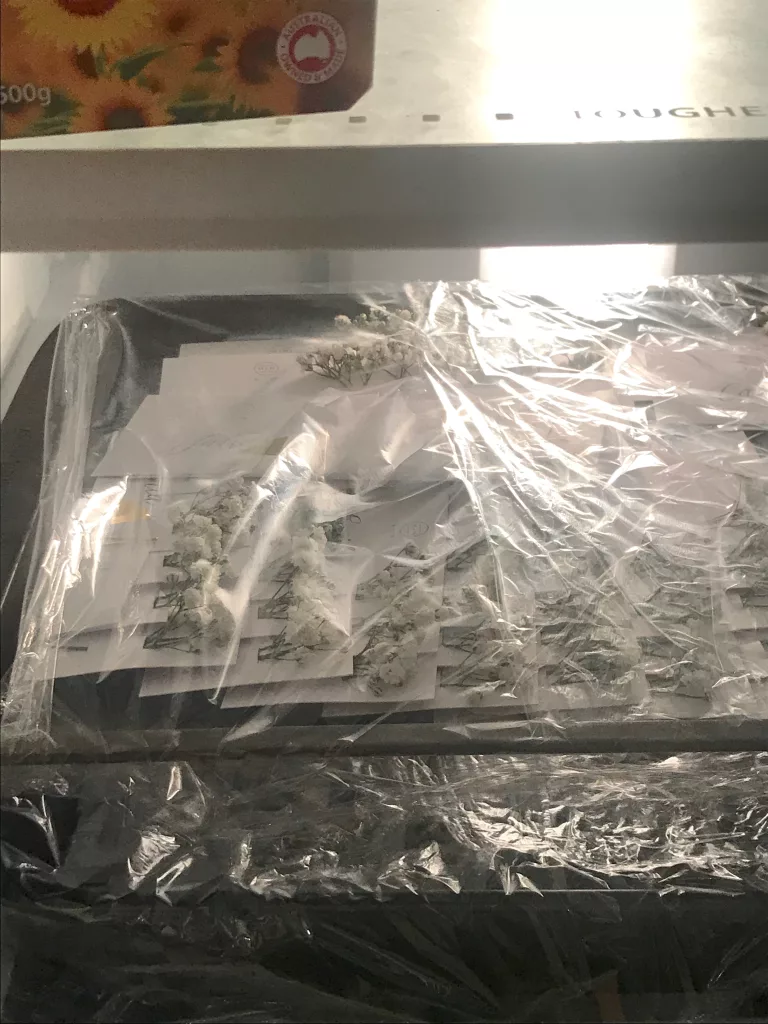
TIP: Any foliage with flowers, such as Baby’s Breath, may risk wilting prior to the event. If it’s a hot day, you may need to place these in the refrigerator. Therefore, it is advisable to create these one day before the event. If you’re using dried or hardy plants such as rosemary or lavender, then they can be prepared a few days earlier without any issue.
Transporting the Place Cards
I found the best way to transport the place cards is by standing them up in a box and placing a separator after every 15-20 place cards.